Good morning, and welcome to the first installment of the Very Official Stitch Snippets series on Needle ‘n Thread.
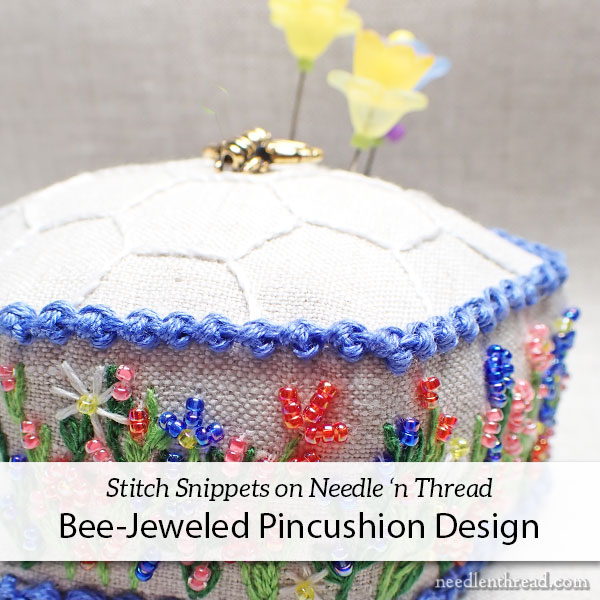
Last Friday, I introduced you to our first project, the Bee-Jeweled Pincushion. Today, I’m going to share the design layout for the pincushion with you, along with a few pointers and comments and whatnot.
Let’s get started!
The design for the Bee-Jeweled Pincushion is not too complicated, as you can see from the image below.
The dashed lines represent cutting lines (incorporating seam allowances) and the solid lines represent the marking lines that, for the most part, will be stitched over.
Some lines – the short, solid lines on the long side panel – are there to mark out important parts of the design for construction purposes. Those lines will be hidden in the seam allowance during construction.
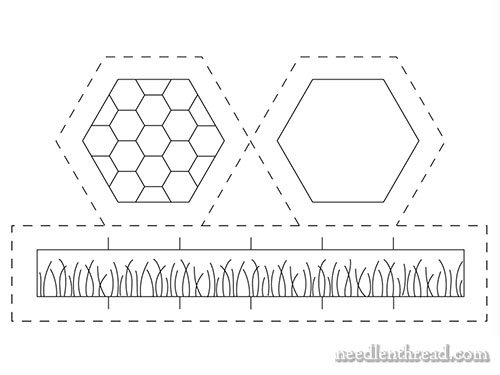
The layout allows all pieces of the design to fit one piece of fabric in the most economical way. We’ll be stitching all the embellished parts completely before cutting anything out of the fabric.
When we start the lessons for the project, I’ll take you through the transfer process step by step, showing you the tools and methods I used to make the process easy and precise.
Bee-Jeweled Pincushion Design Download
Here’s a handy-dandy PDF of the design layout. If you’re going to follow along with this project, go ahead and download the PDF to your computer for printing.
When you print the PDF, choose “actual size” or “no scaling” so that the design prints the size it’s supposed to be. If your printer says some clipping will occur, that’s ok. If it clips any of the design, it will only be part of the seam allowance.
The design should print so that the side panel strip (the long hairy strip) is 9″ long and 1″ high, within the solid lines (so, not counting the seam allowance). The hexies should print at 3″ wide at their widest points. The sides of the hexies should be 1.5″ wide.
Bee-Jeweled Pincushion Design Layout (PDF)
Kit Reminders
The pincushion materials kit will be available here in my shop tomorrow, January 25th, at 10:00 am Central time (11:00 am Eastern, 9:00 am Mountain, 8:00 am Pacific). You can read more about the kit release in last Friday’s article, if you’d like to know more about it.
If the kits prove to be popular and sell out (they may or may not – I’m not sure what to expect), I will open up an advanced notice email list and restock them as quickly as possible.
Project Organization
As the project develops here on the website, I will create an Project Index page for it, which will be listed under “Tips & Techniques” in the main menu on Needle ‘n Thread. Each article will be listed on the index page, chronologically, as they are published so that you can find them easily and view them online.
For members on my Patreon page, each lesson will also be posted in PDF format for easy download and printing.
For Personal Use Only
Please remember that this project, including the design and all instructions, is copyrighted to Mary Corbet’s Needle ‘n Thread and is offered here for your personal use only. It may not be used by other groups, in classes, or for commercial use in any form without specific written permission from me.
If you want to stitch the project with friends, please refer your friends to Needle ‘n Thread to follow along. Thanks!
