Lots of little loose ends to tie up today here in the studio and on the website. Bear with me! It’s been a crazy, wild ride this week and last on this end of the stick. Golly!
But first, today, I want to show you, calmly, some bits of stitching that will most likely finish up my coverage for quite a while of the whitework linens we’ve been talking about. (Well, I don’t say that with certitude, but maybe more with hope. Remember, they’re not my project!)
In figuring out this whole cutwork project and trying to make sense of it, I explored different ways that it could be stitched. I always picture a certain “aesthetic” for this type of ecclesiastical whitework – clean, crisp, white, tidy. And satin stitch checks all the boxes, really, when it comes to simple elegance in whitework.
We talked earlier about buttonhole stitch vs satin stitch for this cutwork here.
I’m trying to keep the approach as simple as possible for those who will be doing the work.
After some more time playing around with the stitching, it seemed to me that I could pare the whole process down to four parts, with the ultimate result being cutwork featuring elegant satin stitch with whipped bars.
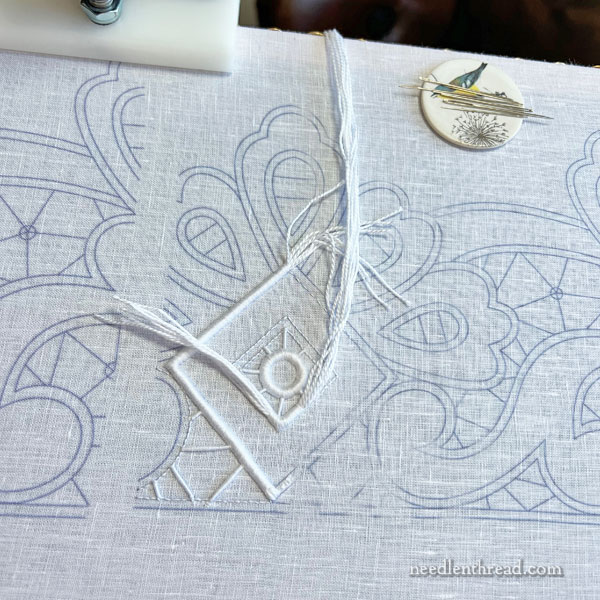
Incidentally, on the practice piece I’m playing around with, you can see that there are two partial designs transferred. The one on the left is larger than the one on the right. There are three cloths being made – one with the larger design, and two with the smaller.
I’d already played a bit with the large design, so I wanted to test some ideas on the smaller design, since those cloths were being handed off first.
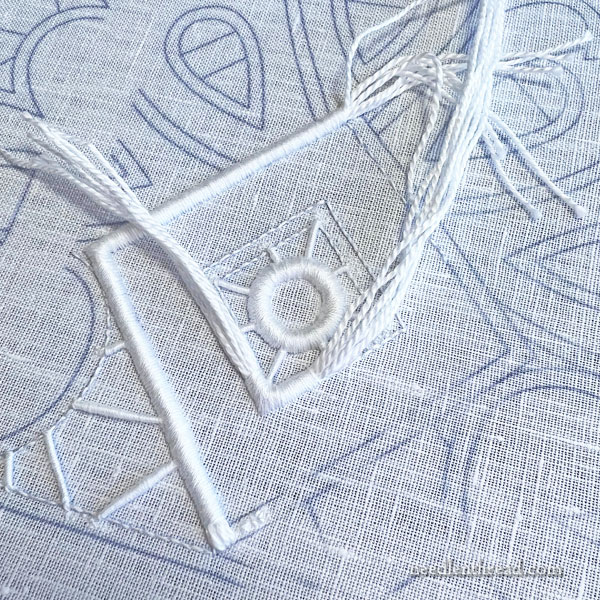
So, the four “levels” or stages of stitching in this method of satin stitch worked over string padding, with whipped bars for the cutwork supports, include, in this order:
1. A reverse running stitch outline along all the design edges that will be satin stitched
2. Whipped bars created during the above outlining process
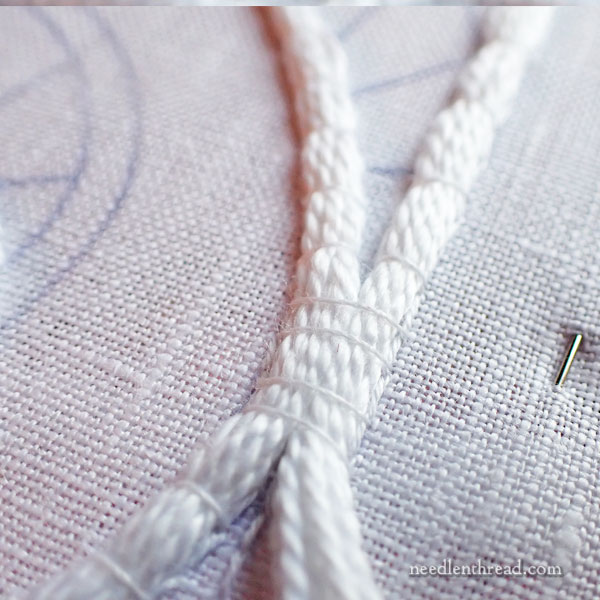
3. Laying the string padding
4. Working the satin stitch
When I first started testing ideas, I didn’t sew the string padding down. I just tensioned it slightly in my left hand while satin stitching with my right. But after working this way a little bit, it seemed to make more sense to lay down all the string padding and sew it down with a fine white sewing thread.
An obvious reason for this is that it just gets all the padding done and out of the way. But it also lays out the order of work for the satin stitch – you can see where you need to go and how you need to get there, especially in areas where parts of the design butt up next to each other. In these areas, the shared pathways can be satin stitched together if the padding is in place.
I also figured that stitching down the string padding would make it easier for the newbie to get comfortable with the piece. It will free up both stitching hands, too, so the embroiderer won’t have to mess with the string padding with one hand while working the satin stitch with the other, like you usually do with overcast stitching.
Of course, there was the concern that the sewing threads might alter the look of the satin stitched top layer somehow, but they really don’t.
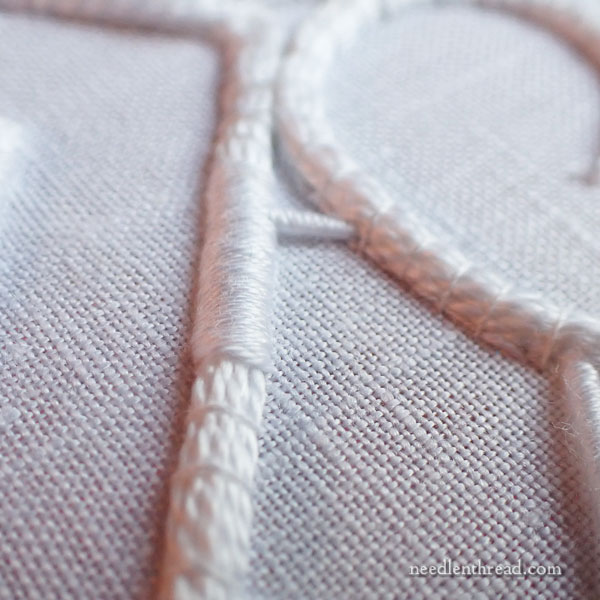
With satin stitch, I like to stitch shared pathways as one, if possible, and then branch off the shared pathway into the smaller satin stitched lines. So I put the string padding together wherever the outlines followed parallel pathways for a little bit, just to see how it would play out with the satin stitch.

I always like seeing this approach in monogramming. I like it here, too.
Wow. My satin stitch looks seriously crammed together here, though.
Ah well…. it’s only practice, right?! Heh heh.
No Chain Stitch
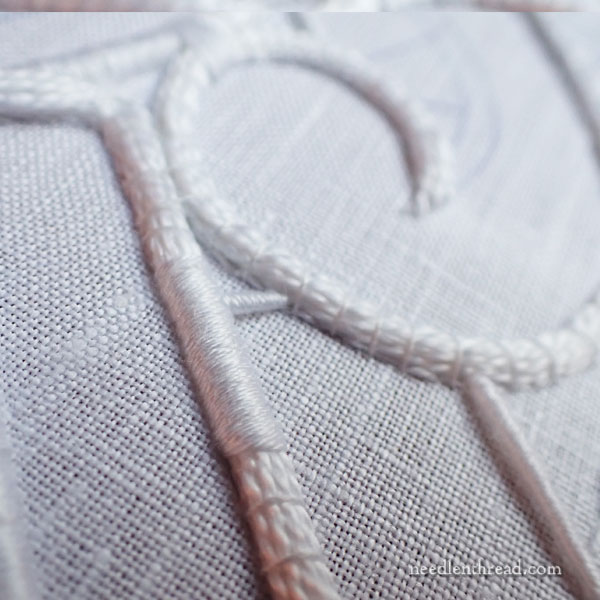
I eliminated the whole idea of an inner chain stitch line on the design (we talked about that in the previous article).
Instead, the whole space between the parallel edge lines on the design will be satin stitch over string padding. I think this will give a more secure edge, since the satin stitch will sit a bit deeper into the linen along the cutwork edges.
And Th…Th…That’s All, Folks!
I hope that’s all for now on this project. We’ll see! It seems that one of the volunteers won’t be able to start embroidering before Easter-ish, so I might keep that linen in the studio and maybe get it jump started. We’ll see.
In Other News…
In the meantime, here are the other newsy bits that have made Studio Life a bit wild and crazy lately!
Jo Butcher Books
You might remember that I reviewed Jo Butcher’s new book here at the beginning of last week, and opened up pre-orders for the book – something that I never do on principle, because I don’t like selling if I don’t have the thing in hand to ship.
But, since the folks at Inspirations had sent me the UPS tracking number and my boxes were already en route within the US, I was pretty darned confident that I’d be able to ship them this past Wednesday. And that’s the way things should have played out.
Unfortunately, the boxes that arrived were all the current issue of Inspirations Magazine, which I didn’t order. Oh, the irony! So the real shipment is again speeding its way to me across the highways of the US. They should be here in the first part of next week apparently. They will go out to you as soon as they get here!
Perhaps I should have known better. Four out of five shipments of books in the past 8 months have been near-disasters. All I can figure is that it has to be me. I can’t imagine that other businesses have these types of problems this consistently. One can but chuckle in disbelief, really…
I apologize Big Time for the delay, and if you have ordered the book, I promise it will be on its way to you as soon as it is in my hands.
Bee-Jeweled Pincushion Kits
If you requested advanced notice for the Bee-Jeweled Pincushion, an email went out to you yesterday. The kits are ready and they will ship in batches today and Monday. They’re going out priority, so they should get to you relatively quickly.
If you want a supply kit for the Bee-Jeweled Pincushion project we’ve been exploring here on the website, you’ll find the remaining available kits right here! If they run out, I will try to prepare more, but wow! There was some sticky stuff going on in the supply chain with this last run, so … it might be a little bit longer this time. I’ll do my best!
Coming Up
Next week, we’ll continue with the Bee-Jeweled Pincushion, now that you have time to finish the greenery on yours. Of course, no pressure – there’s no deadline.
I’ve also been fiddling with embroidery frames lately. We have to have a talk, you and me, about that… and about the mess I’ve been making while exploring theories.
Beads. We’ll talk beads at some point, too! Yay! Sparklies!
Have a wonderful weekend!
