Today, we’re not really chatting about embroidery on the cutwork project we’ve been discussing lately. Instead, we’re going to go on a little detour.
I often find myself meandering into diverging paths, away from embroidery, when I’m trying to figure out solutions for tools, work station set-up, and the like for larger projects.
Oh, who am I kidding? Not just for larger projects – for any projects! I like the tool side of embroidery, I admit it. And given the opportunity, I will explore toolish ideas like a dedicated hound dog, if my interest is piqued and I think there’s value to the tool or it offers a unique or efficient solution.
I’m not into tools that are beautiful but completely impractical. I like tools that do their job well, and if they can be beautiful to boot, well, that’s just icing on the cake! When it comes to tools, I love nothing better than those that are both practical and beautiful.
With the cutwork projects (on 17+ feet of linen), I had to think about how to reasonably set up the linen for stitching. I really think hoops would be a bad idea on this particular type of project (which has some dimension to it and is all white), so it seemed to me that the slate frame – or even a scroll frame, if it could handle the tension with this much fabric – would do the job.
And it does. Slate frames, which I’ve written about here, are made up of four simple pieces and some pegs. The horizontal bars, called rollers, can hold a fairly good amount of fabric rolled up and still keep the fabric under decent tension. The side arms, sometimes called slats, provide the vertical tension between the rollers by holding the rollers apart from each other with pegs.
I have only a few good slate frames and I’m finding that now, I need a few more. If you know anyone who is currently making strong, beautiful, well-made slate frames, I’m all ears! Or if you, or anyone you know, is de-stashing and has any frames they are interested in unloading, I could be your person. Contact me!
When it comes to slate frames, I like the ones that have more rounded rollers for the horizontal bars (they don’t have to be perfectly round, but if they are thicker and a bit rounded, I prefer that to a flat, thin roller), and that have smaller holes on the side stretcher arms – the types of holes that take a cotter pin as opposed to a thick wooden peg.
I know, I know. The wooden pegs are more authentic. But I’m not really concerned about historical accuracy with tools. I prefer tools that evolve over time into even better versions of themselves, because we have different ways of making things now. These days – well past, say, the 1400’s – I don’t mind using steel cotter pins on my frames!
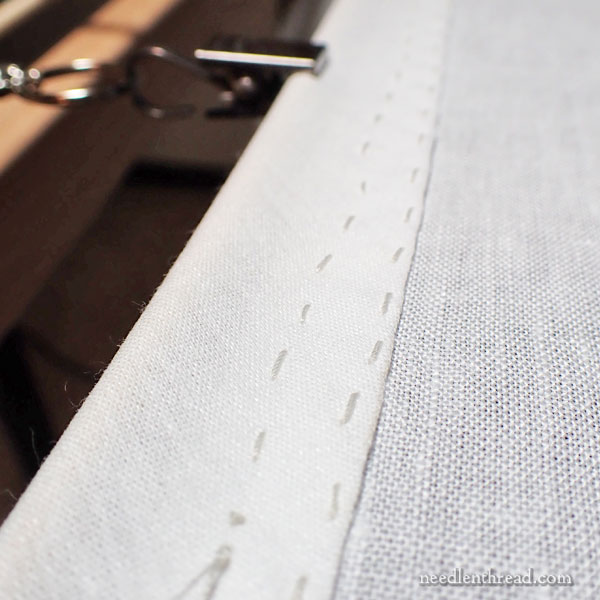
One step that I pretty much always take when setting up a slate frame now is sewing a small fold of other fabric (usually something similar to a very wide bias tape, folded in half) to the edge of my ground fabric. I use a herringbone stitch to sew the strip onto the fabric, and, if I’m lacing the frame, I lace through this piece of fabric rather than through the ground fabric. I reuse these folded strips until they’re pretty well spent.
The fabric can simply be a strip of other strong fabric, too, and it doesn’t necessarily have to be folded. But I like the fold, because I’ve found that inserting something into the fold seems to stabilize and make more consistent the tension supplied by lacing.
Sometimes, I’ll run a thick cord or string into the fold of the fabric for this purpose, or, lately, I’ve taken to inserting a small 3/16″ birch dowel into the fold and lacing around it. The dowel is easily slid in and out of the fold in the fabric.
I’ve experimented several times with different types of tensioning besides lacing, but never with great success. My favorite heavy string for lacing the sides (a heavy linen thread, since linen doesn’t stretch like cotton does) tends to be somewhat expensive, and it’s a repeat cost that could be decreased if I had re-usable tensioners.
One type of tensioners available today for scroll frames are made from velcro, elastic straps, and suspender clips. I tried those, but didn’t like them.
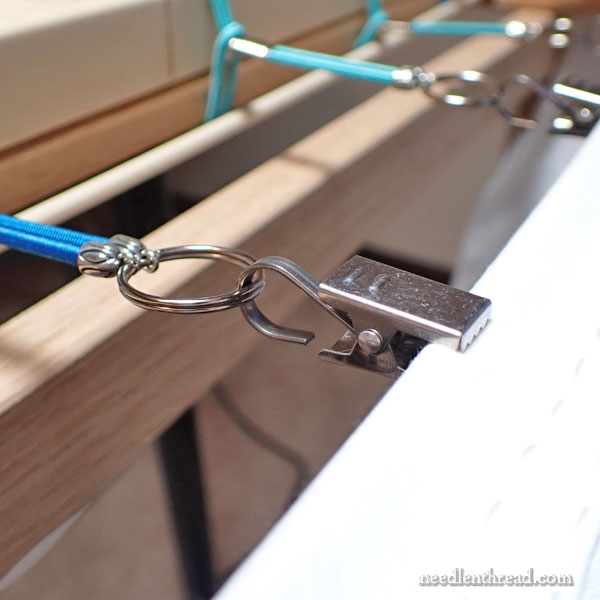
Coming mostly out of Eastern Europe, I’ve seen tensioners like the ones above, involving a clip and a hook and stretchable cord, available in sets in various Etsy shops. I thought I would try some, and to that end, I ordered a set.
Of course, they haven’t come.
Will they ever? Who knows!
So I figured I could make my own and customize them to my notion of how they should work. Better yet, I figured I could make them mostly with goods I have easy access to, either on hand or that are made in the US, which meant not having to wait as long on supplies.
So I gathered supplies and started experimenting.
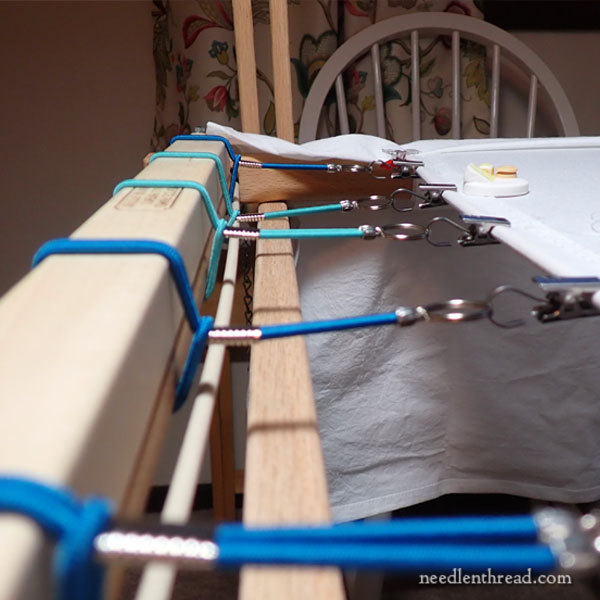
The first ones that I made, pictured above, are not the final concept. As they are, they don’t offer adjustability on their own. I had to insert some extra “frame” (using some individual stretcher bars on top of the side arms of my slate frames) to get the right tension on these. If my fabric were about an inch or so narrower, they would have worked fine.
To work well and universally for different sized projects, the tensioners need to be adjustable, and while some similar tensioners supply the adjustability through different areas where you can hook the clip, I don’t really like that way adjusting the tension. So I’ve come up with another configuration, and I’m going to make a new set based on this new idea.
I’ve been craving some down time where I can get a little obsessive about pursuing what I think will be a good solution. It looks like I just might have a couple hours today, and I can’t wait!
Incidentally, the dowel that you see in the photo above is another small problem I have to tackle, if I’m not tensioning a slate frame with lacing. When you lace a frame, you end up binding the corners of your frame, which adds to its stability. With tensioners, your corners are free, and this can mess with your frame’s stability. I inserted the dowels to take up the extra space in my frame intersections.
But I’ve got a solution in mind for that, too!
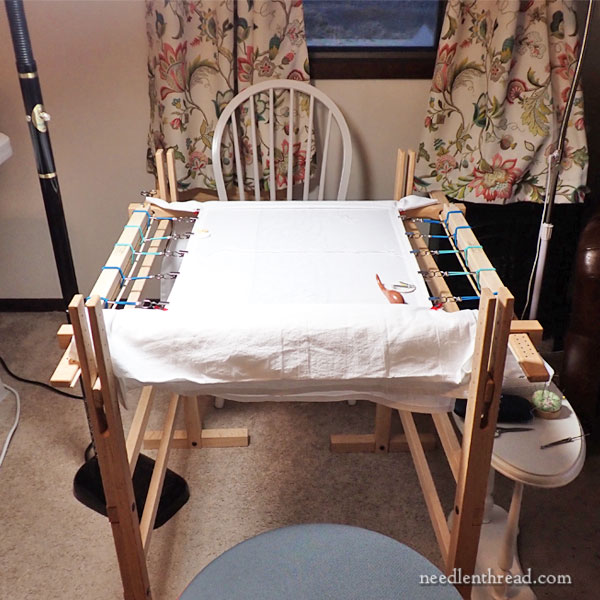
I love working at an established work station, and I especially love working on a slate frame set up on trestles. It’s comfortable, it’s efficient, and it’s roomy.
The way this work station is set up in the studio, Anna and I can both work on this piece, sitting across from each other. We’re only kickstarting the foundation on the linen, since the person who will eventually be embroidering it isn’t available yet. So the work station won’t be here for very long, but we get to enjoy it while it’s here!
We have plenty of room to work while sitting across from each other at the trestles. We have two good windows shedding light on the frame.
When we have time to stitch, we can just plop down and stitch! And if we have extended time, we can put on an audiobook or some good music and immerse ourselves.
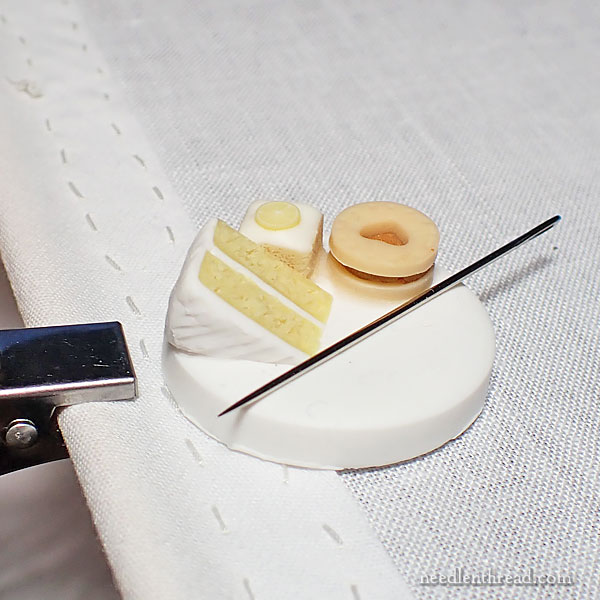
And – better yet – we can use our own favorite needle minders in our own work space.
What could be better?
(That needle minder above was made by Cheryl at Chapel View Crafts in the UK. It was a gift from my niece. Every time I see it, I want tea. Isn’t it cute?)
We’ll probably revisit this whole tensioning subject soon! If you have any questions, thoughts, or suggestions, feel free to chime in below in the comment section!
