OH my word.
It’s a funny thing about goldwork: You feel like you’re really making headway, that you’re flying along, that things are going so much faster than you anticipated – in short, you’re feelin’ pretty darned good about all that endless couching…
…and then suddenly you remember:
You have to plunge!
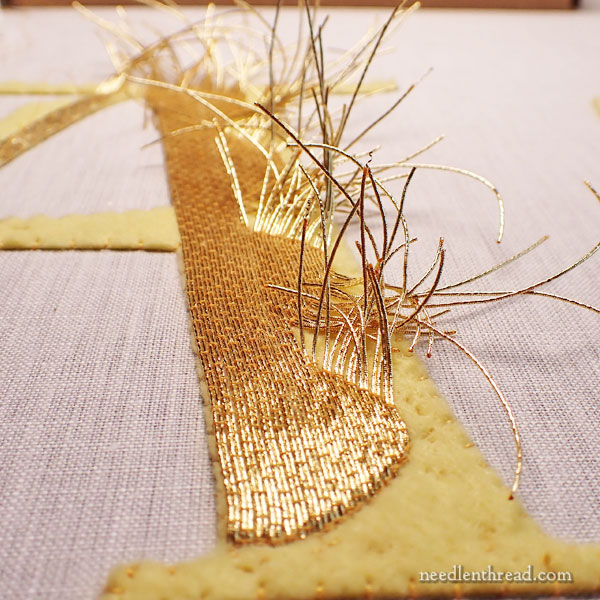
Plunging in goldwork is taking the ends of the couched threads through the fabric to the back, where you must secure them.
My preferred method of plunging is using a plunging lasso, like this one. The lasso is a string that’s passed through a needle to form a loop. You insert the needle into the fabric where you want the goldwork thread to pass to the back, you stick the end of the goldwork thread into the loop of the lasso, and you give the needle a pull and a quick tug to pop the thread to the back.
It’s easy. No biggie.
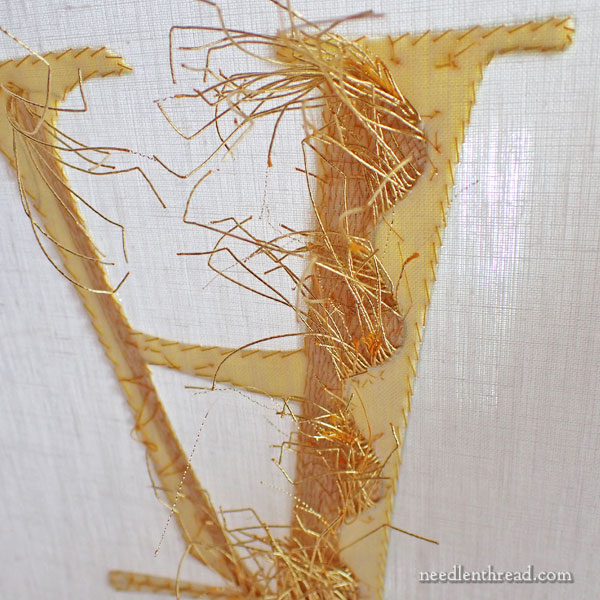
Except when you have sixteen gazillion ends to plunge.
Aaargh! It’s my least favorite part of goldwork!
Wait! Not the plunging itself, mind you. That’s actually kind of fun! There’s something oh-so-satisfying about the pop of that thread as it passes through to the back of the work.
But it’s when you turn the frame over and you realize you’ve got to secure every one of those ends in a sensible, neat way – oh! that’s when things really start to get hairy.
My mood generally alters abruptly.
This is my least favorite part of goldwork. And I’m guessing I’m not the only person out there who doesn’t exactly love this part of goldwork.
You might be thinking (correctly) that the sensible thing to do to avoid having to face that colossal amount of hairy ends would be to plunge a bit here and there as we go along, rather than having to do the whole unruly crop at one time.
And that would work – and it would probably be better for my general mental outlook – if each letter was on its own separate frame.
Alas, all the letters are on one large frame. We can’t really spontaneously flip that frame when we decide we want to plunge a few threads.
It’s all a matter of give-and-take here, when it comes to space and efficiency. It’s more efficient and it takes up less space to have all the letters on a large frame: we don’t need two sets of trestles up – two of us can work at the one frame, and we don’t have to set up smaller slate frames 10 times.
On the other hand, we have to flip the frame and plunge when we both have plunging to do. And because we both work at different paces, between other jobs, we have to catch up with each other before we can flip.
So, in our first run here of working together on the same frame (something we’re doing for the first time, so it takes some fine tuning), by the time we could flip, we both had a boat load of plunging and securing to do.
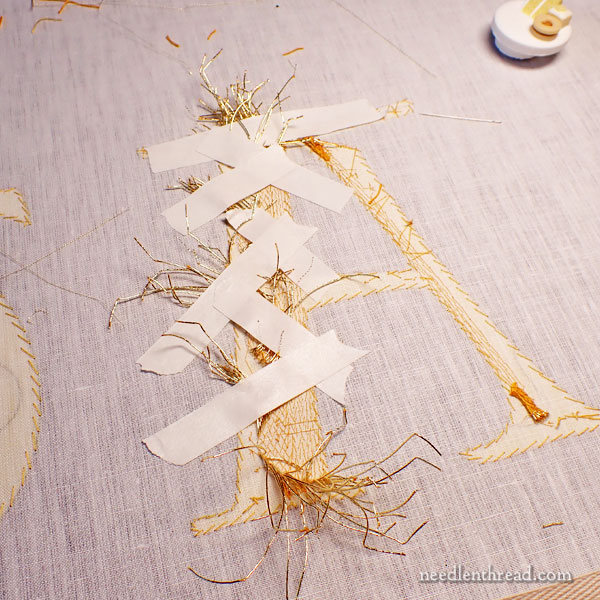
The only thing for it was to take some low-tack artist’s tape and move all those ends out of the way, to concentrate on just a small area at a time.
And then just to move (slowly) through each area of threads, doing whatever it took to get the threads in place and secure.
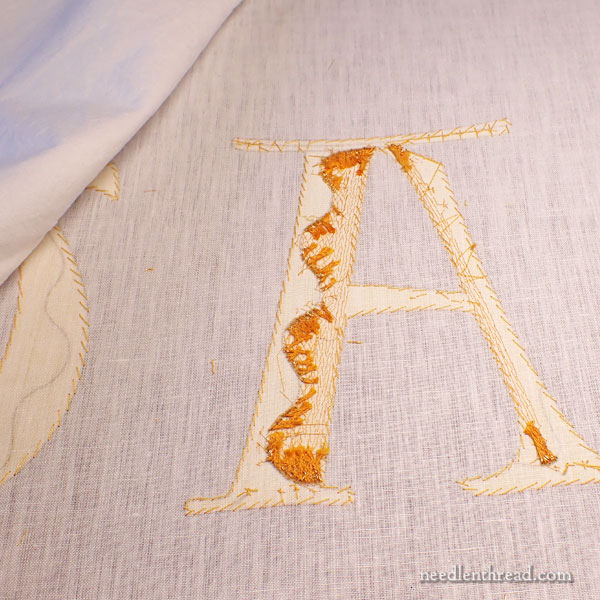
Because there’s more embroidery to do on these letters, it’s really important to keep the ends out of the path of future stitching, and this sometimes results in a fairly solid mass of ends in one area.
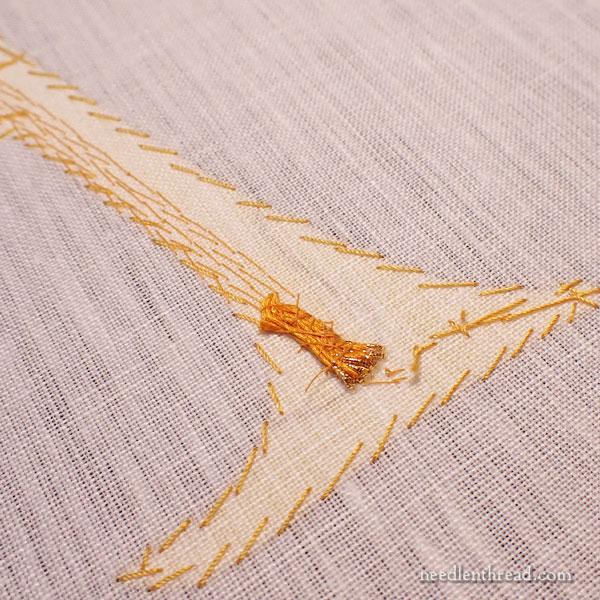
When plunging, it’s important, too, to turn the threads back in the direction of the stitched line. For one thing, you’re using the backs of the couching stitches to wrap under when securing the threads. For another, you get a better edge on the front of the goldwork if the threads are turned back along the stitching path on the back of the goldwork.
I always strip off the gold wire from the ends, leaving just the core of the thread for securing on the back. This keeps the thread ends less prominent and stiff. They’re easier to lay out and flatten a bit, so that there’s less bulk on the back of the embroidery.
Gosh. I ended up with lots of bundles. I did my best to keep as flat to the fabric as possible. The less build-up, the better.

The back of Anna’s “D” looks much better than my “A.”
Often, when you’re securing the threads on the back, you have to do whatever it takes to get the threads secured, while keeping within certain parameters of carefulness: be careful not to break the backs of the couching stitches; be careful not to build up too many ends in one area, if you can avoid it; be careful not to secure in an area that has to be embroidered still; be careful not to strip the gold too close to the fabric; be careful not to pith yourself with the needle and bleed on the back of the work…
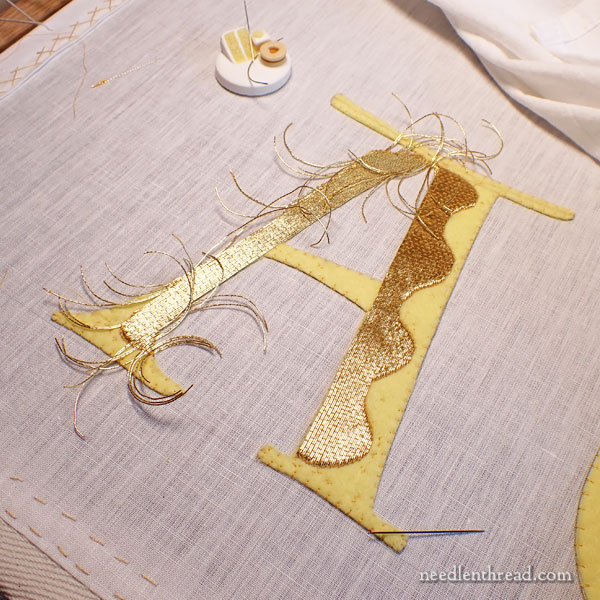
It is, admittedly, satisfying, to turn the frame over and see the filled areas taking shape with distinct edges, once some of the plunging is done.
I made a mistake on this A, but it’s not anything anyone but me will ever notice, so I’m not even going to say what it is. (Maybe later, I’ll say what it is.) There are two A’s in the wording, so I’ll approach the second A a little differently. I still have a bit of plunging on this one, and then I can move on to the next letter.
Our plan is to do all the couching of passing threads first; then we move on to putting down some twist and some pearl purl outlines on the insides of the letters. Then we move on to chip work (no plunging! yay!), followed by outlining the full letters.
It seemed to be going pretty quickly, until we had to flip the flippin’ frame!
Heh heh.
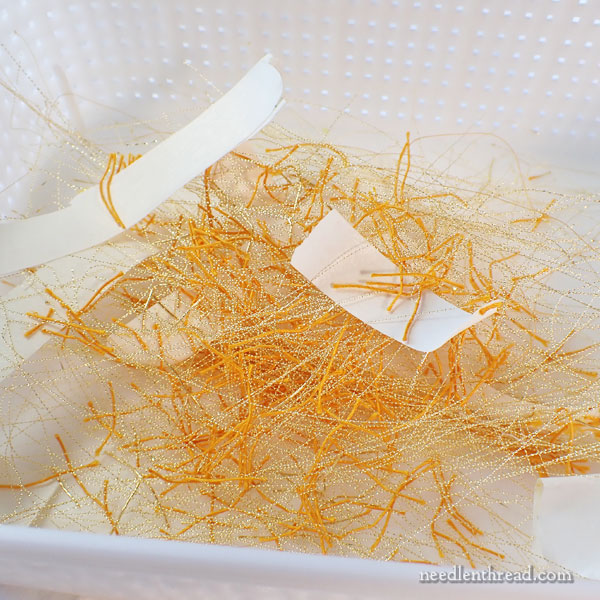
I like keeping a container full of all the residue as we go.
I don’t know why. Perhaps because it’s a sign of progress. It is somewhat satisfying to see the bits and pieces build up. It means we’re getting somewhere!
Looking for More?
If you’re curious about this project and its backstory, you can read previous articles on it through the following links:
Goldwork Testing, 1-2-3
Testing some Texture in Goldwork
Goldwork Threads & Idea Walls
Letters on a Large Embroidery Frame
