Following up on yesterday's post about selecting a good hand embroidery hoop, here's a little tutorial on how to bind the inside ring of your hoop in order to maintain better tension for a longer period of time.
Binding a hoop isn't absolutely essential in embroidery, but it does have its advantages. When you bind at least one ring (I bind the inside ring), you supply a little extra friction to keep your fabric tighter, longer. Also, the binding adds a bit of protective "padding" that will make the hoop a bit easier on your fabric. And though binding seems as if it would be a time-waster or a pain in the neck, really, it's very simple, and once it's done, you don't normally have to do it again. I have four hoops with the inner ring bound that I've been using for three or four years, and the binding job is just as good now as it was when I first did it. They work great! I'm glad I took the time to bind them.
That being said, not all my hoops are bound; I often work with hoops that aren't. If you want to bind the inside ring of one of your hoops, here's a little tutorial to show you how. Keep in mind that the tutorial focuses on the inside ring of the hoop. If you decide to bind the outside ring of the hoop, you'll need to begin and end your twill tape on the outside of the outside ring. Binding doesn't really work well on the plastic Susan Bates-style hoops that have a lip.
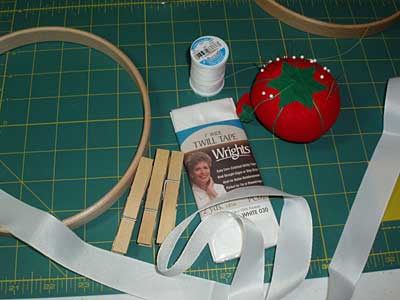
First, gather your supplies. I'm using the same Hardwicke Manor Hoop I spoke about yesterday (7" round x 5/8" deep). (By the way, it's HardwickE Manor Hoop, with an "E" - seems I spelled it wrong ...)
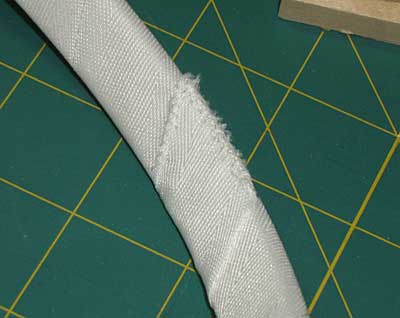
I'm using 1" twill tape, the kind you buy in the notions section at a sewing store. It's polyester. For better friction, I'd suggest cotton twill tape, but I didn't have any on hand. Cotton twill tape is easier to bind the hoop with, too, as it's not as slippery as polyester and it has a little more body to it. You can also use narrower twill tape, but the 1" works well on the 5/8" hoops. On smaller hoops - the 5/16" ones - I use narrower twill tape.
Twill tape vs bias tape: I like twill tape better. You can use bias tape, but the folded bias tape has a noticeable edge where the fold ends, so you don't get smooth coverage. Any overlapping or any spots of bulging thickness reduce the effectiveness of binding the hoop.
You'll definitely want some clothespins to help you out, unless you have four hands. I've always wanted four hands, but since I haven't managed growing extras, I just use clothespins.
You'll also need scissor, sewing thread, and a sewing needle.
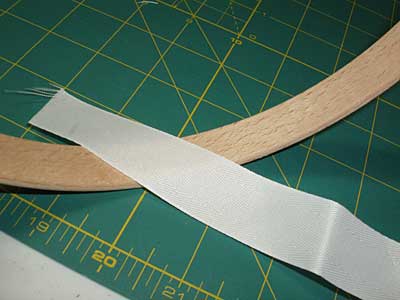
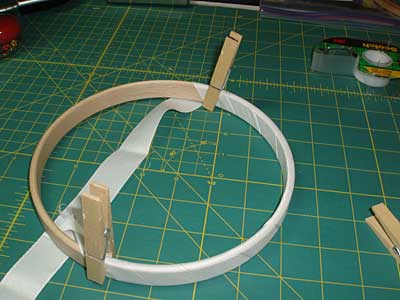
Begin by laying your twill tape at an angle across the inside of your inside embroidery ring. You want the beginning and the end of the length of twill tape to meet on the inside of the ring, because that's where you'll stitch them together, avoiding a bulge from your stitching on the outside of the ring, where it meets the inside of the outer ring of the hoop. (Wow.... confusing...!)
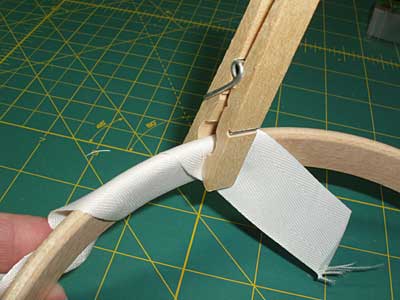
Wrap the twill tape around the hoop once to establish the angle needed for the tape to lay perfectly parallel to the wrap before, and then use a clothespin to hold the edge.
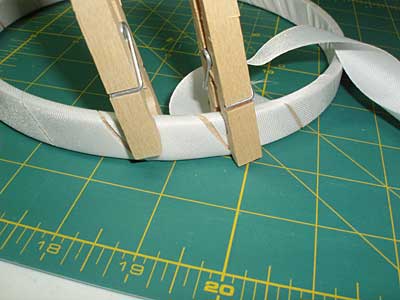
Continue to wrap the twill tape around the hoop, lining up the edges of the tape so that they are parallel and not overlapping. Pull the tape tight, and work with it to reduce any bulging or buckling. You want it to hug the hoop.
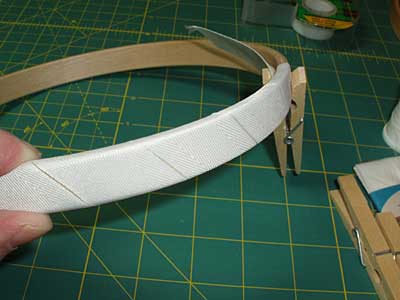
When you get to about the halfway point, if everything is looking good, go ahead and clamp another clothespin on to secure the tape at that point. This way, if you mess up a bit on the second half, you don't have to re-wrap the whole ring.
When you arrive back at the beginning of your twill tape, fix the end with another clothespin. You may have more space than you want between the wraps, or you may need to adjust to fit the last wrap in just right. Clamp the end with another clothespin, then work the twill tape around with your hands, running the hoop through your hands and shifting the tape around as you need to. You might have to tug a bit here and there, or twist the hoop in your hands a bit, adjusting until you line up the edges of the wraps as close as possible to each other and until wraps of the twill tape are hugging the hoop all around.
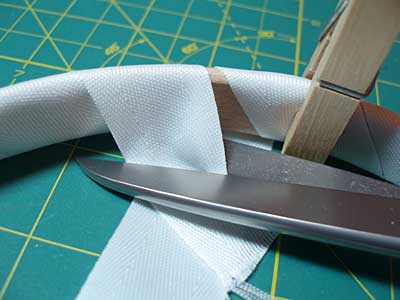
Undo the clothespin on the beginning of the wrap, and cut the extra off, so that the twill ends at the farther edge of the ring.
Then, take the end of the twill tape (it'll be the end with the long tail) and finish wrapping it so that it overlaps the beginning of the tape. Don't trim it just yet. Stick a clothespin on to hold both ends in the right place.
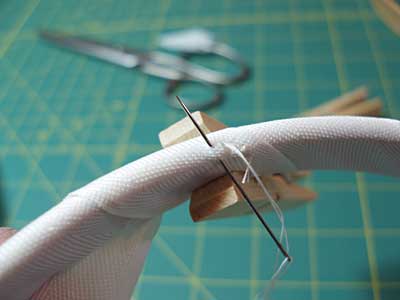
Then, take your needle and thread (with a knot in the end of the thread), and begin stitching over the overlap. I just use a whip stitch, and I stitch down the edge of the inside of the ring, through both pieces of twill, and then back again over the same path.
I also stitch down one side of the twill wraps, stitching two edges of the wrap together. Then, clip off the extra twill tape...
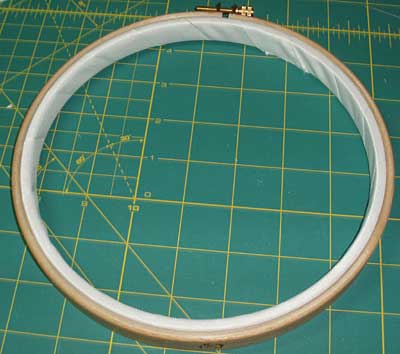
... and the inner ring of your hoop is now bound!
Try binding one hoop - I think you'll like it!
Tomorrow, stay tuned for the first "action" installment of the Long and Short Stitch lessons. I'll discuss materials, talk about transferring the pattern, give you the design to transfer, and show you my transfer and set-up process.
Incidentally, I've had a jolly awful time editing the first video, soooo... I gave up and will try again this weekend. I bit the bullet and invested in a new camcorder today, so you should be getting a better quality video, at any rate. But yikes! After hours in front of the computer yesterday, and practically all day today, I was ready to pull out my hair.
Instead, I shopped! My Mom always says, "Get your hair done and go shopping - you'll feel better." Her solution to every gal's problems! And... she's right! It worked! I can't wait to get back to the whole video process!!
See you tomorrow!


|
