|

|
2009-08-06 19:29:26-04 |
|
|
Just a quick announcement! If you want to share photos of your long and short stitch project, get feedback from fellow embroiderers, or ask a specific question about a problem, I've set up a Flickr group for the Long and Short Stitch Shading lessons. You're welcome to join up! I think it'll be a good way to get feedback from others, display your work, and help others, too. Here's the Flickr group address:
Flickr Group for Long & Short Stitch Lessons
In order to comment and post photos in the group, you need a Flickr account. They're free and it's relatively easy to sign up. Once you have an account, you add your photos to your photostream. Then, you can join the group and add your photos to the group photo pool. You can even put little notes on your photos, to highlight an area you might have a question about - which is a very hand feature, when learning a technique online.
So, if you're interested, feel free to join the group on Flickr. I'll be checking in at least once a day, too.


|
|
|
|
2009-08-07 05:21:24-04 |
|
|
Today's article is the continuation of yesterday's Long and Short Stitch Shading, Lesson 2. We'll be looking at the larger box in Element 1 on the Long & Short Stitch Sampler. This box is stitched on the diagonal, so it's a little more difficult than yesterday's vertical stitching.
If you're just joining in on the Long and Short Stitch lessons, you can visit the Long & Short Stitch Lesson Index to see a list of already published lessons and articles in this series.
Once you've worked through the first box in Element One on the sampler, it's time to move to the second box, which is the larger of the two boxes. This second box is set behind the first. Often, in needlepainting (long and short stitch shading), the elements farther back in the design are embroidered first, but we'll make an exception with these boxes! The first box was easier to stitch, so that's why we started with it.
Materials:
1. Project in hoop or frame
2. #9 or #10 crewel (embroidery) needles (I'm using #10)
3. DMC Colors: 814, 347, 349, 351, 353, 745, Ecru - note that 3855 (darker yellow) isn't used on this box
4. Small, sharp embroidery scissors
Procedure:
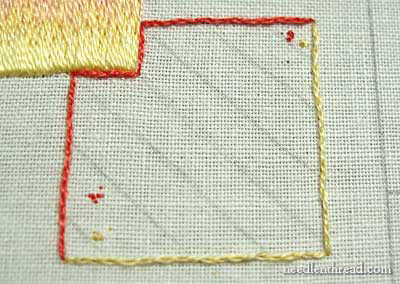
Begin by stitching a split stitch line around the box. Start on the left side and stitch up the left side and across the top of the box in the salmony-red 351. Stitch down the right side of the box and across the base line in yellow 745.
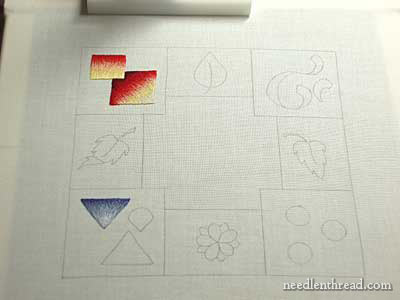
When you've finished split stitching the lines, go ahead and draw in your diagonal stitch direction with a pencil. Take a look at the diagram below:
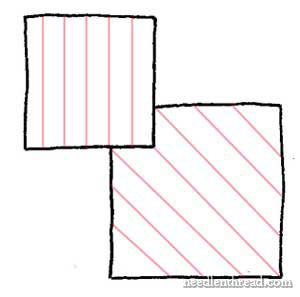
The pink lines in the boxes above indicate the direction of stitching. Notice that on the second box, the direction is diagonal instead of vertical.
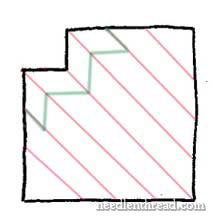
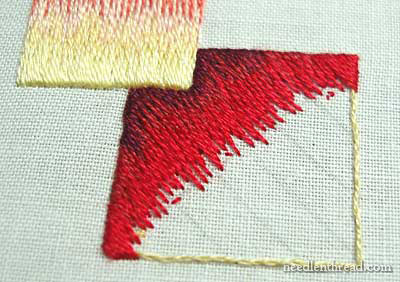
The first row will be stitched in the top left corner of the box, just underneath the smaller box. The first row is worked in dark burgundy (814). In the diagram below, you can see the basic shape of the first area to be filled:
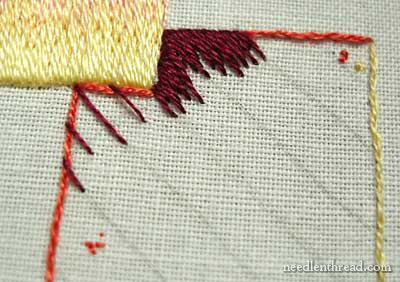
Following the same directions from yesterday's post - the first part of lesson 2 on basic long and short stitch - work from the center point (just under the corner of the top box) towards the top line. Mark in your directional stitches before you begin - this will help keep you on the diagonal.
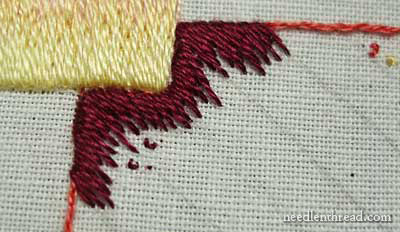
Then stitch from the center point to the left side of the box, following the direction of your diagonal lines and filling in between your directional stitches.

The second row is worked in dark red (347). Bring your needle up in the center of your first row, splitting the stitches as you learned in yesterday's lesson. Work from the center to the top line of the box, marking in directional stitches and filling in between them.
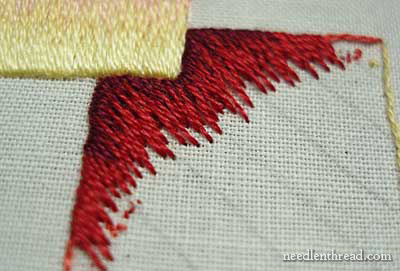
Move back to the center and work to the left side of the box, filling in the second row.
The next row is worked in bright red (349). Begin in the center and work to the top line and then back to the center to the left side of the box. Here, I began in the center and worked first to the left side of the box. (You can work in either direction first...)
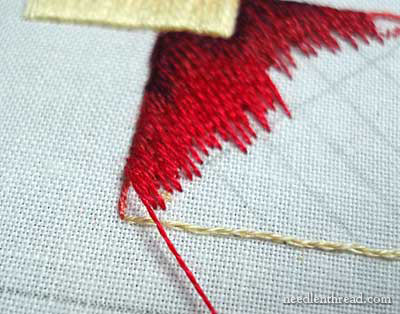
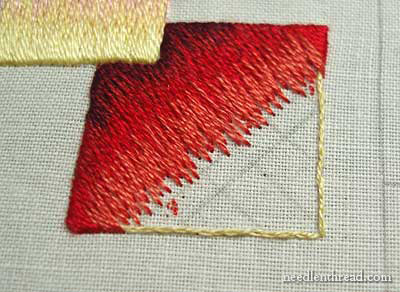
When you get to the point that your long stitches would cross over the split stitch line at the base of the box, cross over the split stitch line and fill in the rest of the corner with satin stitch.
You can see that the last few stitches in the corner here are worked in satin stitch. You may not arrive at this point working the third row - you might not get here until the fourth row of stitching - and this is fine. It depends, you see, on how deep you stitch each row of stitches. But whenever you arrive at the point where your long stitches are going to cross over the corner, go ahead and cross the split stitch line, then finish the corner off with satin stitch.
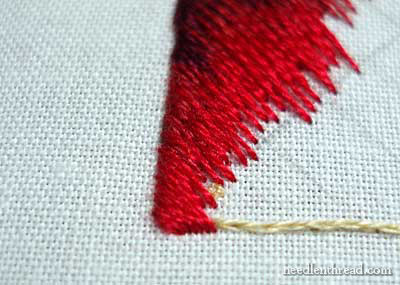
This is the completed third row.
The fourth row is worked in the salmony-red (351). Again, as you come to the point where your long stitches want to cross the corner, go ahead and cross the corner and fill the rest of the area by working over the split stitch line toward the corner.
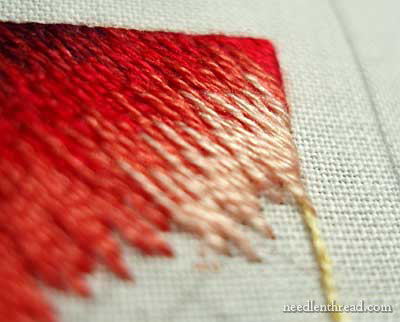
The fifth row is worked in the lighter salmon (353), and, as you work, notice that you will be filling quite a bit over the split stitch line on the right side of the box and on the base line of the box.
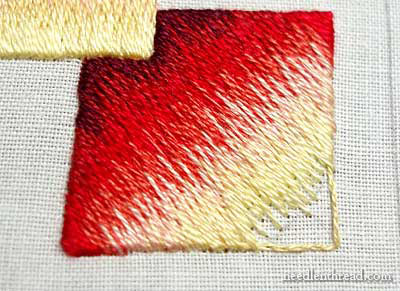
Work the sixth row in light yellow (745) in the same method.
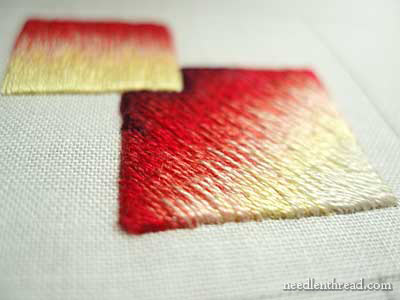
And, finally, work into the corner of the box in Ecru.
Voila! You have finished stitching inside the boxes!
Next lesson - filling in an angled area that begins broad and works to a tip (triangles).
Long & Short Stitch Shading Lessons - Related Posts
Supplies
Lesson One: Setting Up
Lesson Two, Part 1: Inside the Box - Basic Long and Short Stitch (with three-part video tutorials)
INDEX of Long & Short Stitch Lessons


|
|
|
|
|