It's time for Lesson 7 in the Long and Short Stitch Shading series here on Needle 'n Thread! In this lesson, we'll be working element #6, the leaf in the center right side of the sampler.
If you've just popped in, you can find the rest of these lessons on long and short stitch in the Long and Short Stitch Lesson Index. We're working incrementally through a small sampler in order to practice filling and shading with long and short stitch.
In today's lesson, the leaf that we're working is pointind downwards, and it has some little spikes on its outer edge. We're going to be working from a dark edge to a lighter center. Other than the shape and the direction of the color changes, the concepts are much the same as those used in Lesson 6, where we stitched a simple flat leaf shape. We'll be cutting in a bit of color for shadows on this leaf, but I think you'll find, overall, that this leaf is fairly simple if you've already worked the flat leaf in Lesson 6.
For this lesson, you will need the following colors of DMC stranded cotton: 469 (dk green); 471 (med. green); 472 (med-lt green); 613 (pale green); 3012 (med. olive green) and 814 (burgundy)
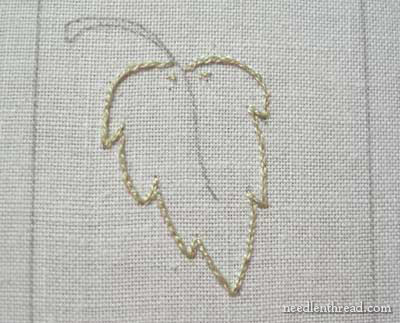
Split stitch the outline of the leaf. To do this, you can use 469 (dk green). I used 613 (pale green) because I was planning different color placement, originally. If you are afraid you won't cover your split stitch line completely, use the dark green because it's the color on the outside of this leaf. If you don't generally have problems with the outside edge, it really won't matter which green you use for the split stitch outline.
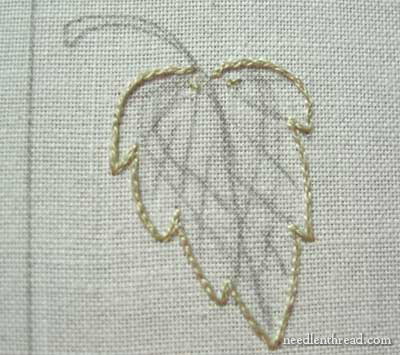
Draw in your directional lines and your shade spaces. I'm afraid I made another mess with my pencil lines, so here's a cleaned up version so you can get a better idea of where to sketch in your lines!
The dark purple lines are stitch direction and the green spotted lines indicate shade changes.
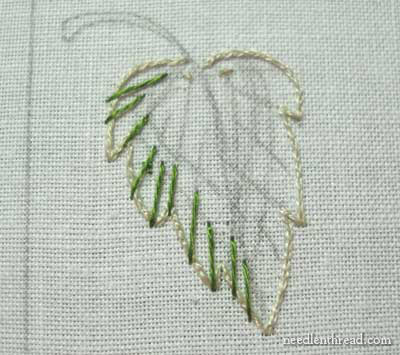
Beginning with the darkest green (469) and working on the left side of the leaf, stitch in directional lines for the outer edge of the leaf. Fill in between the directional lines with long and short stitch, in the same manner covered in previous lessons.
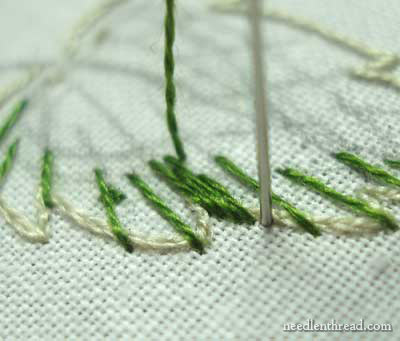
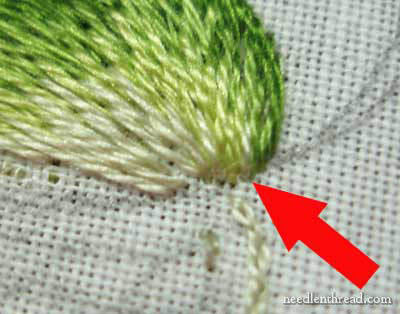
As the stitch direction changes, the stitches "fan out" a bit - that is, they are closer together on the inside of the leaf, and slightly farther apart on the outside of the leaf. Notice that there is some tiny space there between the stitches next to the split stitch line. This won't be noticeable at all, because the "fanning" out of these stitches isn't that extreme. If, however, you notice that, in fanning your stitches out so that they lie in the correct direction, there is a noticeable space between your stitches at the split stitch line, take a small stitch over the line (forming a "short stitch") to cover up the split stitch line. Tucking in a little stitch here and there to fill a gap is not only fine, but it's often quite necessary!
Work long and short stitch in dark green around the outside edge of the leaf, filling it in completely. Your long stitches may be as long as a quarter inch here.
On some parts of the leaf, where the little spike sticks out, you can take one stitch from the tip of the spike and completely cover the split stitch line with it (it will run in the same direction as the split stitch line, so you'll basically be stitching a straight stitch from the tip of the spike on top of the split stithch line to cover it up.
After you've finished the dark green all around the left side of the leaf, change your thread to medium green, 471. This will be your second layer of color. Remember to go deep into the first layer as you stitch, and to alter where you start your stitches, so that the starting points don't create a line on the leaf.
Here's the stitch direction again.
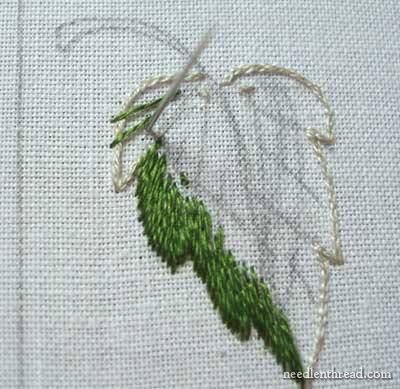
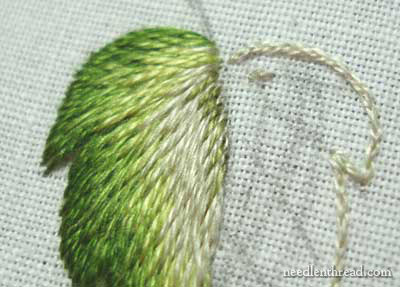
And here's the completed second layer. Once you finish the second layer, switch threads to med-light green (472) and stitch the third shade of color towards the center of the leaf, leaving room for one more shade.
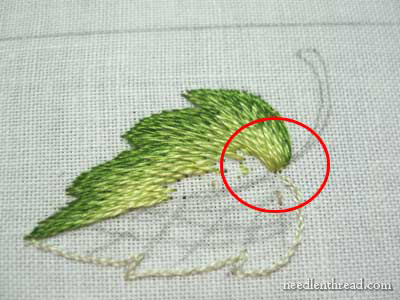
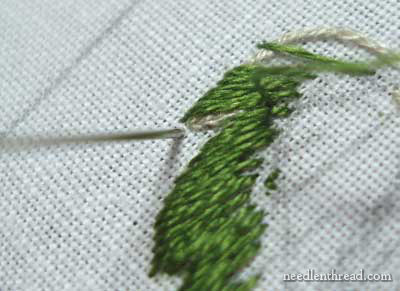
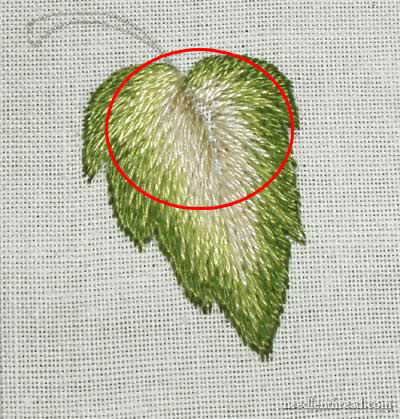
As you get to the base of the leaf with the third layer, you will probably be running into the center vein. That's ok. In this area, which is slightly crowded, you can take the third layer of color all the way in to the center vein. This is the circled part in the photo above.
On this leaf, you want to keep your central vein area as neat as possible, and you want all your stitches to meet, if possible. Although you will be stitching a vein as you did in Lesson 6, the vein on this leaf is not as thick.
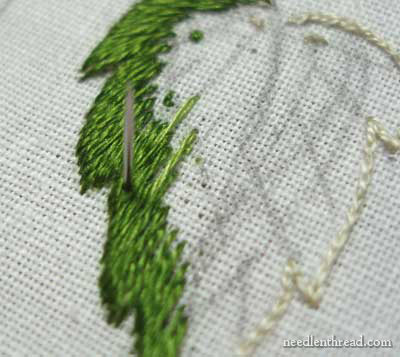
This is what the leaf should look like after stitching the third shade of green. Now, switch your thread to the palest green 613. This is the color you will use to fill in the center of the leaf.
Notice in the photo above that I "cut in" some small stitches in 613, into the stitches that have already met the center vein at the base of the leaf. This is to lighten up that area, so that the color change does not seem so drastic.
Finish filling the center area with 613, taking your stitches all the way to the vein line in the center of the leaf. Once you've finished filling the center with 613, change your thread again to color 3012. In the very center of the leaf, where 613 meets the vein line, "cut in" some tiny stitches in 3012, to create a shadow along the vein line.
I'm not sure if "cutting in" is a legitimate term. That's what I call it when a few tiny stitches are being added to an area where the color is already stitched in. So, basically, you're splitting stitches that are already there - you don't have any filling space left, so you're just adding these tiny stitches into the stitches already there.
You've pretty much finished the left side of the leaf, so now it's time to move to the right side.

Again, stitch in directional lines with dark green, 469.
Fill in the dark green in long and short stitch on the outside edge, from the tip all the way to the base. Make sure you cover the base split stitch line.
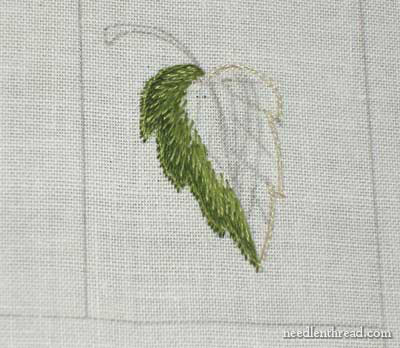
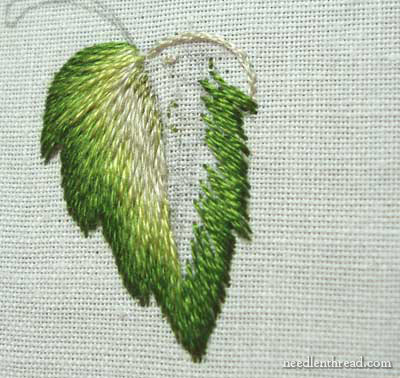
Now, switch to color 471 again, and stitch the next layer of color. When you finish the second layer, it should look something like the leaf in the photo above.
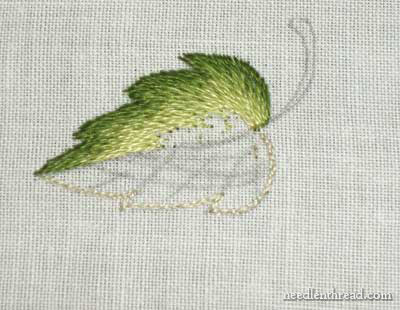
Now, you're going to switch directly to the palest green (613), skipping the light green layer. Fill to the center, with the exception of a small area, as shown in the photo above. Change your thread to medium olive green (3012) and fill in the remaining area.
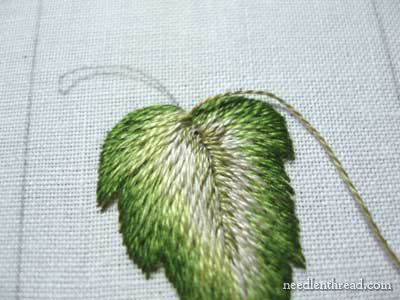
You can also "cut in" some tiny stitches of 3012, all the way up the vein line towards the tip, as shown in the photo above.
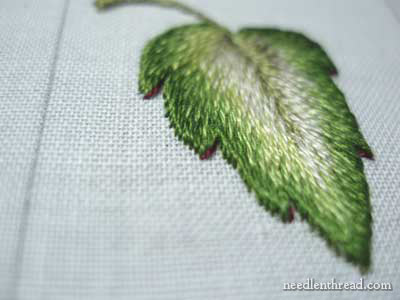
Once you finish filling in a bit of a shadow next to the vein, take your thread to the base of the leaf, coming up in the center on the vein, and work a long split stitch line along the vein in 3012, to help define the center of the leaf. The "vein" you are now stitching should not extend all the way to the tip.
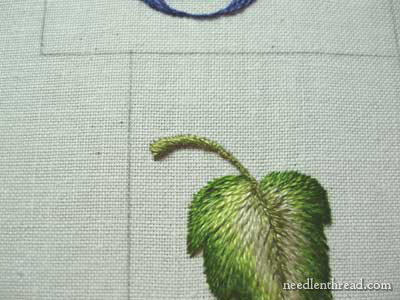
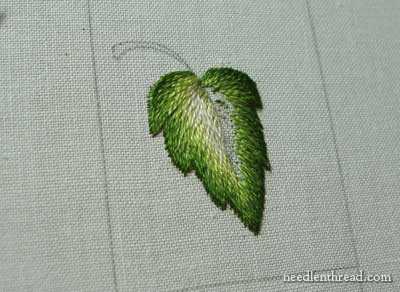
For the stem, I split stitched around the edges in 3012, and then satin stitched in the same color all the way down to where the stem meets the leaf. As the stem narrows, the satin stitches become very tiny.
This is the leaf so far. The stem is a bit too large for the leaf, methinks!
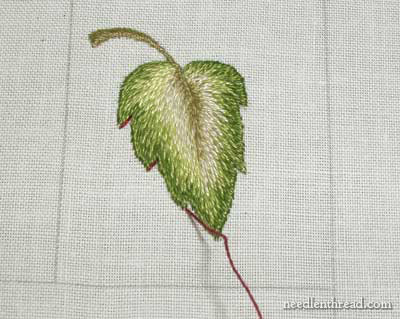
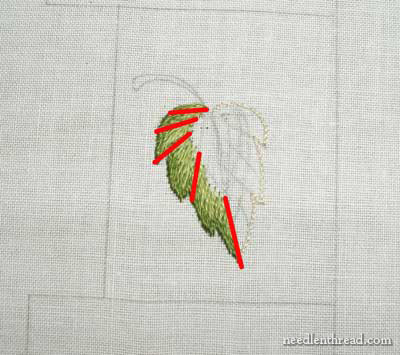
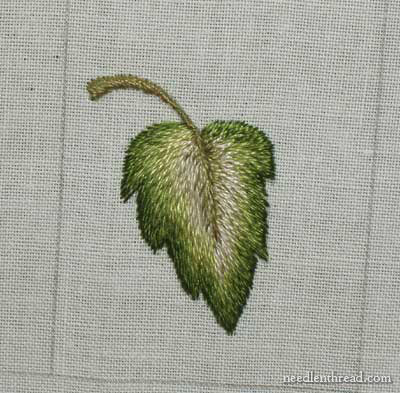
Now, to make the leaf pop out a bit, I took the burgundy (814), and stitched a tiny straight stitch in burgundy on the inside edge of each spike on the leaf. This may look better in a darker brown, but I used the burgundy since it is on our color list. If you have a darker brown on hand and want to use it instead, feel free to do so!
Ta-dum! You've finished Lesson 7! Only two more lessons to go!!
If you want to visit the other lessons in this series, go to the Long and Short Stitch Lessons index, where you'll find the whole list of lessons so far, including one with three videos demonstrating long and short stitch.
If you're following along with the lessons so far, you can add your photos to the Needle 'n Thread flickr group if you would like feedback on your progress.
And, finally, here's a PDF version of this lesson, if you'd like to print it out:
Lesson 7: Long and Short Stitch Shading - a More Complex Leaf (PDF)
Enjoy the lesson! Feel free to ask any questions or add comments below!


|
