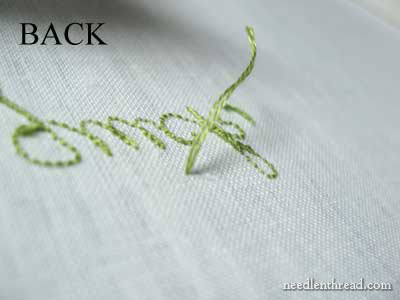
Remember when you learned penmanship and your teacher had to remind you to dot your i's and cross your t's? The same thing holds true when writing with your needle and thread - dotting the i's and crossing the t's are important, but dotting the i's is the part that's tricky. The dot floats above the lettering, presenting the problem of traveling up to it to stitch the dot. You don't want your thread to show through the front, so how do you get up there to the dot, without traveling a thread on the back of your work? Here's one way.
When hand embroidering your lettering or text, by the way, it doesn't really matter when you dot your i, not like it does in penmanship. With embroidery, you already have your lettering mapped out for you. You know exactly where that dot on that i is going to be. So while it may seem to be out of sequence to talk about dotting an i before we've even written the word, the fact is, it doesn't really matter! Besides, since you might be writing a completely different text on your sampler, I thought it a good idea to address this question, in case you already have some i's to dot!

Start by bringing an unknotted thread to the front of the fabric, right where you want your dot. The thread does not connect to any other lettering - you're just starting out with a new thread, and bringing it to the front of your fabric. In this particular tutorial, I'm using two strands of DMC cotton, but the technique applies equally as well to stitching with any kind of embroidery thread, really.
On the back of your fabric, leave about an inch-long tail, so that you can easily get ahold of it to snip it, later.
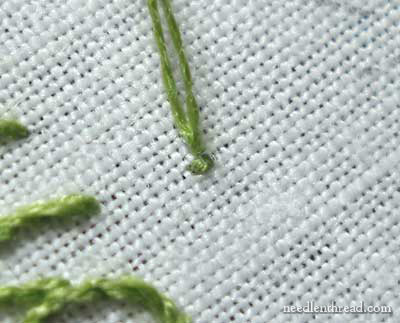
Now we're going to work a couple anchoring stitches. Going back to the front of your fabric, take one tiny straight stitch over only one or two threads of fabric. If you're working with a larger text on muslin or a high thread count cotton, you can certainly take the stitch over two or three fabric threads. It depends a bit, too, on what size you want your dot. If you want your dot to be relatively small, then take this anchoring stitch over as few threads as possible in your fabric, making the anchoring stitches as small as possible. After you take your first tiny stitch, bring the needle back up right next to that stitch.
Now, take your second anchoring stitch straight into that first tiny stitch.
Now your thread is anchored sufficiently to stitch the dot. Turn the fabric over, pull your working thread out of the way, and snip off the one-inch tail that you left on the back. Snip as close as possible to the fabric, but don't pull up on the tail with any force. Just try to snip right next to the fabric.
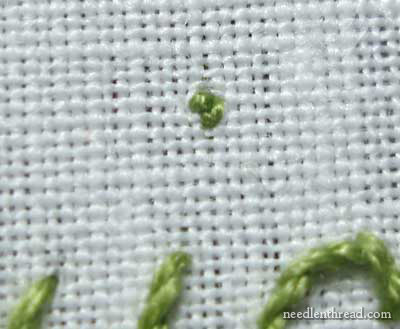
On the front of your fabric, this is what you'll have - two tiny stitches, worked perpendicular to each other, the second stitch stitched into the first.
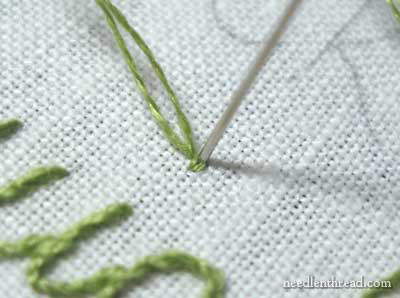
Now, stitch over those anchoring stitches with two straight stitches, side-by-side, that cover the anchoring stitches. Bring the needle up right above the anchoring stitches and go down right below them, then bring the needle up again in the same exact hole above the ancoring stitches, and go down in the same hole below them, arranging the two straight stitches to lie right next to each other over the anchoring stitches.
If you are working with a single strand of thread, you might have to take several straight stitches to cover your anchoring stitches. The trick is always going up and down in the same hole above and below your anchoring stitches, and making sure your straight stitches are lying side-by-side. This is what will make the dot look round.
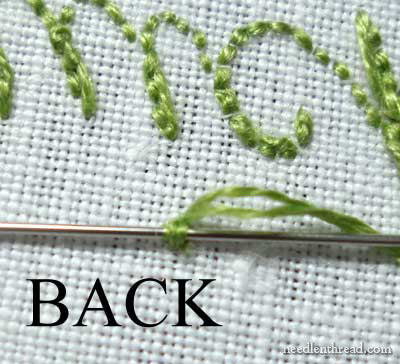
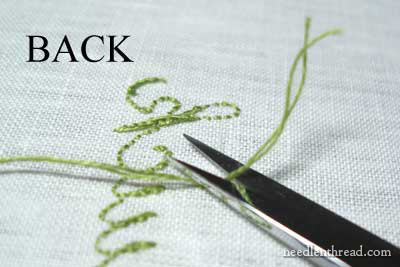
Now, turn the work over, and take the needle through the stitches on the back, running through them twice, once in one direction, and once perpendicular to that. If you can't manage a perpendicular stitch, then run the needle under the stitches twice, going in the same direction each time.
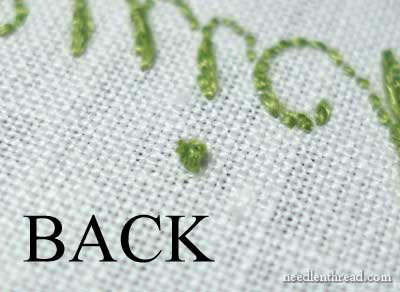
Cut your thread close to the fabric, but don't pull up on it before cutting. Just get as close as you can, without risking cutting your stitches or your fabric.
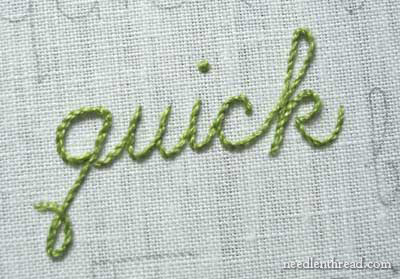
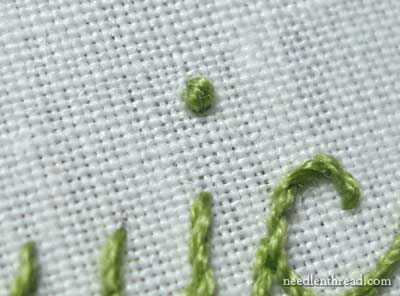
And there's your perfect little dot, floating by itself above the text.
Next up, we'll cover the lettering on that word, using stem stitch and focusing on connecting cursive text and keeping the direction of the stem stitch right.
For more tutorials on hand embroidered lettering and text, visit the Hand Embroidery: Lettering and Text Index of tutorials.
Any questions? Feel free to leave them in the comments below, and I'll do my best to answer them!


|
