Stem stitch is a beautiful rope-like hand embroidery stitch that works great for writing with a needle and thread. There are two real difficulties with stem stitch: stitch direction and curves. I'll try to eliminate both of those difficulties in this tutorial.
Before venturing into the tutorial, you might want to take a look at my stem stitch video to get the hang of the motion of the stitch, and you might find it useful to read this article on stem stitch vs. outline stitch.
The best way to keep your stem stitch always looking right as you embroider words is to first establish your stitch direction. Now, with stem stitch, whether you are right handed or left handed is an important consideration, so let's first clarify some stitching directions for both types of stitchers.
Right Handed Stitchers
Stitching Direction: For righties, stem stitch always travels left-to-right. It is true that you can move your hoop around and work the stitches vertically, but for right handers, whenever you consider the line you are stitching as horizontal to the floor, you will notice that, if you're working stem stitch, the direction of your line is going to be from left to right.
Needle / Thread placement: For right handers, when looking at your horizontal line that is moving from left to right, the working thread always hangs below the line, below the needle.
Left Handed Stitchers
Stitching Direction: For lefties, when you stitch a line horizontal to the floor, it will always travel from the right to the left. Even if you are stitching vertically, if you "turn the hoop" in your mind's eye, the line should always be moving from right to left.
Needle / Thread placement: For left handed stitchers, the working thread should always be above the needle, above the stitching line.
Now, these principles of stitching direction and thread placement hold true, even when traveling around curves. To change the placement of the thread as you round a curve in order for the stitches to hold themselves in the curve will mar the look of your stem stitch.
[I have to throw this note in, because it does put a wrench in the works, but please consider these directions to be written for s-twisted threads only. If stitching with z-twisted threads, the directions must be reversed. But let's forget that consideration for now, and assume that we will mostly be working with s-twisted threads - your typical DMC stranded cotton, pearl cotton, floche, most stranded silks, etc. If you want to see a close-up picture of what I mean about Z-twist and S-twist on threads, check out this post on The Silk Mill threads. There is a close-up picture of threads half-way through the post that show the difference in twist direction. Additionally, if you really want some in-depth reading on thread twists, this PDF on knowledge of sewing threads is somewhat interesting.]
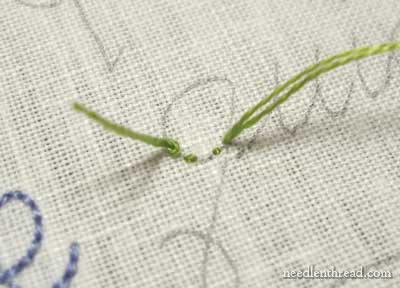
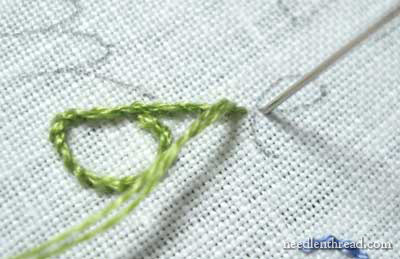
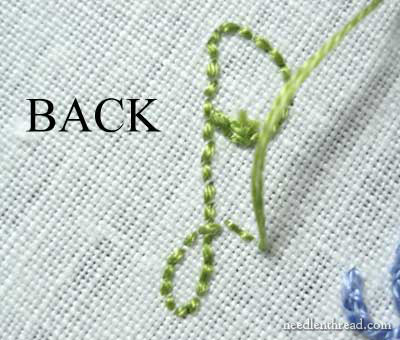
To begin, I'm going to anchor my thread just as I did in the first backstitch lettering lesson. I will be traveling from the base of the circle on the "q" around to the top of the circle, down the long tail, and then up and around the curl on the tail.
To keep the stitch direction from left to right (I am right handed), I turned the work over. As I progress around the curve, I'll simply turn my hoop, so that I can keep the same direction with ease.
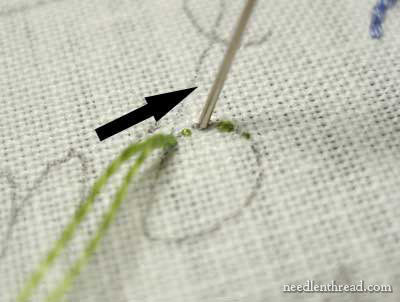
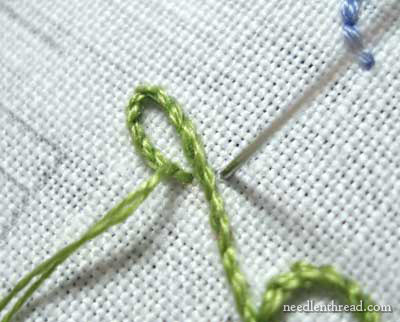
As I round the curve and come to the top of the head on the "q," I am back to working right-side-up again.
Now, I could make a sharp "corner" here where the loop runs into the back of the "q", but instead of doing that, I'm going to make a smooth, tight curve here. To do this, I am taking my stitches very small in the corner, but I'm still keeping the correct placement of the working thread.
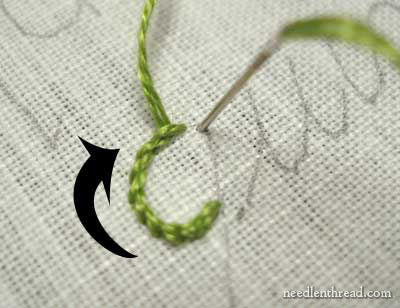
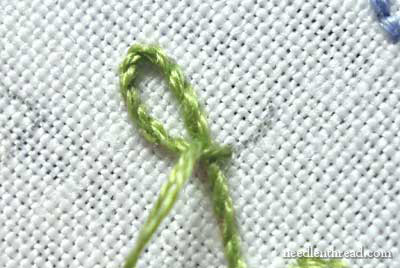
Now, I've turned my work again, keeping the left-to-right direction of stitching, and heading down the back and the tail of the "q". Coming right out of the curve, I resumed a stitch length that is slightly longer than the stitches I used in the curve, but not so long as to look thinner or out of proportion with the other stitches on the "q" so far.
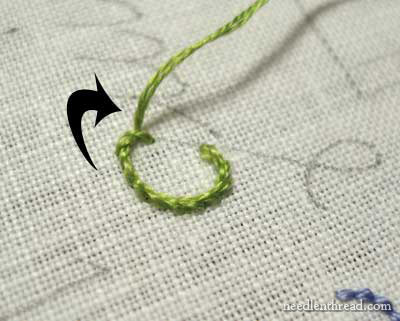
Approaching the point where the tail curls back over on itself at the base of the letter, I'm going to keep right on going with my stem stitch, crossing the intersection of the lines, and moving into the tight curve of that little curl.

As I start into the curve, I'm going to start decreasing the length of my stitches.

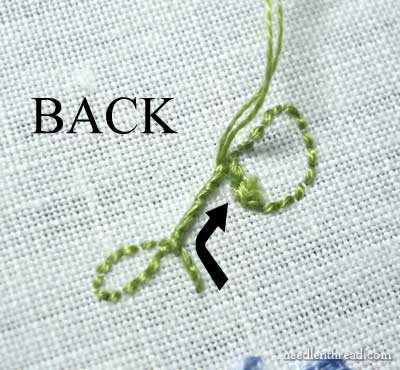
After I worked around the curve in shorter stitches, keeping the working thread below the needle and turning the hoop to keep the left-to-right direction, I started to lengthen the stitches again slightly coming out of the curve.
Now, keep in mind that this shortening and lengthening of stitches does not have to be mathematically accurate or anything! You just want your stitches to "take the curve" while keeping the closed-rope-look of the stem stitch, so just adjust your stitches slightly if you need to, in order to get them comfortably and neatly around the curve.
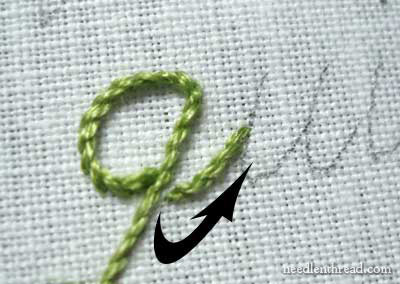
Now it's time to cross the curl over the back of the "q" and this is quite easy. As you approach the already-stitched line, simply jump your next stitch over the line. Work the stem stitch as you normally would - only cross over the stitches already there.
Return back to the end of the previous stitch, just like you would with any stem stitch, and cross over one more time, to complete the stem stitch.
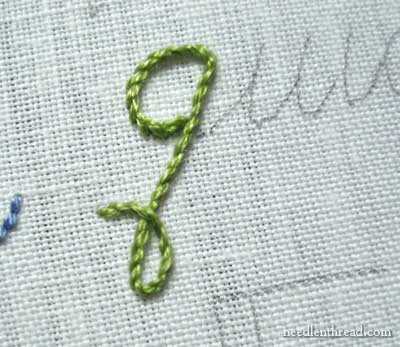
And there's the finished letter.
The techniques for rounding curves and crossing over already stitched lines will remain the same throughout the rest of the tutorial here, so I won't go in as much detail with each letter.
The next step is to travel your thread on the back of your work up to where the next letter starts.
Whip your thread around the stitches on the back of the letter, taking the most direct path to the spot where the next letter begins.
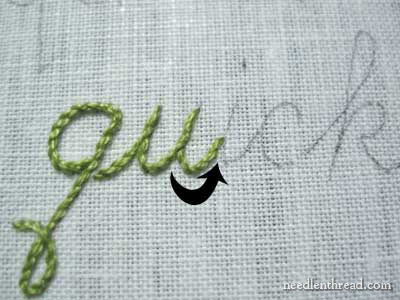
Here, I'm stitching the connection between the q and the u, stopping at the point where the connection meets the downstroke of the u. If I were handwriting this, I would not lift my pen off the paper at this point, but when embroidering letters, I don't double these lines.

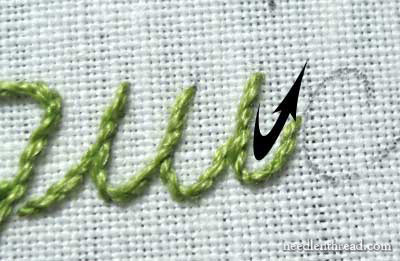
Now, I've turned my work so that I can continue working left-to-right. I've ended the last stitch where the connection meets the downstroke of the u, and then I've brought my needle up at the top of the downstroke. I did not need to "travel" my thread at all here, because this spot is pretty much directly above where my last stitch ended, and only a very short distance away. I'll be stitching through that carried thread on the back - it will line up with my next stitches and not show through to the front of the work.
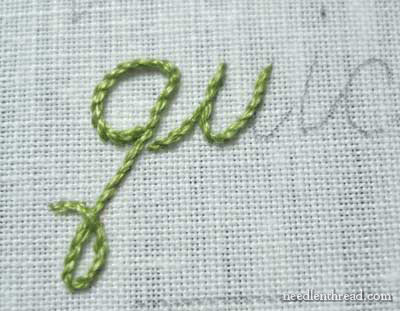
I continued down the downstroke, then around the curve, then up the other side of the u.
Then I moved back down and stitched the connection between the u and the i.
Again, as a reminder, as you stitch your letters, always look ahead and work out a sensible path to follow for stitching. On this u, two paths presented itself, and both would have been fine: the first path is the one I took - down the downstroke and up the other side of the u. Alternately, I could have gone down the downstroke, around the curve, and stopped where the curve met the second downstroke on the u, then worked the downstroke and the connection. Either way would've been fine, and perhaps the second way would have been more consistent, as it would have matched the first half of the letter better. But it really doesn't matter in this case - the letter is clear, and the stitching is tidy. And that's really what you want to achieve.
Here, I've stitched the downstroke of the i, and the connection with the c.
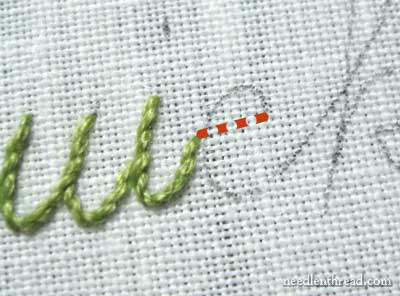
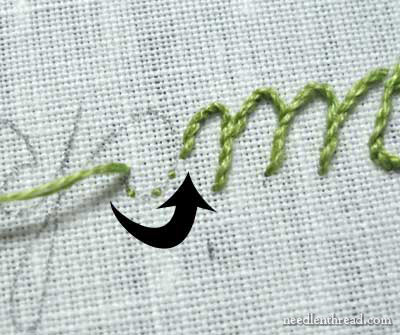
Now you can see I'm in a situation where I can't carry my thread across to the next beginning point, nor can I "travel" the thread on the back through any stitches already there. Yet I have a long enough thread to keep stitching... so, what to do?
I could end my thread and start again, but why bother, when I can "start" without ending??
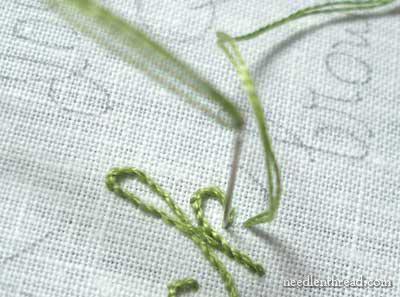
Just as I start a thread by taking tiny anchoring stitches, here, I'm taking tiny stitches along to the next starting point. I will cover these stitches up with the stem stitch, and I've avoided having to end my thread and start a new one and having a thread carrying visibly across the back of the fabric.
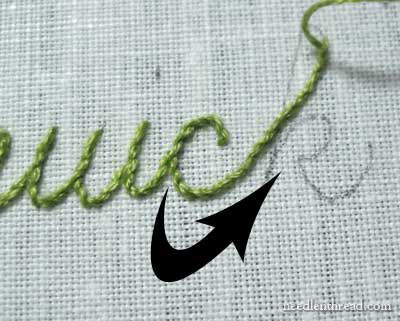
To keep the left-to-right direction of stitching, and to keep my working thread in the correct place in relation to the needle (below the needle), I started the c upside-down and turned the hoop as I progressed through the curve.
Continuing from the c, I worked my way up the top loop of the k.
I turned the work to accommodate the direction of the line, taking smaller stitches around the top of the loop of the k.
Then, coming down the back of the k, I stopped here for one main reason: I was out of thread. This was a good place to stop. If I had had more thread, I probably would have continued down the whole back of the k, but I will pick that part up with the new thread, and move up the k here, instead of down.
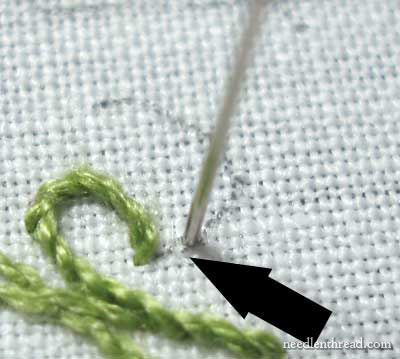
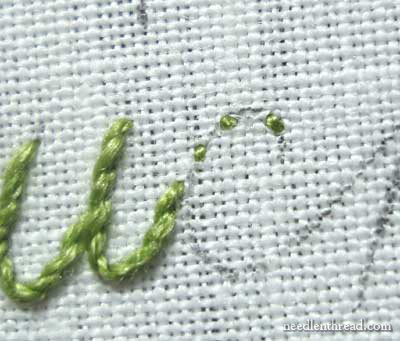
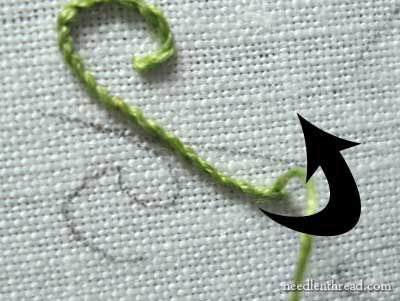
When you get to a point where two lines converge to make a sharp corner, as happens here in the middle of the k, it is necessary to end one line of stitching and start a new one. End the line of stitching around the loop right in the corner, as you see in the photo above. To start the next line of stitching (the downstroke of the k here), bring your needle up in the fabric a stitch length away.
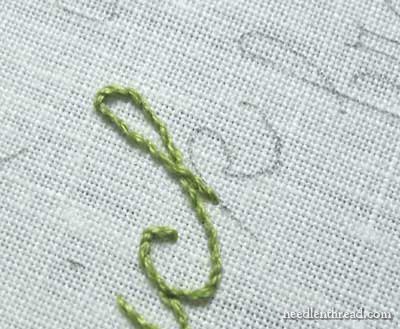
Then take the needle down into the fabric right in the corner, to make the first stitch. Basically, I'm beginning this stem stitch line with a backstitch, if you want to think of it this way.
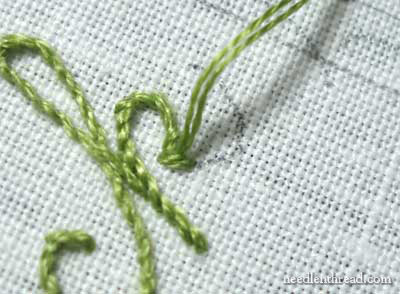
Now, bring your working thread up halfway the length of that backstitch, on the line, but above the stitch, to continue on with the stem stitch.
And the last stroke of the k is finished!
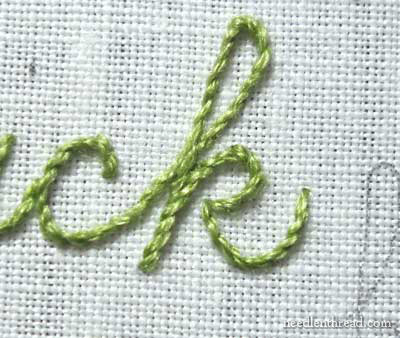
So, there you have the stem stitch worked on cursive lettering, using two strands of DMC stranded cotton.
If you're interested, feel free to check out my other tutorials on hand embroidering text. The next tutorial will focus on smaller text using a finer line.


|
