Here's the first stitching instruction installment for hand embroidered lettering. Yesterday, I showed you the lettering sample I'll be using for these tutorials, and how I set it up to start stitching. Today, the stitching begins...
The first sample of hand embroidered lettering is on the word "The" at the beginning of my sample sentence ("The quick brown fox jumped over the lazy dog"). I'm using two strands of DMC cotton and a #8 crewel needle, and the stitch I'm using is backstitch. Fabric and hoop were discussed in yesterday's post.
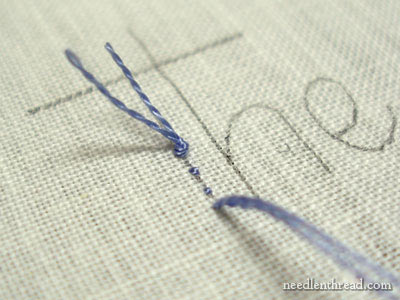
To begin stitching, I started at the base of the T. With knot in the thread, take your needle down into the fabric about a half an inch away from the base of the letter. Take two small straight stitchs in the fabric, towards your starting point and away from the knot, ending at the back of the fabric. Then, bring your needle up at the very base of the letter, so that you're ready to travel up the line of the T, covering up the small stitches en route.
I've already posted a picture tutorial on beginning your embroidery threads in this manner, if you want to take a look at this technique in detail.
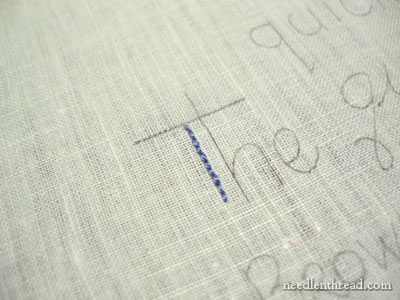
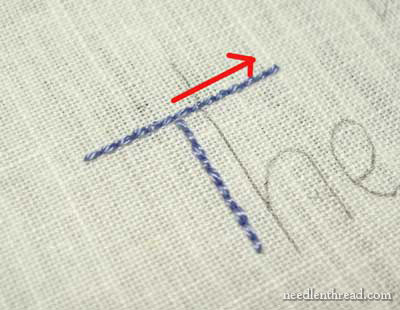
Using small stitches evenly spaced, I'm embroidering the base of the T with backstitch. I stitched all the way to the top of the line.
Now, at this point, if you were hand writing, you would probably pick up your pen and take it to the far left of the top line on the T, put the pen down, and draw a straight line to cross the T.
However, we're not going to do that here. Our last backstitch ended a whole stitch length below the cross line. If we were to take our thread to the left side of the cross line on the T, we'd end up trailing a thread across the back of the embroidery, where it could be seen.
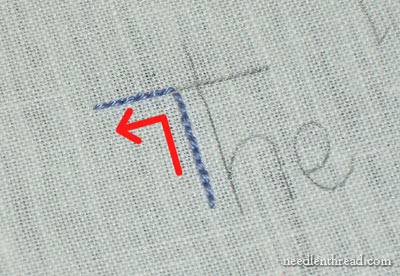
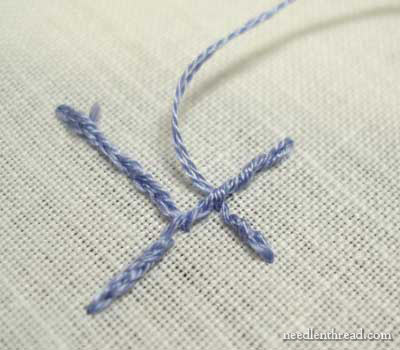
Instead, I started my next stitch on the cross line right in the middle of the line and worked the backstitch all the way to the left end of the cross line.
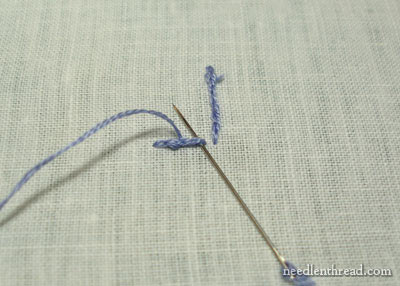
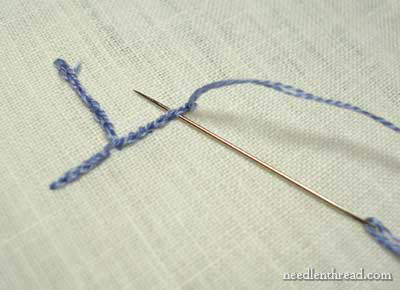
To return to the center and finish the right side of the cross line, turn your work over. Wrap your working thread around the back of the stitches by "whip stitching" around the back of the stitches. You'll only need to whip the back of the stitches about twice to return you to the center of the cross line.
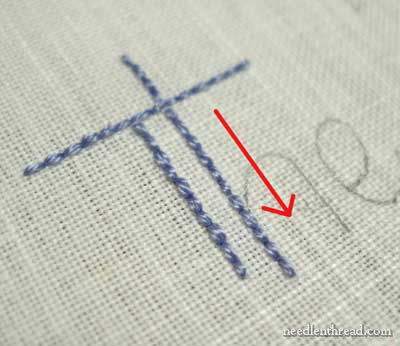
Finish backstitching the cross line all the way to the right. The next step is to return to where the H crosses the cross line of the T.
To do this, turn your work over and whip stitch around the back of the stitches, to the point where the H crosses the cross line on the T.
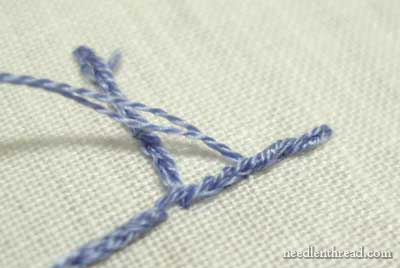
You'll only need to whip around the backs of the stitches once or twice - and make sure you don't pick up any fabric! Just take your needle underneath the threads, wrapping them.
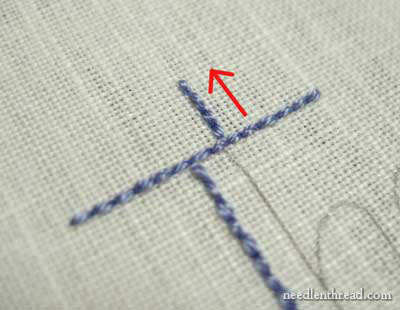
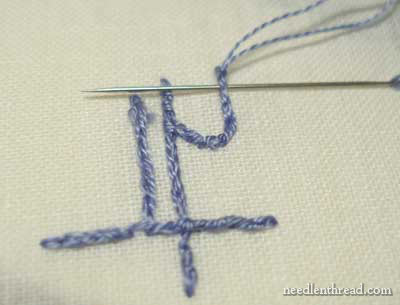
I'm working the top of the H that extends above the cross line on the T. This way, I don't have to travel back up here later to finish the H. It's important to look ahead when you're embroidering text, to see the easiest (and "cleanest") path to follow for your stitches. In this case, stitching this little stem here will get it out of the way. Then, I can move back down and do the rest of the H.
Once you get to the top of the H, turn your work over and "travel" your threads back down the back of the stitches by whipping them as you did above.
Continue backstitching down the downstroke on the H. If you were hand writing, once you reached the end of the downstroke, it is likely that you would not lift your pencil or pen to bring it back up to the bump on the H. However, when embroidering text, you don't want to double different parts of your lines - they'd end up looking bulky.
So, just as you traveled your threads on the back before, now you'll turn over your work and wrap the back of the stitches up the point where the bump on the H begins.
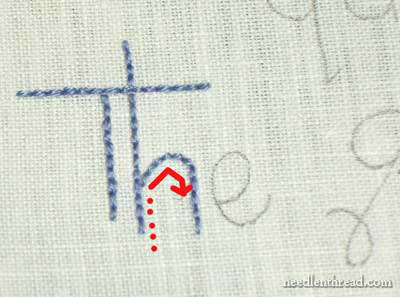
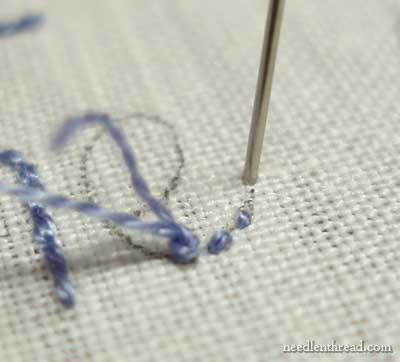
The "traveling" on the back (by wrapping your thread around the backs of your stitches) is indicated by the dotted line here. When you travel to the right place, come to the front of your fabric and backstitch the bump of the H.
When you finish the H, turn your work over, and wrap the working thread around the stitches on the back. Cut the working thread.
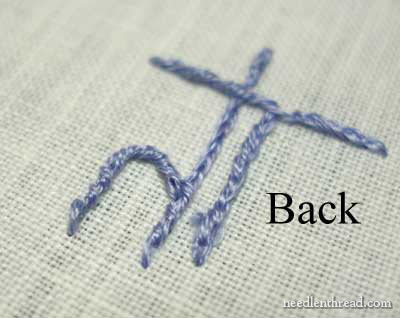
This is what the back of your embroidery will look like about now. The E in "The" is separate from the other two letters, so I'm not going to travel my thread from the H to the E. The most obvious reason for this is that the thread will be seen from the front, through the white linen. Even using white thread with white fabric, your thread would be seen. And even if you were using DARK fabric with a light thread, carrying your thread across an empty space could still be visible, because the thread can form a small ridge in the fabric, especially once the fabric softens with time. Even though it is (admittedly) a pain in the neck to constantly be changing threads, it is best to get into the habit of changing them rather than carrying them across open spaces. If it's a habit, it won't seem like such a big deal when you have to start and stop often.
If it really bothers you to start and stop your threads often, when working up your text, consider arranging it so that each letter in every word touches. Then you can travel your threads on the back by wrapping them through the back of your stitches, and you won't have to start and stop for individual letters.
Begin the next thread the same way the first thread was begun, by a series of tiny stitches that will be covered up with the backstitch.
Considering the E, I decided to start from the base and work up around the loop, rather than starting at the inside of the loop and working down to the base. My reason for this was that I wanted a neat join, where the loop and the back of the E met, and I figured I could achieve that better by stitching the back of the E first, and then meeting the back after traveling into the loop.
You see, then, that it's a good idea to think ahead along the path that you want to stitch. Notice where the various parts of the letter meet.
When the E is finished, turn the work over and run your working thread under the backs of the stitches, then snip the thread.
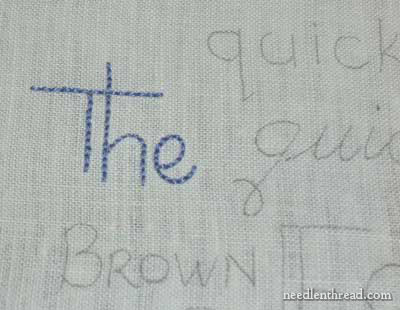
And there is the end of the first word, stitched in a simple backstitch, which works well for this style of lettering. Though there are some curves in the lettering, there are not many tight curves, so the backstitch looks smooth and not too blocky with the simple printed lettering.
Next up, we'll work cursive in stem stitch.
Hope you enjoyed the tutorial and that there was a little tip or two that was helpful for you!
Other Posts on Hand Embroidered Lettering
Hand Embroidery: Lettering and Text 1 - setting up the sampler


|
