This past weekend, I actually managed to get some stitching in! While I didn't progress a whole lot on the needlebook I'm working on, I did manage some trial-and-error (mostly error!) with satin stitching, which I thought I'd share with you. This is one of those "teaching moments" that translates into "don't make the same mistakes I make!"
I mentioned earlier when I showed you this needlebook embroidery kit that the fabric is not necessarily ideal for surface embroidery. Still, it works. But it can be frustrating at times!
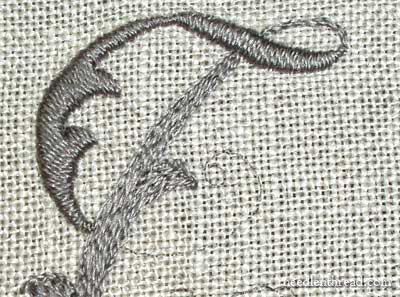
First, I finished the top bar of the T, but I'm not too keen on that squiggle right in the middle. From a distance, it's not noticeable enough to pick the stitching out!
I also managed filling the bulk of the monogram.
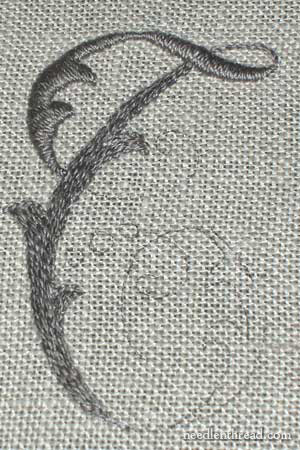
Again, I'm using split stitch on the edge (which you can see clearly on the left edge of the letter there) and then filling with long split stitches and straight stitches. You can also see in the photo above the open weave of the fabric - great for counted work, but more difficult for surface embroidery, especially stitches like satin stitch.
The upwards loop on the T is also outlined and filled, ready for satin stitching.
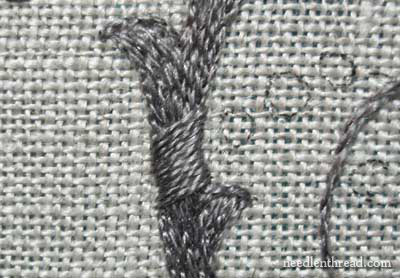
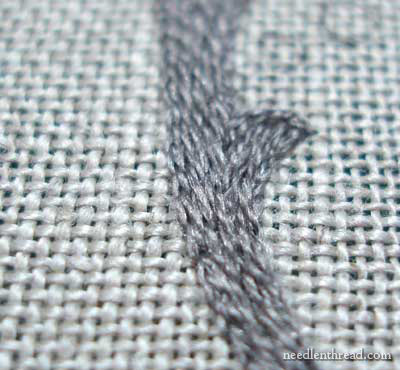
I began satin stitching on the body of the T (the back spine, more or less) in the direction you see in the photo above. I thought this slant would make the little off-shoot curls easier to handle.
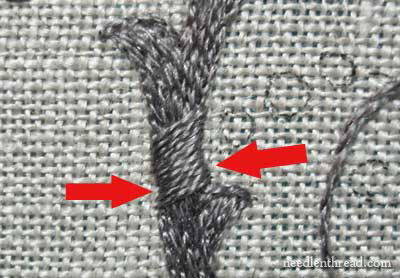
I didn't like the stitching. See how the edges jog in where the arrows are pointing? Was this a problem with the fabric, or with my stitching? Well, it'd be nice to have an excuse - to be able to say it's the fabric! - but this wasn't necessarily the case! Still, I'm finding it hard to see the lines clearly for stitching on this fabric, and the colors don't help much either. The grey is difficult to see on top of the natural linen, so judging the very edge was a bit frustrating.
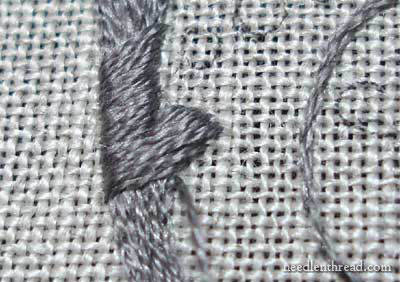
I picked the stitching out (careful not to cut any of the padding or outlining underneath!), and re-stitched. I was much more satisfied with the edge - it's much cleaner...

... but good golly, Miss Molly! That thing, in the circle up there, looks bizarre, to say the least!
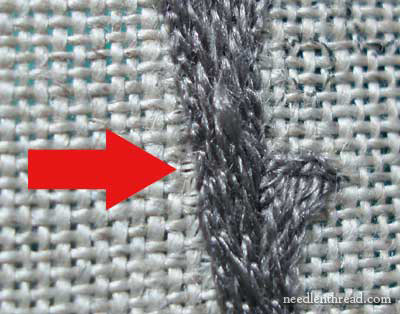
So I picked all the stitching out again! (Well, sometimes, you just have to!) Where the arrow is pointing, you can see how the actual threads of the fabric have to be split, in order for the satin stitching to look good.
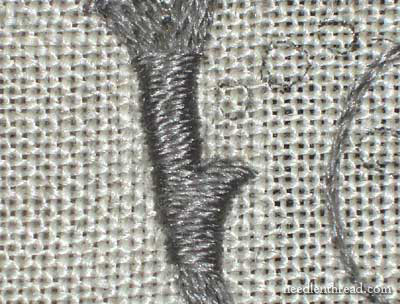
Ah. Now things are looking better!
I decided to go with very little slant in the satin stitching, right in the middle of the back of the T. As I work downwards and upwards on the curve, I know I'll have to slant my stitches a bit, but right in the middle, I found that horizontal stitches worked pretty well.
I'm much more satisfied with this bit of satin stitching! Whew.
Like I said... I didn't progress a whole lot. But hey! Every bit counts!
Hope you have a great Monday!
|
