I love the pomegranate as a symbol in art, and I especially love it rendered in embroidery, so I was really excited to see the crewel embroidery kit on the Tristan Brooks website that featured this seedy fruit. And, better yet, it was one of the "smalls" - a little complete embroidery kit, with all the threads and everything ready for stitching, for a project that can easily be completed in two evenings (and maybe one, if you want to spend several hours in a row stitching!)
These little crewel embroidery kits (which I've found rather addictive!) take me three sessions, approximately: one session for setting up, and two stitching sessions, If I can spend a couple hours straight stitching. The first crewel kit I finished took a lot less time than this one, for some reason. Last week, I finished this pomegranate small, and overall, I really like it a lot. However, if I were stitching it again, there are a couple things I'd do differently.
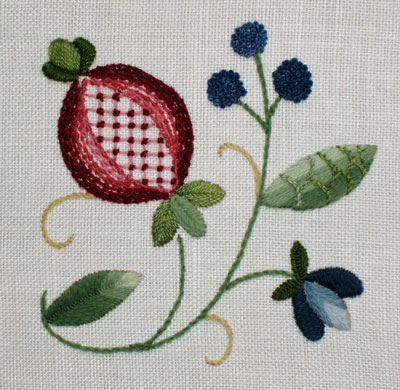
This is the finished piece. The colors are really appealing to me - I love the reds and the blues and the greens, with just a tiny touch of yellow.
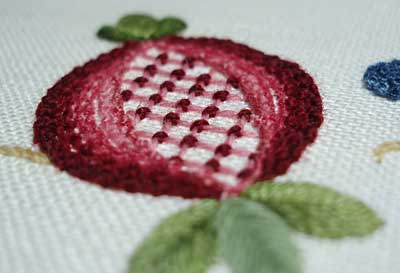
In retrospect, I would have paid a little more attention to the shape of the pomegranate. The top edge on the right side of the fruit is looking a bit flat.
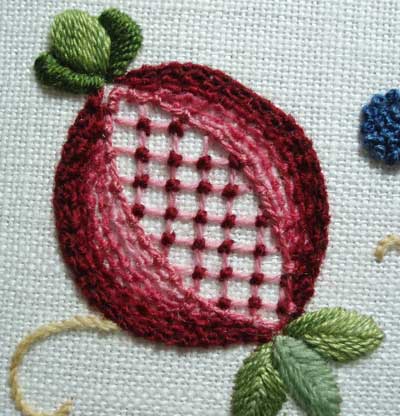
The only thing I changed in the design and kit directions on this one was the center of the pomegranate. The original design has a few scattered French knots in red in the center, with a tiny green fly stitch at the base of each French knot. These look like teeny flower buds of some sort. I'm a sucker for lattice work in embroidery, and I love seeing laid work in crewel embroidery. So I filled the middle of my pomegranate with a lattice in the medium pink, tacked down with the dark red at the intersections.
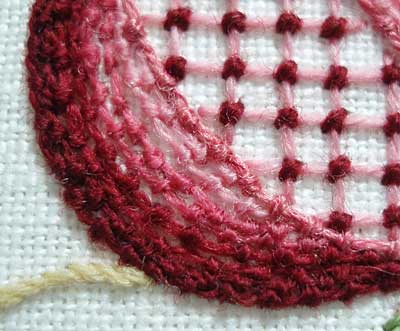
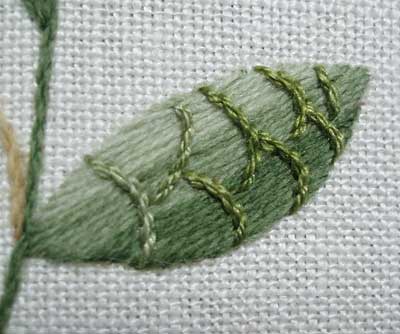
Concerning the stitch chosen for the skin of the pomegranate, the kit called for coral knots, layered from dark on the outside to light on the inside, all worked in Heathway wools, except for the innermost line (in medium pink), which is stitched with Gumnuts Poppies.
On the picture accompanying the project, the lines of coral knots become a bit more spaced out as they move towards the center, so that the fabric is visible. Two things I wonder, now that the project is finished: 1. I wonder if this would have looked better, if the rows of coral knots were packed together all the way to the edge, so that the ground fabric isn't visible? 2. I wonder how the pomegranate would have looked if stitched in a different stitch - for example, stem stitch used as a filling?
I do like the texture of the coral knots, but stem stitch would've been a bit more pomegranate-skin-like. A pomegranate has very smooth skin. But - I like the texture. So I'm happy enough with the coral knot pomegranate. I just wonder if I would like it as well (or maybe better?) in stem stitch. Maybe I'll test that some day....
One thing I do really like about these kits is the use of Gumnut Yarns (poppies) and Heathway wool next to each other, creating a noticeable contrast. Poppies by Gumnut Yarns is a 50 / 50 wool / silk blend, so it has a very nice sheen. It's a really beautiful thread to stitch with! I'd like to try the other threads from Gumnut yarns to see if they are comparable in quality. Maybe someday I will. (In the meantime, if you're interested in seeing the threads available through Gumnut yarns, check out their website! Their threads look enticing!)
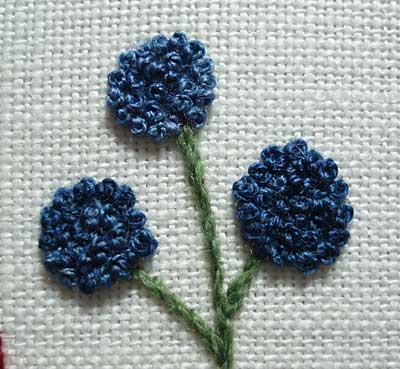
The blueberries are clusters of French knots, worked with Gumnut Poppies. This is actually two colors of thread - the middle berry is slightly lighter than the side berries. It's a great thread for French knots, by the way!
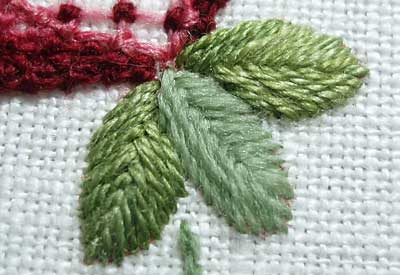
This is the other thing - probably the Biggest Thing - in this design that I don't like, and now, I wish I had worked it differently. While I like the Heathway and Gumnut Poppies next to each other (the base of this leaf is Heathway wool, the weird vein-things are worked in stem stitch with Gumnut Poppies), I don't like the striped effect in the leaf, and I don't like the shape of the stem stitching in the middle. I ended up eyeballing this, actually, because once the satin stitches are in, you can't see the lines for the stem stitching. My first instinct, actually, was to substitute the stem stitched bumps with a double fly stitch, worked down across the leaf. I wish I had done this! That's really my only Big Regret in this kit. I didn't pick the stem stitching out, because it would have ruined the satin stitching underneath, and I didn't know if I would have enough thread to replace the satin stitched leaf if I had to.
And, well. It's not that big of a regret! Overall, I really like this kit, I'm pleased enough with the way the piece came out, and I'm dying to get going on the next small!
"But what about the rooster?" you ask.
Oh, I started him. I started one of the flowers, and I have taken good photos of the parts I've put in and picked out again. And then the parts I put in and picked out yet again. I put in and picked out on the flower three times so far. It's been great fun! I'm hoping to remedy the situation today by switching colors.
I hope you're having a terrific weekend! Back to my needle and thread....
|
