After coming to a screeching halt on the flower on my Crewel Rooster project, I moved on to the stem. Stems deserve stem stitch. Maybe that's a bit narrow-minded, but it really is the first stitch I think of when it comes to stems. Because the stems on the Rooster project are thick, they needed to be filled, so I embroidered the first stem with a stem stitch filling, using D'Aubusson wool in a dark and a medium green.
Compared to stitching with the Appleton wool, I liked the D'Aubusson better. First, it's a finer thread, and second, it seemed to me to be a bit smoother. I like the look of the stem stitch with this thread, too.
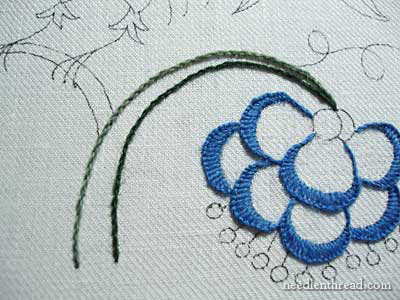
I began by stitching the lower line of the stem with the dark green, and the upper line of the stem with the medium green. Unfortunately, this shade of green doesn't work so well with the blue, I thought. Maybe something a little brighter and greener? But not a grass or kelly green? In any case, I stuck with it, because this is the thread I have!
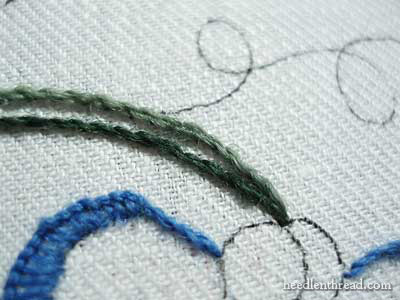
The two lines converge in the same hole at the tip of the stem.
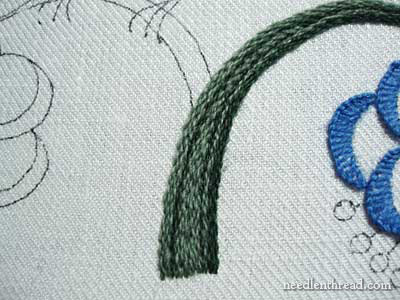
After working the outside lines, I filled the inside by taking turns doing a row on the left, then on the right, then on the left, and I changed out the shade of green now and then - keeping most of the darker green towards the right side of the stem and most of the lighter green towards the left side (which is the top of the stem, where the light would hit, if I were worrying much about realistic lighting.... which I'm not. But at the time, it struck me as the way to do it....)
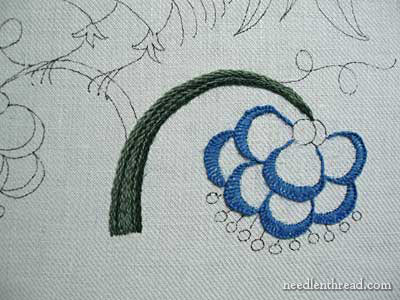
Here's the first stem, then, and the first flower.
You can see that the green is a bit muted for the blue in the flower. I can't wait to see what shades of D'Aubusson going to be available! I really like stitching with this thread. As wools go, it's a nice wool to stitch with!
After finishing the first stem, I jumped again to another part of the design, the body of the bird.
Now, you'll have to bear with me when discussing the belly of the rooster, because I have started and stopped and picked out, and re-worked this a number of times. (Is this process beginning to sound familiar?) Even at this point, I know I will pick it out AGAIN.
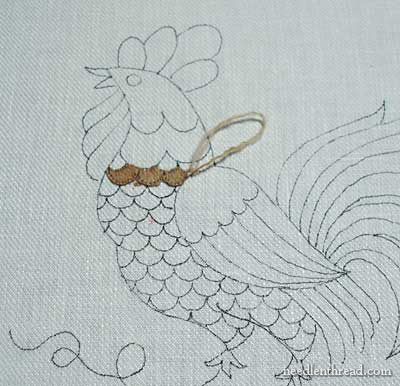
If you're stitching along with me on this - or planning to eventually - you do not have to work any part of the design (and especially the Rooster Belly!) the same way I decided to. At first, I started with some lines of fly stitch down the contours of the bird, with a stem stitch outline around the body. But oh me, oh my. I didn't like it. I want a Bold Rooster. Roosters, after all, are generally pretty bold. So I decided he had to be filled. I drew scallops all over him and went at him with the buttonhole stitch, and you can see the beginning of that in the photo above.
However, the thread I was using - which I think is Paternayan crewel yarn - was awfully persnickety.
When working with wool, it is essential to use short strands to stitch with. If you're used to getting just about every stitch out of an 18"-20" strand of cotton (or even some silks), you may be in for a surprise when you try wool. I am cutting my wool lengths at about 14", and I can't use it all. I find I have to change threads even when I want to squeeze out several more stitches. This is more the case with some threads than others. I'll try to illustrate this for you in an upcoming post.
But, back to the rooster fellow. I picked out these stitches. I like the idea of the scallops - a lot - but they need to start from the bottom of his legs and move up, so that they can overlap each layer nicely, like feathers. Also, I don't like this color brown for the whole body. So I picked out a lighter golden wheat and a medium golden wheat color for the bulk of the rooster's body. And now, I'm scalloping away with buttonhole stitches!
That's where I am! I'm always open to comments, suggestions, questions, advice! Feel free to let me know what you're thinking about this so far, especially if you have any ideas for me! I LOVE ideas!
I'm off to make some headway on this guy!
Previous Articles on The Crewel Rooster:
Free Hand Embroidery Pattern for The Crewel Rooster
Setting up The Crewel Rooster Project
Choosing Threads for The Crewel Rooster - and the first flower
Crewel Design Books
|
