It's tempting to be horribly punny this morning. Crewel embroidery - cruel. Fowl? Truly foul! But I will refrain, and focus on the breast of the rooster, which I've embroidered in buttonhole scallops primarily with Appleton wools. This is going to be one of those journeys that may drive you nuts before you finish reading. It's ok. You'll be in good company. I've already arrived.
Last time we visited my rooster crewel work project, I was debating how to embroider the rooster's body. I knew I would use wool thread (it's crewel embroidery - wool is somewhat required!) and I knew I wanted it filled completely. That's about all I knew. Having gone at the beast with a permanent pen, drawing scallops all over him, I felt obliged to continue with the scallop motif. Here's my trial-and-error process.
Scalloped buttonhole stitch is a truncated version of the buttonhole wheel, so if you're unfamiliar with the stitch but interested in working scallops all over the breast of a bird (or anything else), you can check out the buttonhole wheel stitch video. It'll show you enough to learn the scalloped buttonhole.
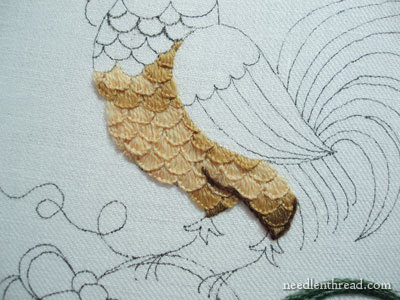
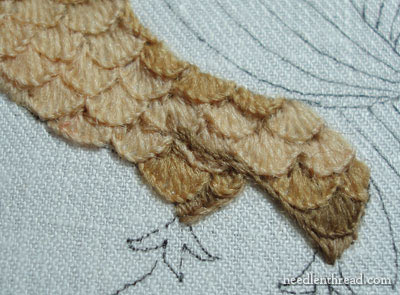
I began scalloping (it's a word, really!) at the base of the rooster's legs, using a medium soft brown. This wool, in fact, is Paternayan crewel wool. The color name is "amber" but it's more brown than amber. The rest of the body is worked in Appleton crewel wool, in two colors of gold. Working up the legs, I layered each row of scallops on top of the previous row, with the hopes of creating a feathered and layered look.
The layered look worked out fine. As for feathers, think of it as "stylized" feathers. Before I finished the rooster's body, I went back to the forefront leg and stitched some very dark brown around it. I did this for two reasons: first, I was curious what the dark outline would look like; second, I didn't want to forget where the leg line (now covered with stitches) was.
I wasn't sure if I liked this. But this is part of the journey, so I won't tell you the outcome just yet.
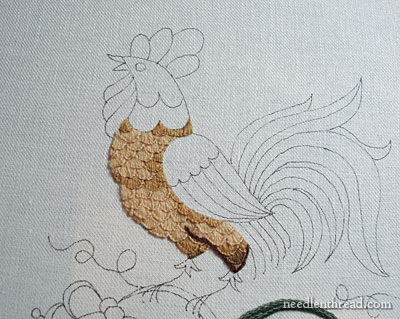
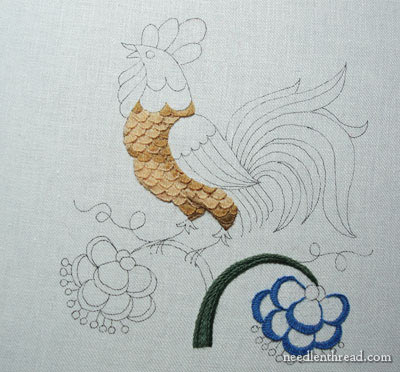
I finished stitching the scallops up the breast of the rooster, working darker gold scallops in areas that I thought should be a bit shaded. I wasn't particularly thrilled with my attempt at shading - but that's all part of the journey, too, so I won't tell you the outcome yet, either.
Compare the photo above with the one directly above it. Do you see a difference? Probably not. But I was hoping for a subtly noticeable difference.
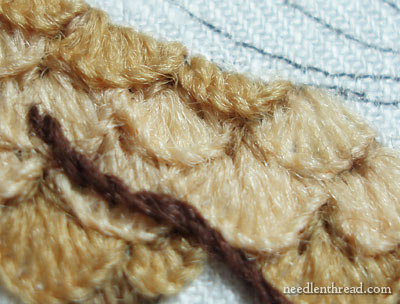
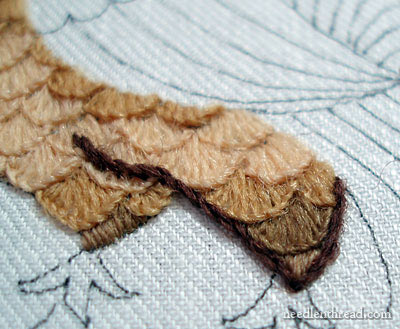
Close up, there you have my attempt at shading under the scallops. Taking that medium soft brown (the Paternayan wool), I stitched little upside-down V's underneath some of the scallops, to try to create a little shadow underneath them and lift them up a bit more off the feathers below.
And then I picked out that dark brown line, and replaced it with the Paternayan wool in the medium soft brown.

But it didn't seem bold enough to me - the line seemed to get lost in that mess of scalloped feathers. So I stitched back in the very dark brown, and then I went around the body of the bird in the dark brown. You see, I had this notion that I wanted a bold rooster. I wanted him to stand out. I tried to achieve this with the dark brown.
And I hated it.
So I picked out the line around the body, And stitched back in the line around the foremost leg in the medium brown. It's always fun to do the same thing twice.
The rest of the body needed something around it, to finish off the edges and to cover the transfer line. Brown? No. Contrast wasn't working. It just looked wrong.
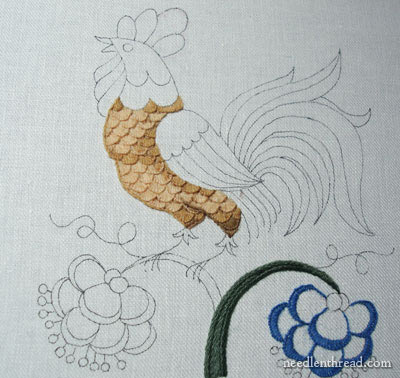
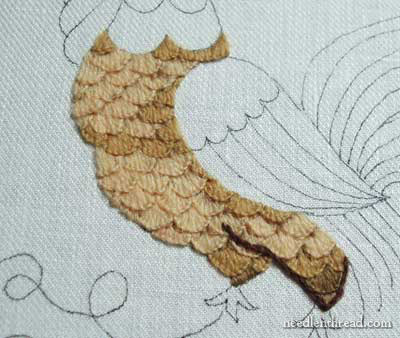
So I took the darker of the golds used for the scallops, and worked a stem stitch line down the left side of the rooster's body.
And I saw that it was good.
Good enough, anyway!
To tell you the truth, I'm now debating the use of the two tones of gold on the majority of the body. It looks as if they poor guy is sweating. And he probably is - he's figured out what's coming.
Now, step back from your computer monitor, and squint. From far away, he's not so bad.
If you think the body process here was wearisome, just wait until we get to the tail!
As always, I'm open to suggestions, comments, questions! What would you have done differently? What do you like or not like? Any ideas for (reasonable) adjustments? I'm all ears.... (as long as you don't tell me to pick him out -- again!)
Back to the needle and thread.... See you tomorrow!
|
