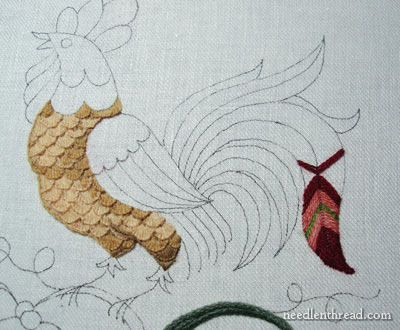
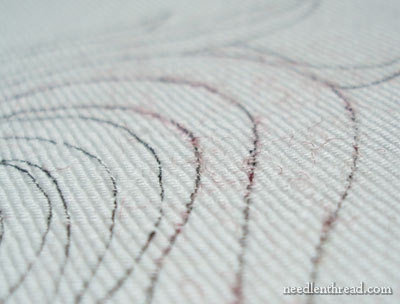
Roosters are weird. They have these flappy things that grow on their faces and heads. They have these coats of feathers that overlay their backs. They have floppy tails. Poofy, floppy tails. Actually, when you start looking closely at roosters (if you avoid the face, anyway!) they are rather attractive birds - and in fact, in many cases, they're downright gorgeous. Embroidering a rooster with no reference point has been a bit of a challenge, but on the bright side of the adventure, given the variety in rooster-kind, I figure I can pretty much do anything, as long as the general shape of the bird is there. So I set about to play with the tail after finishing the scalloped body. Let's look at the tail today. This is a tale of disaster, but again, it's all part of the journey!
Embroidering the tail on this rooster design should be fun. There's lots of scope here for variety in stitches and color.
Now, bear with me on this, ok?
I started at the tip of the largest feather on the tail - and the thread I'm using here is the D'Aubusson wool in a brick red, and Simply Wool by Gentle Arts in a peachy color and a greeny color.
The stitch is fly stitch, worked vertically from the outside tip of the tail.
As I worked into the tail feather, I thought it might be interesting to change colors, so I did. I also thought it might be interesting to change types of thread, so that I could see two different wools side-by-side in the same stitch, for the sake of comparing the look of the threads.
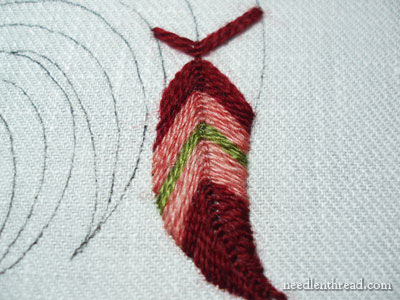
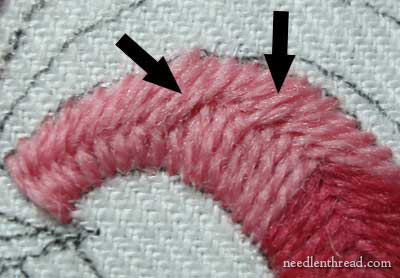
This striped bit towards the tip of the tale shows a notable difference between the two types of threads I'm using.
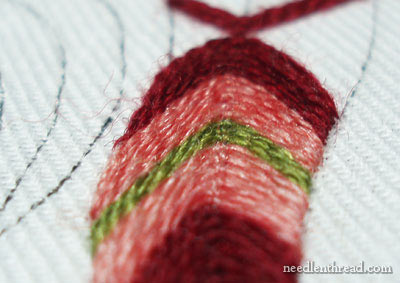
The D'Aubusson wool is a fine weight embroidery wool. Simply Wool by Gentle Arts is, too. But Simply Wool is slightly finer, and it has a lot more sheen to it. D'Aubusson wool looks more like wool, but Simply Wool looks like (and behaves like) a blend of wool and silk, though I know it isn't a blend. But it is smoother, and it does have a higher sheen.
As for the actual stripe thing going on here, I knew right off - as soon as I did it - that I didn't really like it. Somehow, it reminded me of a sock. A sock? A sock.
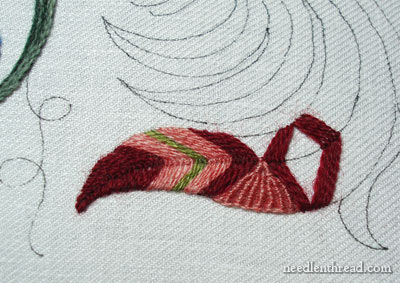
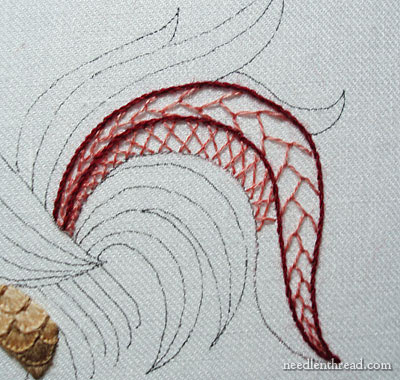
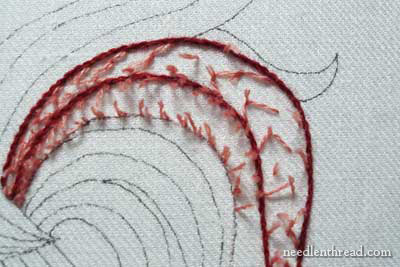
I digressed from the striped effect and decided to add some texture, using spiderweb stitch worked in this fan shape. Now it was starting to remind me of a ribbed sock. I was liking it less and less.
The ribbed spiderweb stitch, by the way, is difficult to work in a tiny space with this thread (Simply Wool). It was not pleasant stitching.
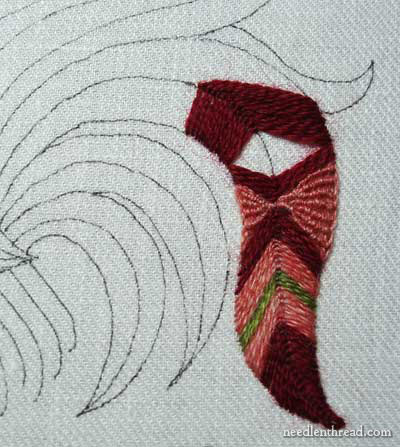
So I worked two opposite triangles in the spiderweb stitch, then picked up the dark red fly stitch again, then decided to change directions on that stitch and leave a diamond-shaped hole for another inset design area. You know, just to sort of spice the feather up and make it look really... really dumb. I didn't like where this was going at all - but don't worry! It gets worse!
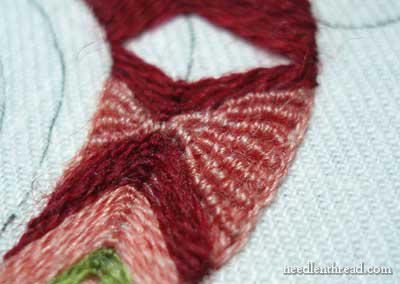
Here's my close-up of the bumpy ribbed inset on the tail. You can see that it isn't exactly smooth and perfectly straight, as far as the spines are concerned. They're a bit wobbly, and, as I worked towards the tip of the triangle, I had to reduce the number of spines by wrapping more than one at a time. But, besides the stitching, another thing this photo above shows pretty clearly is the soft sheen of the Simply Wool thread.
Working my way around the curve of the feather, I kept going with the fly stitch in the D'Aubusson wool. As I took the curve, it became more and more difficult to compensate for the curve without moving my stitches apart and showing more of the fabric underneath. At this point, I was really not liking the tail at all.
I cut back the red and picked it out, leaving a slight border on the spiderweb triangles. Then I moved to the inside end of the feather, thinking it might help to work this stitch from this direction, and meet the area already stitched. I gave that theory about half an inch, and then resorted to this:

What a glorious picking mess! This is a good time to be thankful for those tweezers in your workbox!
This is also a good time to be thankful for a Really Good Fabric! You can see the fuzzies left from the wool - not a big deal. Take a scrap piece of cloth and, using gentle small circular motions, "wipe" the wool fuzzies off. But look at the fabric. I have put in a lot of stitching here - some of it rather tight stitching - and then picked it all out. In some places, I've done this twice. The fabric holds up really well. The holes close back up, and once you've rubbed the fuzzies away, you can't really tell you've had any stitching there. The fabric is Legacy Linen Twill, made specifically for hand embroidery. It's on sale during the month of January at Hedgehog Handworks, at a Really Good Price per yard - $35.70 - and it's 62.5" wide. This is a fantastic price for Legacy Linen, and especially for linen twill, which is usually expensive.
Ok..... Now what?

Now let's try some of those fun stitches, like feather stitch. After all, it's a feather.
And let's work a row of herringbone stitch underneath that.
And then let's cut all that out, too.
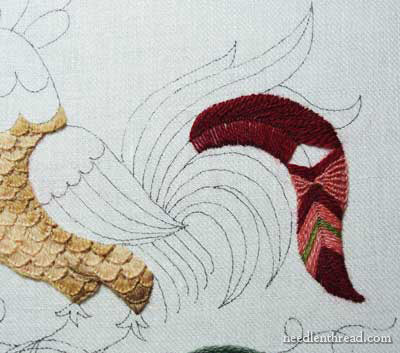
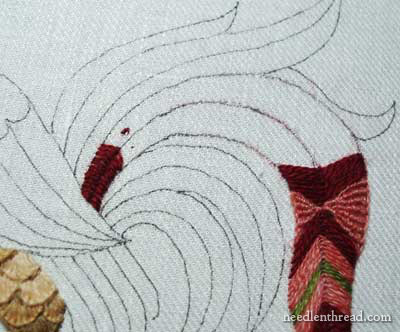
Let's forget the big feather and move down to the smaller one at the base of the tail.
This is stitched using fishbone stitch, in three colors of Heathway wool. The Heathway is soft and boingy, and it covers well and smoothly.
But by this time, I was tailed-out, and I must have lost my concentration somewhere along the feather. It wasn't until I actually looked at the photos that I found these two mistakes. I overlapped incorrectly, and ended up with these very noticeable jolts in the center line.
It doesn't matter so much. Why, you ask? Because deep down, I don't like the color changes on this. It's too stripey. More socks! I have a distinct feeling this is going to go.
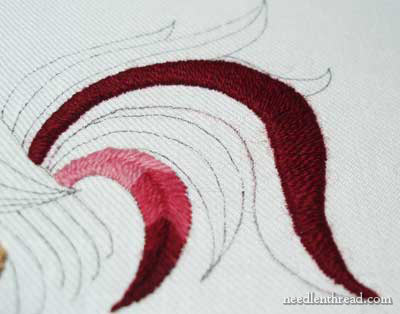
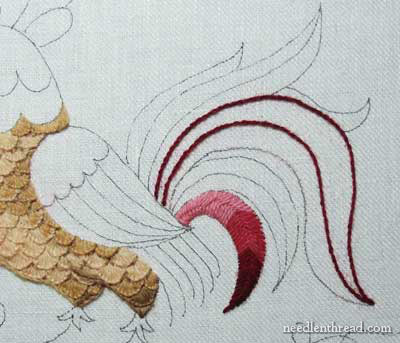
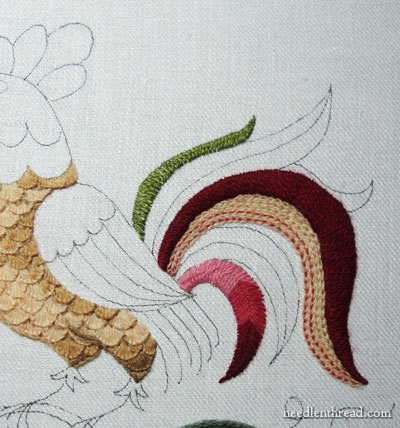
Still, I left it for now, and then I moved back up to that large feather, which I satin stitched in the dark brick D'Aubusson wool.
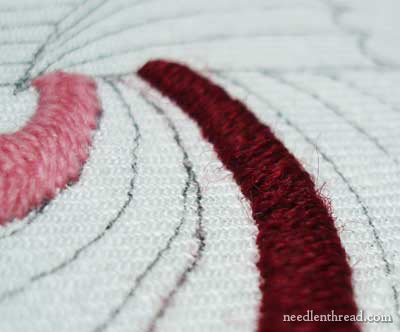
This wool makes a nice satin stitch in small spaces. In larger spaces, it's definitely necessary to pad underneath the satin stitching to give the top threads some friction to keep them in place. The wool threads line up nicely for satin stitch, and, unlike the Heathway, which looses its twisted look in satin stitch, creating a very smooth surface, the D'Aubusson keeps its twist and looks very clean and neat in satin stitch. The light plays off the twists.
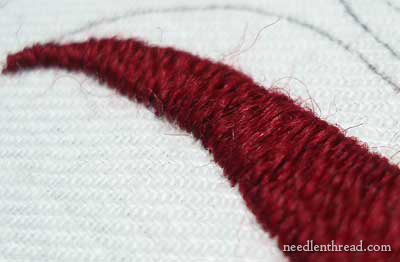
I like satin stitch in the D'Aubusson wool.
On the lower half of that large feather, I chain stitched in the straw-colored D'Aubusson, to fill the area. Then, on the two outside rows, I worked backstitch through the chain stitches, in the coral Simply Wool from Gentle Arts. I was determined to get the Simply Wool thread next to the D'Aubusson, so that the difference in weight could be seen better.
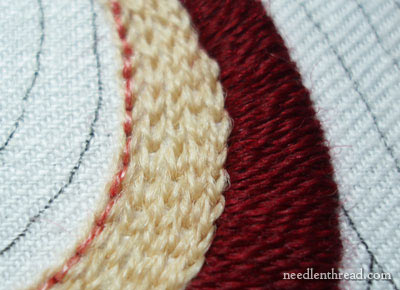
Above, you can see one row of the chain stitches backstitched with the Simply Wool in coral. The D'Aubusson is a fine thread, compared to Appleton and Heathway. But the Simply Wool is a wee bit finer - and you can see that it has more of a sheen to it.
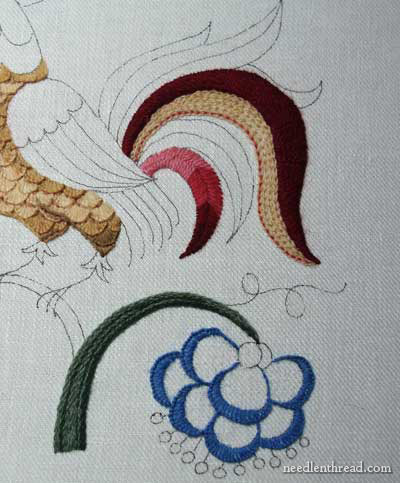
And here you can see the two rows of backstitching in the chain stitch on the middle feather, and the top feather worked in green, Simply Wool by Gentle Arts, in a basket stitch.
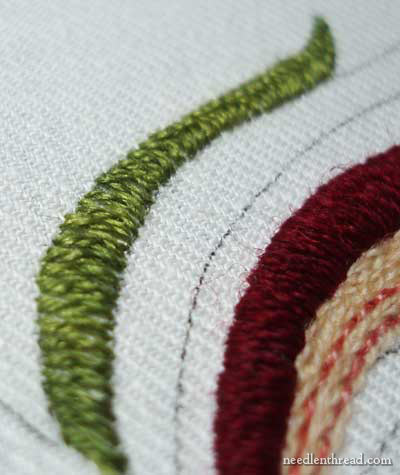
Basket stitch looks a lot like a closed double-herringbone stitch (that is, double herringbone, worked close together so there isn't much space between the stitches). The difference is that you don't work two rows - it's all done in one forward movement of stitching. But more on that later!
The tail so far is half-way tolerable. I will leave the middle feather as it is. The lower feather is bugging me, and it will most likely go. The top feather in the green is likable, so I think I'll keep it!
One distinct difficulty in working only with threads from your stash is that you often get stuck with colors you wouldn't normally use in a given project (I'm having that problem with pinks right now), or you end up working without colors you normally would use (I'd love to have several shades of coral for this fellow). Still, it's fun to make do and see what comes of it!
Do you think the wing should be colorful? What would your approach be to the wing? Any ideas?
For more posts on this project, visit the following links:
Free Hand Embroidery Pattern for The Crewel Rooster
Setting up The Crewel Rooster Project
Choosing Threads for The Crewel Rooster - and the first flower
Crewel Design Books
Stem Stitch Filling on Flower Stems
Scalloped Feathers on the Rooster's Body
|
