The first step in a crewel project, once you've selected your design, is to get the project ready for stitching. The set-up of any embroidery project may seem ho-hum, but it is in these initial steps of setting up that the finish (good or bad) is often determined. If you take the time to set up an embroidery project correctly, then despite other mishaps along the way, the finished product can still come out very well. If you skimp on the setting up, though, you may very well doom your project from the start.
Here, I'm showing you my set-up process for the Crewel Rooster. This process can pretty much be applied to any surface embroidery project, so even if you aren't working a crewel embroidery project, you can apply the process to your own projects.
I'm working the Crewel Rooster on Legacy Linen Twill. Crewel embroidery is traditionally done on a medium-weight plain weave linen or on linen twill. I like linen twill, and I find I really like Legacy's linen twill, now that I've been working with it. It's a nice crisp medium-weight twill, made specifically for hand embroidery. Unlike other twills that are woven for upholstery, this twill is finely woven and tight. The weave does not loosen and separate as you stitch, which is often what happens with inferior twills that are great for upholstery and regular sewing applications, but are not made to support hand embroidery stitches.
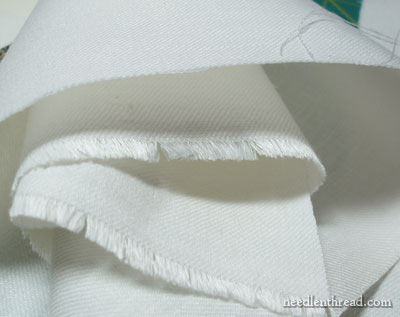
Legacy's linen twill is an egg-shell white (not quite white, not quite cream), and it has a beautiful "hand" - that is, the surface feels smooth and ... well, just really nice. I like it a lot. In the US, if you're looking for this particular linen, so far I've found it at Tristan Brooks Designs. I am not certain of other sources yet, but I do know that some of my favorite spots (like Needle in a Haystack and Hedgehog Handworks) that carry Legacy Linen are not carrying twill yet. If your local needlework shop carries any items from Access Commodities (Au Ver a Soie threads, Trebizond, Hardwicke Manor hoops, etc.), then chances are, they can special order Legacy's linen twill.
If you don't have linen twill and you're planning on joining me in exploring crewel stitches, let's talk a bit about alternatives. Second choice: a plain-weave medium-weight linen, which you can line with muslin. The muslin behind the plain-weave helps support the stitches between the weave of the linen. Third choice: cotton twill, or even a satin jean fabric (cotton sateen) - like the kind used for Mountmellick embroidery. Fourth choice: you could use a heavier cotton, such as the type used to make pillow cases or sheets, but probably you don't want to use this type of fabric with wool threads. If you're just following along for the sake of the stitching, you might just skip the whole "crewel" part, think in terms of regular surface embroidery, and use embroidery cotton (DMC or Anchor stranded cotton).
The very first thing to do with your fabric is to iron it to ensure that there aren't any wrinkles or creases in it. If you have bought a cut of linen or other fabric that has been folded and that has a crease in it from the fold, you might have to wet the linen first. In fact, I soaked mine in hot and then cold water twice, then left it to rest in hot water until the water was lukewarm. This shrinks the fabric. On some embroidery, it might not be desirable to pre-shrink your fabric (it is not recommended, for example, for Schwalm embroidery). But since I do not plan to wash this after I stitch it, I went ahead and pre-shrunk it. The good soaking ensured that all the creases were gone. Then, I ironed the linen while it was still damp, which gave me a perfect wrinkle-free surface.
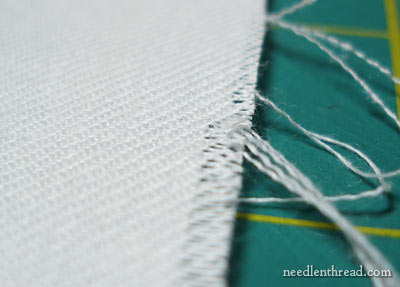
Next, "square up" your cut of fabric. When setting up an embroidery project, it's important that your fabric is "square." To achieve this with linen - whether twill or plain weave - pull out threads from the sides of your cut, until you have a straight edge.
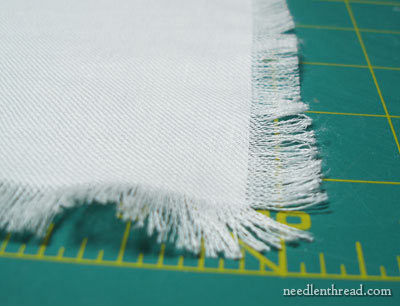
Do this on all four sides of your cut. See the remaining threads in the photo above? Just trim along the straight edge, removing this extra fringe, and you'll have a perfectly squared up piece of fabric.
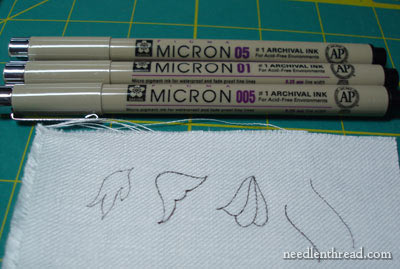
After cutting your fabric, you'll transfer the design. For this project, I traced my pattern on a light box, using Micron art pens. I chose the 01 size, as the 005 (which is tiny!) snagged a bit on the linen as I wrote with it. You might test the pen or pencil you are going to use on scrap of fabric, to see how well it draws on the fabric you have chosen.
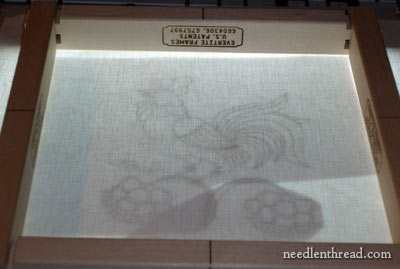
I placed my design on the light box and taped it down. Then I laid the linen over the design, and I taped it on the sides, too, to keep it from moving. I centered my 10" Evertite frame over the design just to make certain that the 10" frame would work without a problem - and it is perfect! So, now it's time to move the frame and trace the design.
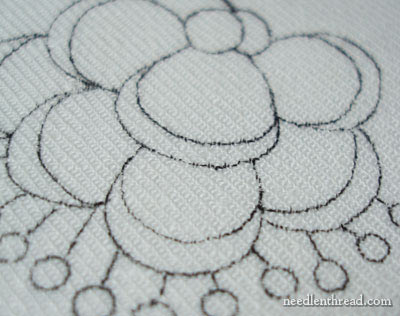
When you trace a design onto fabric this way, it's important to draw in long, smooth strokes, rather than short, sketchy strokes. Don't sketch! You want a continuous smooth line. When you have to stop in the middle of a curve or something to adjust your hand position, lift the pen off the fabric completely. If you leave it on the fabric, you risk either jarring it and getting a warble in your line, or you risk a pen blot from the ink soaking into the fabric while it rests on it.
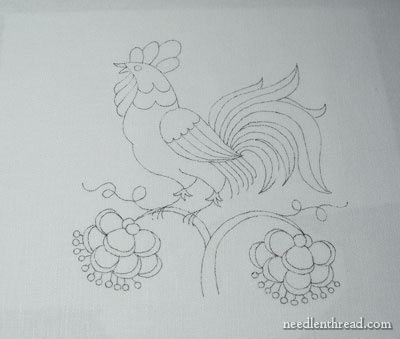
Here's the traced design, ready to go. The next step is to center up the design with the center marks on your frame, and to tack the fabric onto your stretcher bar frames. I have a whole tutorial on setting up stretcher bar frames, if you are unsure of how to go about doing this.
For crewel embroidery, it's important that your fabric is kept taut during stitching. There are several ways to achieve this, and I'll list them here in order of preference (with a few noted conditions!):
1. Slate Frame - slate frames are ideal for larger crewel work projects. If you have one, and are working on a large project, it is worth the time it takes to dress a slate frame. For a smaller project like this, though, I prefer Evertite Stretcher Bar Frames.
2. Evertite Stretcher Bar Frames - These are ideal for smaller projects. They are quicker to set up than a slate frame, yet they still give you the option of tightening your work further, after you've set up the project. You can achieve excellent, drum-tight tension with Evertite frames.
3. Regular stretcher bar frames - these don't have the screw mechanism set into the bars, like on the Evertite frames, but they are still quite suitable for small to medium sized projects. Just make sure when you tack on the fabric that you are pulling it enough to achieve a tight tension, without warping the fabric.
4. Hoop - for crewel work, you'll want a good, sturdy embroidery hoop that is somewhat thick. Because of the weight of the fabric, a thin plastic hoop doesn't really cut it as well. On the other hand, if this is all you have on hand, it's better than nothing! Just make sure that you remove your work from the hoop every time you finish a stitching session. Hoops make marks, so the shorter the time the fabric is in the hoop, the better. Additionally, if you're using a good wooden hoop (like Hardwicke Manor hoops), you can bind the inside ring of the hoop to protect your fabric and also to provide better tension.
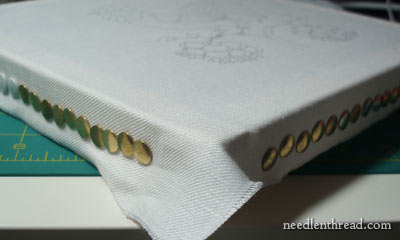
Here's my rooster, set up and ready to go. The next step will be sorting out the threads I'm going to use. I am using only threads that I have on hand - not buying anything new right now! - so I'll be sifting through my stash to see what wool threads I can come up with. I know I have a heap of Appleton wools, plus some leftovers from the crewel smalls I've been working on, plus the Fine D'Aubusson, made for Au Ver a Soie and distributed by Access Commodities. I'll show you all these in an upcoming post!
Now, I'm off to fix my rooster. Yes, fix him. Well - I'm going to adjust the design one more time, I think!
If you have any questions, comments, or suggestions, feel free to leave a comment below!
Have a terrific Monday!
|
