The rooster wing gave me some cause for concern. Should I embroider it in colors, like I did with the tail? Should it match the rest of the body? Should I do something completely different with it - introducing a new set of colors, for example? Oh, so many possibilities, and when I started out on them, I found out that most of them really stunk. Winging it on the wing was probably the worst idea I've had on this piece so far.
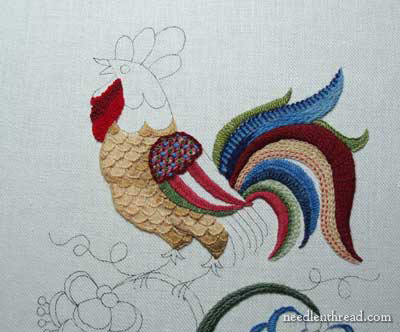
The last time I showed you this crewel project, you could see the red scalloped line I had embroidered in chain stitch, using Bella Lusso wool, across the scallops on the wing.
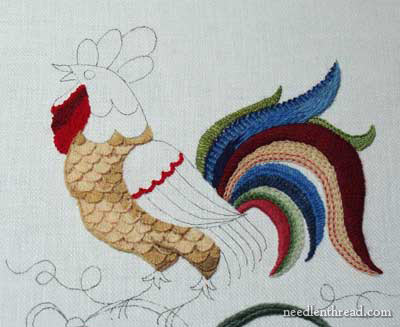
Well, it didn't take much to convince me that the red scalloped line wasn't going to work.
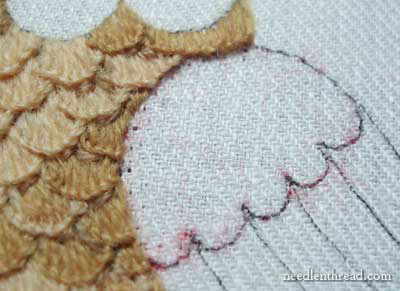
So I picked it out. The Bella Lusso merino wool goes in great! It's a beautiful thread to stitch with - very fine, very soft, very smooth. Coming out, it leaves shreds, but these wipe off easily.
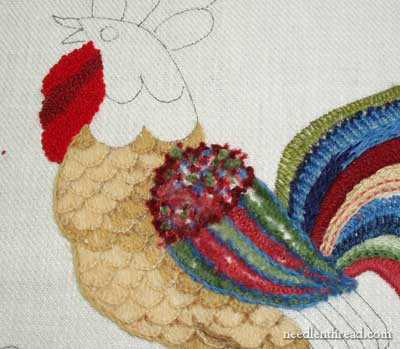
Once I picked out the red, I got it into my head that I would work the wing in colors matching the tail. The top section, I decided to fill with a lattice design, like so:
I wasn't really liking it much, but I plugged on. I filled the open parts of the lattice area:
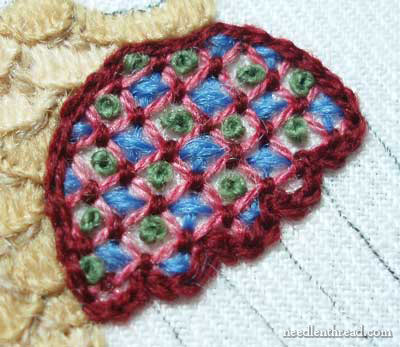
Green French knots alternate with blue cross stitches in the open areas between the lattice lines. The outline is worked again in chain stitch, using D'Aubusson in the brick red - the same stuff used on the large center tail feather.
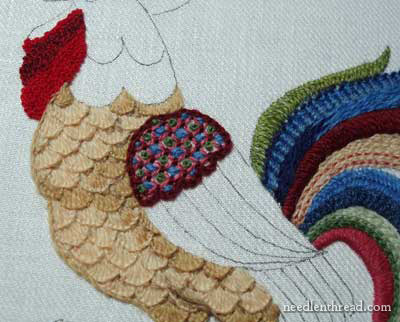
This colorful lattice design left the base of the wing questionable: more color? which colors? Argh. I continued with the same color scheme, and came up with this:
Using the same greens and pinks found in the tail, I embroidered these stripes down the wing, following the design, in buttonhole stitch.
(Don't worry, it gets worse!)

Between the colored striped, I worked a blue stem stitch. Well, what the heck? If we're going with a colored wing, it might as well be Really Colored.
I didn't like it. I didn't like it At All. For one thing, the wing looks as if it were stitched somewhere else, cut out, and stuck on a piece that it doesn't really fit on. It just looked too bizarre and busy for me.
On this project, I have discovered that picking out can sometimes be highly pleasurable. For one thing, there's the building anticipation of trying something different in the same space. For another, there's the sheer relief in removing something I really don't like!
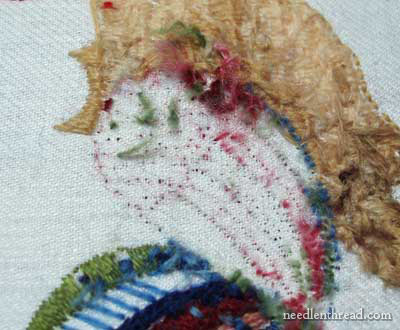
Quite a bit of picking later... from the back.
Another fine testament to the Legacy Linen Twill!! It holds up incredibly well. We're back at the drawing board.
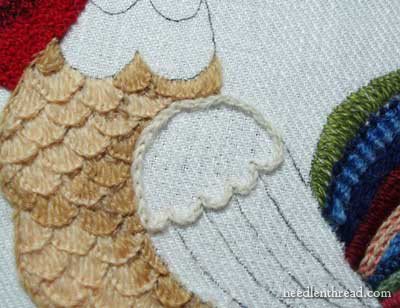
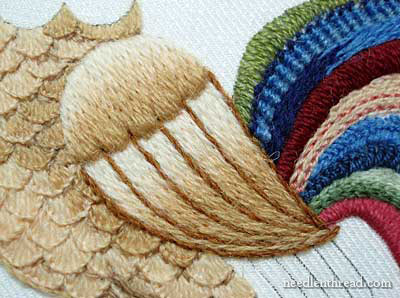
I decided color on the wing just wasn't going to hack it. So, taking the two primary shades of the rooster's body, and adding a creamy white, I explored a new idea. Above, you can see the split stitch line that's going to form the base of some long and short stitch shading.
The wing needed to stand out a bit from the side of the bird, so to that end, I padded the long and short stitching space completely with the same creamy white. Here, I'm working with Appleton wool.
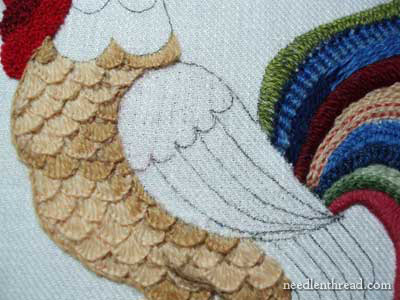
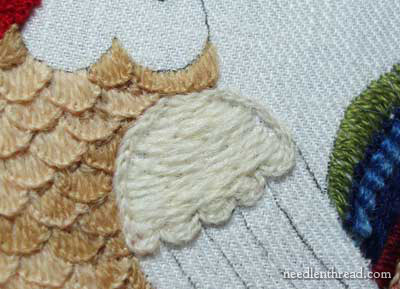
Then I began the first of three layers of long and short stitch, with the lightest shade on the top.
And there's the top of the wing. My mother says it looks like a pillow stuck on the side of the rooster. Thanks, Mom.
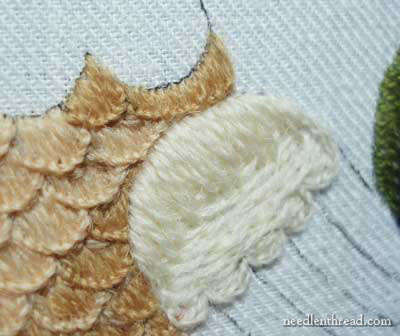
Then I worked long and short stitch shading down the stripes of the wings, in the same colors, from light to dark down the wing. I separated the lines on the wing with a darker gold altogether.
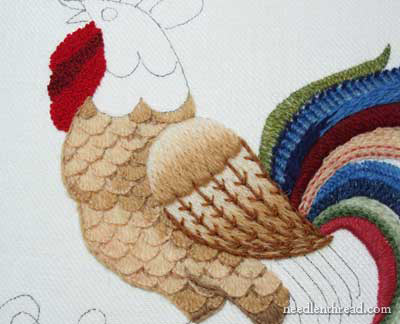
Finally, I went back and added some fly stitches on the stripes. Now, don't be alarmed. Please don't be alarmed. It's not over yet.
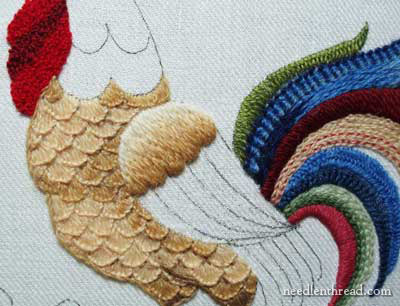
I also finished the long feathers underneath the wing, in the colors you see above. These may yet change.
The wing, however, is going to stay more or less like it is. I have an idea for the top part, which I may or may not implement.
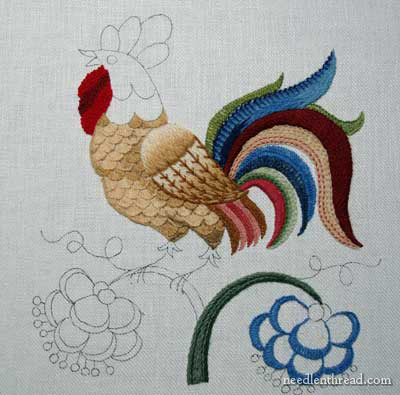
But overall, the wing isn't changing. It's not!! But guess what? The body.... the body is changing! Oh, boy.
We shall see where it takes us.
Any comments? Questions? Suggestions? Let me know by leaving a comment below. And please don't tell me to give it up! I'm not ready to throw the towel in on this guy just yet. He'll be right ----- eventually....
Maybe.....
For further posts on this project, feel free to visit the following links:
Free Hand Embroidery Pattern for The Crewel Rooster
Setting up The Crewel Rooster Project
Choosing Threads for The Crewel Rooster - and the first flower
Crewel Design Books
Stem Stitch Filling on Flower Stems
Scalloped Feathers on the Rooster's Body
The Beginnings of the Rooster's Tail
French Knots on the Wattle
Adding the First Blue Feather using a Raised Backstitch
The Rooster Tail, Finished for Now
|
