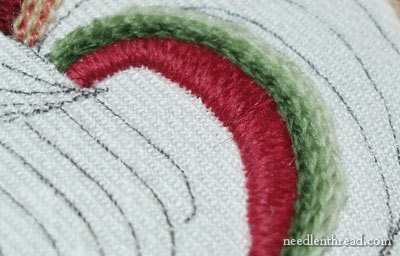
When picking my way through an embroidery design, there comes a point when I like to move on from one area and all it "finished" for now. Returning to it later, I may have a fresher perspective, and I may change some things (or not, depending on how the rest of the design comes together). A bit down the road, I'll pick out the dark red satin stitching on the large middle feather of my crewel rooster project, and re-embroider it. But for now, I'm calling the tail finished, so I can move on to other parts of the design.
I've been mentioning for a while while working on this crewel project that the lower tail feather would be removed. I didn't like the abrupt shade changing on that feather, which you can see in yesterday's post on adding the first blue feather. But I did like the use of the pink, believe it or not. I like the shade of the middle tone of pink.

The first task - to get rid of the previous stitching. When I cut out an area of stitching like this, using either a very sharp seam ripper or my smallest embroidery scissors, I put the cutting blade (whichever one it is) parallel to the fabric, and run it right underneath the stitches, slicing them open and being careful not to jab the fabric. I do this on the front and on the back, and then I pick the stitches out with tweezers.
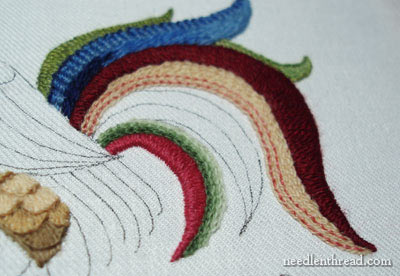
Once the stitches were out, this is what I put in. Now, don't cringe.
I satin stitched the lower half in the mid-tone pink (which is Heathway wool) and then chain stitched in three shades of Heathway green on top of that, from dark to light. Heathway and satin stitching.... More on that later, but just briefly, it's a thread that works so nicely for satin stitching. It's really smooth!
So here's the tail so far. Now it's a matter of that one remaining feather, which I worked in blues.
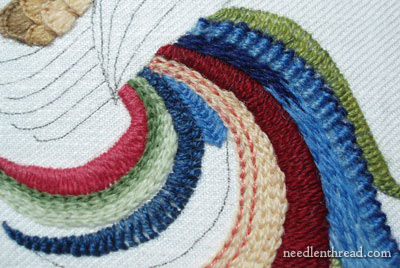
The lower part is worked in basket stitch, the upper part in fly stitch.
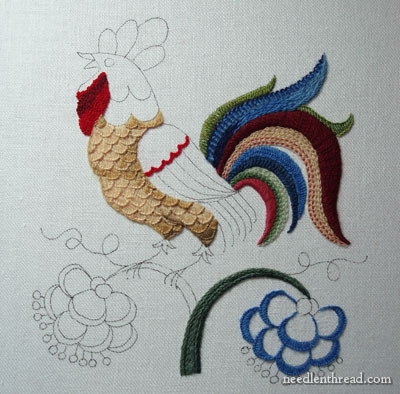
(Ignore the red scallops on the wing! They came out already!)
For now, I'm calling the tail done. I will likely go back to it and address two things: the middle dark red satin stitching, which I'm pretty sure is going to go completely, and there is a chance that the pink is going to come out again. I don't mind it a lot - it's not as bad as it was - but I'm not 100% satisfied with it. I've got a couple different ideas bubbling about in my brain.
But for now, I need to move away from the tail! Any comments, questions, suggestions are always welcome!
For further posts on this project, feel free to visit the following links:
Free Hand Embroidery Pattern for The Crewel Rooster
Setting up The Crewel Rooster Project
Choosing Threads for The Crewel Rooster - and the first flower
Crewel Design Books
Stem Stitch Filling on Flower Stems
Scalloped Feathers on the Rooster's Body
The Beginnings of the Rooster's Tail
French Knots on the Wattle
Adding the First Blue Feather using a Raised Backstitch
|
