Picking out a palette for the flowers on my crewel rooster project wasn't so easy. I wanted colors that coordinated with the rooster at least a little bit, and that had enough shade options to keep the flowers from being too flat. This is where I dropped my original intention to just use threads from my present stash (at the time I started the rooster). Last week, when I received that order from Hedgehog that had all that luscious floche in it, I also received a small range of colors of Renaissance Dyeing Wool, so I dug into those for the flowers.
I like the Renaissance Dyeing wools, and they embroider really well. So I have duly justified the alteration in my original stash-only intention! At first, though, I thought perhaps these colors would not work for the flowers, especially once I started stitching. But I have resolved that they WILL work. My plan is to use the same colors on both flowers, but I'll stitch them in different locations on the flowers, so that the flowers aren't identical.
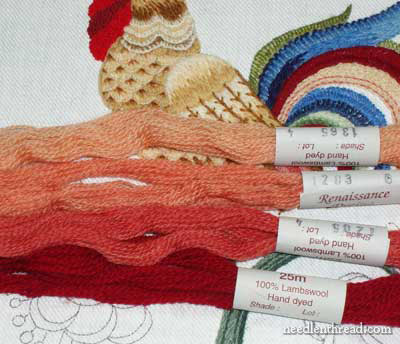
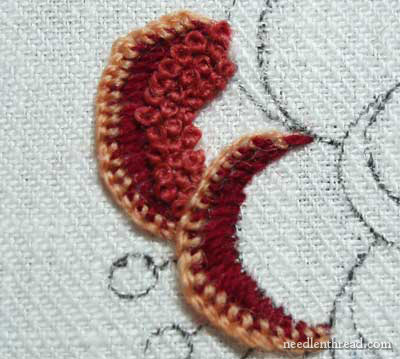
These are the shades - a deeper red (the same used in the tail of the rooster) to a lighter salmon. I think they'll work well together?
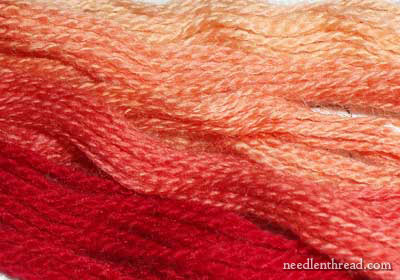
They're beautiful - like a gorgeous Kansas sunset. (Really - we have stellar sunsets in Kansas!)
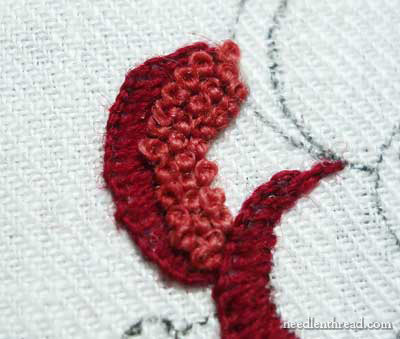
I'm going back to the buttonhole scallops around the outside of the petals, and then filling the inside with French knots.
Around the outside of the darker petals, I'm working a row of detached buttonhole stitches in the loops of the previous stitches.
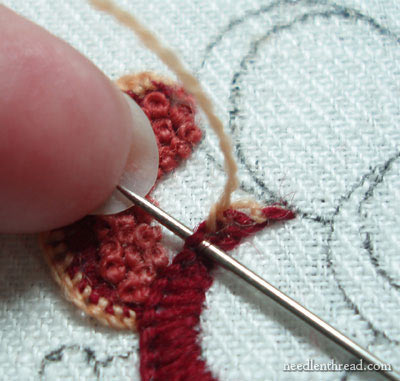
I didn't think out the order of stitching before I began. It's true that I want the detached buttonhole edges to rest over the petals beneath - which means they have to fit over those French knots - but I think it makes more sense to stitch the detached edges first. Since I didn't do that, I had to work the buttonhole over the French knots in the first petal I worked. To transport the needle without catching the knots, I find the fingernail on my little finger to be the perfect transport tool. If you do this carefully, it works great! Just slide your needle onto the tip of your fingernail, which is covering the stitches underneath, then transport the tip of the needle on your fingernail beyond the stitches, so that the needle doesn't catch. Now, if you don't do this carefully, you're in for a shocker. Needles sliding under the nail and into the skin are not pleasant. So if you stitch this way, be careful. (I do this all the time....)
I think I'm going to like the flowers!
Oh, trust me. I AM going to like the flowers, because there's no more picking out from this point on. It's time to finish this guy! And I can't wait to see the flower complete, so hopefully, today I'll make some headway on that.
For further posts on this project, feel free to visit the following links:
Free Hand Embroidery Pattern for The Crewel Rooster
Setting up The Crewel Rooster Project
Choosing Threads for The Crewel Rooster - and the first flower
Crewel Design Books
Stem Stitch Filling on Flower Stems
Scalloped Feathers on the Rooster's Body
The Beginnings of the Rooster's Tail
French Knots on the Wattle
Adding the First Blue Feather using a Raised Backstitch
The Rooster Tail, Finished for Now
The Wing - Three Attempts
Adjusting the Tail Feathers One More Time
The Rooster's Head, Neck, and Comb
The First Flower Attempt Comes Out
|
