|

|
2010-01-21 06:30:01.258-05 |
|
|
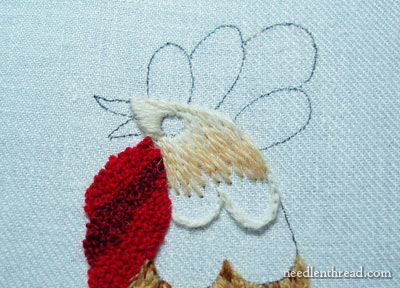
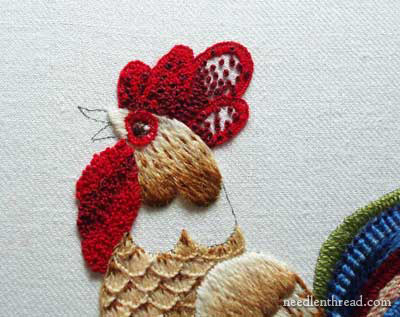
Crewel embroidery is definitely different from regular surface embroidery, as far as the threads are concerned. Wool thread is not at all like working with silk or cotton! There are, however, some wool threads that are easier to use than others, and I had occasion to use two "easier" wools on the head of the rooster - specifically, on his crown. But before we get to the crown (which I'm sure must have a more technically correct name....), I'll show you my finish on the actual head. Keep in mind, again, that this is a stylized rooster. In truth, the head of this bird doesn't look a bit like any rooster I've ever seen!
I set about to embroider the head of the rooster using Appleton wool, as it's the only wool I have a creamy white color available in. I planned for the head to be stitched in long and short stitch, from very light (creamy white - like on the top of the wing), through the three shades of gold already used on the body, ending with the darkest. So, in that rather smallish head space, my plan was to use four shades, and it worked out pretty well. The head and the crown, in fact, are the only parts of this whole venture that didn't get stitched twice so far!

I began by stitching around the whole head in split stitch, in the creamy white. I split stitched the head, and then across the top scallop line of the larger scallops on the neck, so that the whole head was surrounded with the creamy white split stitching. (Unfortunately, I forgot to take a picture of just the split stitching!)
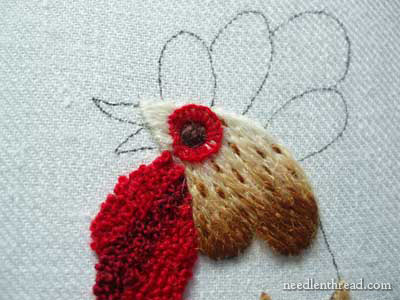
Then, beginning up by the beak (which doesn't look a thing like a rooster beak!), I started long and short stitch, working down the head. I left the eye blank.
Who would have ever known that the rooster and the shark were remotely related? I think my rooster proves there's a familial resemblance between the two creatures. The whole time I stitched this, a little voice inside my head was screaming, "Shark! Shark!" I swear I even heard the music from Jaws....
Regardless, I fearlessly continued to stitch, filling in the head with the gold colors found in the body. These are all Appleton crewel wools.
I finished off the head in the darkest gold-brown (the same color accenting the wing), and then I bespeckled the head with small straight stitches.
The base of the head looks a little dark, but I planned to lighten it up later with some stuff around the neck.
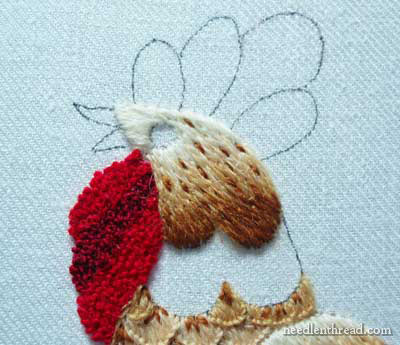
The blank eye was still looking rather sharky, so it was time to do something about that.
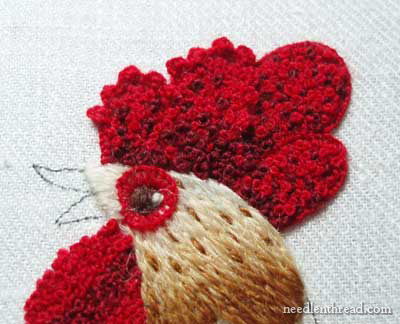
A wee bit o' red around the eye area - a buttonhole wheel, to be precise, stitched with Bella Lusso merino wool - began to remedy the eye situation.
I thought about filling in the eye with black, but I was afraid that the black would Really Stand Out, since nothing else on the whole piece would be worked in black. Besides, I didn't have any black wool. So I filled in the eye with dark brown Appleton crewel wool, in satin stitch.
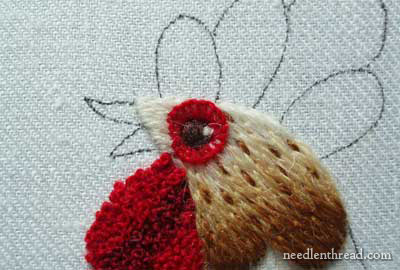
Then I jumped back in with two little stitches in creamy white, to add a glint and pick the eye up a bit. I didn't want it to look like a sunken hole in the middle of a red ring.
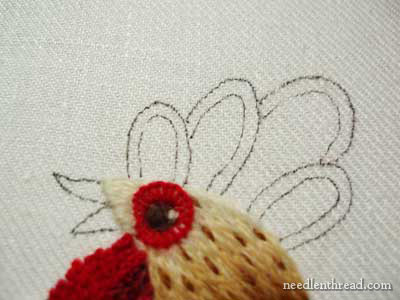
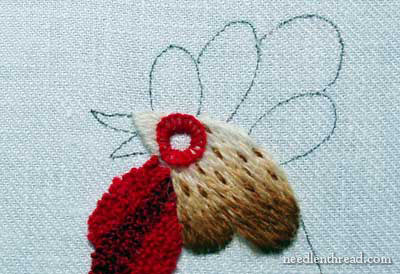
Sorry for the poor color and out-of-focus shot here, but I wanted you to see the lines I drew inside the scallops on the crown. They're drawn in about 1/8" from the outside lines on each scallop.
Using Bella Lusso merino wool, I embroidered an outline around each scallop on the crown in buttonhole stitch, so that the twisted edge of the buttonhole stitch was on the outside line of each scallop. I wasn't worried too much about perfection in this buttonhole stitching, because my plan was to cover most of it up, anyway.
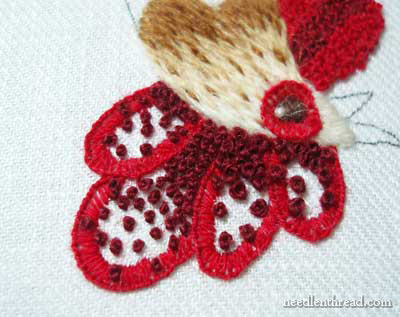
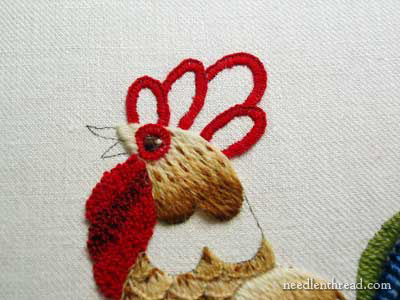
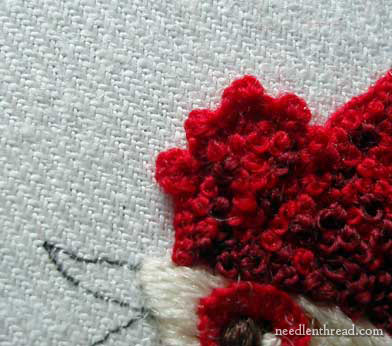
I often turn my work upside down in my stand clamp, to better reach the top edge of the embroidery design. Using D'Aubusson wool in brick red, I randomly stitched in some French knots all over the crown, even on top of the buttonhole stitches around the edges. At the base of the crown, the dark red stitches are denser - I was hoping for a kind of mottled shading.
Then I started filling in around the dark knots with the brighter red Bella Lusso.
I'm afraid I couldn't wait to fill in the whole crown before trying out what I had in mind for the edges. Since the first two scallops were filled, I went ahead and experimented on the first scallop. Into the edge of the buttonhole stitching around the scallop, I stitched another row of detached buttonhole stitch. That is, I worked this next row of buttonhole stitches through the previous row, but without passing into the fabric. Then, working around this row of detached buttonhole stitch, I started working some buttonhole scallops to give the crown some bumps on the edges.
I liked it, so I continued with the plan!
I did the same thing around the second scallop, then finished filling the third and fourth scallops with the bright red French knots.
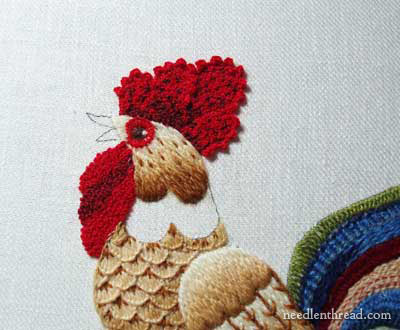
Then I finished adding buttonhole scallops on the rest of the crown. Overall, I will admit, I was pleased with the effect.
Now, to address the neck, and finish up this whole rooster body!
I got a little eager on the neck scallops, and forgot to take intermediate pictures. But this is what I did:
I divided that large scallop area on the neck into three equal layers. Starting in the bottom layer, I embroidered a buttonhole stitch line across the lower division of the neck scallops in the darkest gold (the dark color on the wing). Then, in the middle section, I used the next lightest gold and stitched a buttonhole line. Then, in the next section up (the last division in the neck scallops) I worked the lighter gold. Then, working directly on the dark edge of the long-and-short stitching at the base of the head, I worked buttonhole stitch in the creamy white.
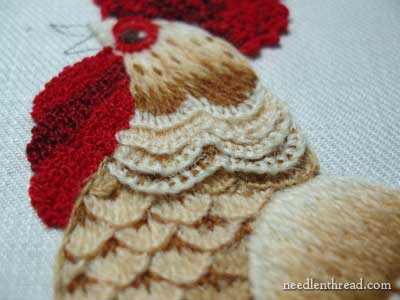
Then, taking the creamy white, I worked a detached buttonhole across each layer of color, working in the twist on the edge of the buttonhole stitches, but not through the fabric. This "lifted" the white edges.
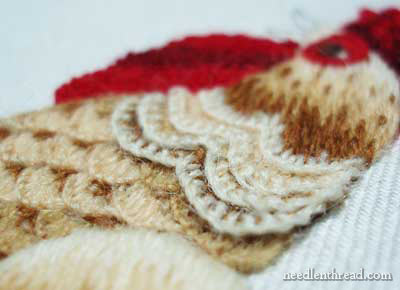
You can see that the white edges don't go back down into the fabric, but they sort of "layer" over each other.
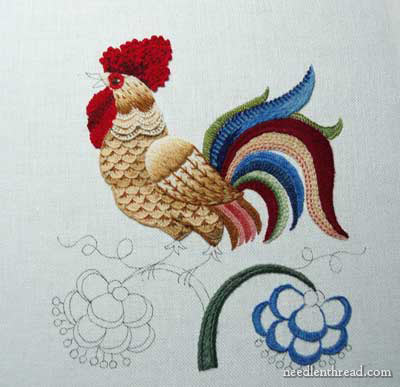
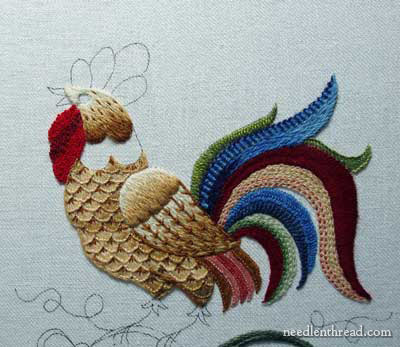
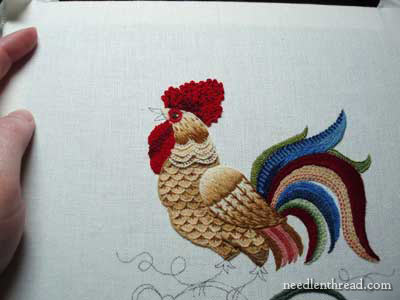
There he is so far. I haven't done his beak yet, or his legs, and I'm still contemplating the under feathers below the wing.
I'm not exactly sure what stitch to use on the legs. Any suggestion? I was thinking French knots down the line of his leg, to give kind of a bumpy look. But what color? What color are roosters' legs? What color legs should this guy sport? Suggestions?
Thanks, everyone, for your comments and suggestions so far on this project! Your suggestions have been really helpful!
For further posts on this project, feel free to visit the following links:
Free Hand Embroidery Pattern for The Crewel Rooster
Setting up The Crewel Rooster Project
Choosing Threads for The Crewel Rooster - and the first flower
Crewel Design Books
Stem Stitch Filling on Flower Stems
Scalloped Feathers on the Rooster's Body
The Beginnings of the Rooster's Tail
French Knots on the Wattle
Adding the First Blue Feather using a Raised Backstitch
The Rooster Tail, Finished for Now
The Wing - Three Attempts
Adjusting the Tail Feathers One More Time
|
|
|
|
|