I've finished the color on the arms of my goldwork embroidery project. "Arms" is probably the wrong word, but "leaves" don't really work, either. What the heck are those things?!
This project has been really fun to work on so far, and I hope to make Great Progress on it this weekend. I was going to make a switch back to the blackwork fish for the weekend (I'm eager to make noticeable progress on him!), but I'm afraid he'll have to wait until next week....
In the meantime - it's goldwork for me, and here's my progress on the Colored Tendril Thingies that stick out of the sides of the Stylized Pomegranate-Artichoke-Flower Thing. (I think I need to come up with specific words for these design elements.)
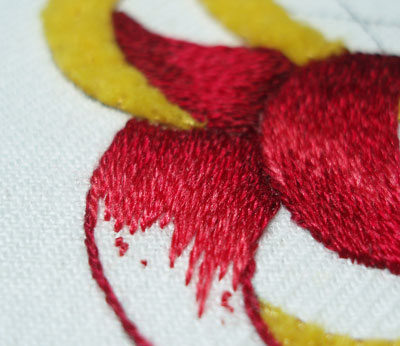
Before I go further, though, I want to show you two photos. The first is the last photo on yesterday's article discussing the beginning of the stitching:
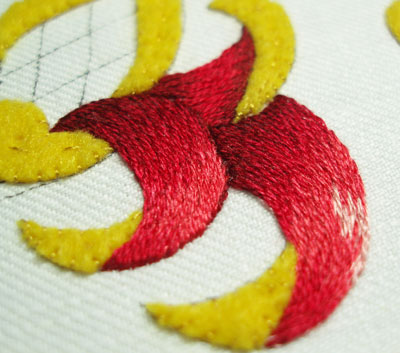
And this photos is the same area of stitching, taken from a different angle:
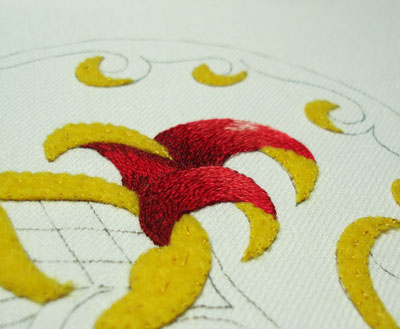
I always find it interesting how needlework changes, when viewed from another angle. When viewed from the second angle, I think the shading becomes much more obvious, and that movement out from the center - the curving of the arms - becomes even more noticeable. At the same time, it makes the lack of depth in the shading on the top (small) leaf more obvious. This view is one of the reasons I thought I should pick that area out. I'm still debating that point!
Ok, on with it!
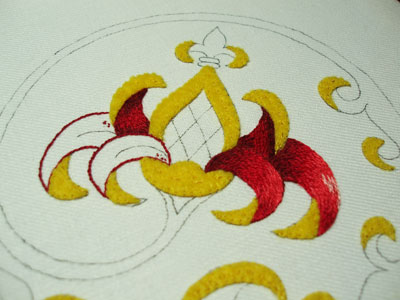
Moving over to the left side of the design, I managed to add one more shade in that top curl. I think it looks better than the first one on the right. I also changed my stitch direction on that, beginning at the base of the curl (next to the body of the fruit) and working towards the turn-over, which is the same stitch direction I've used on the other curls, but not on the first small one. On that first one on the right, I started at the turn over and stitched down to the source - and this is probably part of the reason it doesn't quite look right. Maybe not. Anyway - I'll get back to that!
I also outlined the curls with one of the darker reds, using split stitch.
Again, if you're not familiar with long and short stitch shading, but you want to give this design a try using the same techniques, then do visit my Long and Short Stitch Shading lessons, and take a look specifically at Lesson 5, which addresses embroidering this type of shape.
I'm following pretty much the same shading pattern as I did in the right half of the design, with the exception of adding the little light pink tint on the longer curl.
Notice that my long and short stitches are not uniformly long and short! This is a point that I go over in the long and short stitch shading lessons, but I thought I'd re-emphasize here. If you go with a uniform long-short pattern, keeping the stitches the same length, worked in uniform rows, the shading doesn't end up looking as natural, smooth, and "painted."
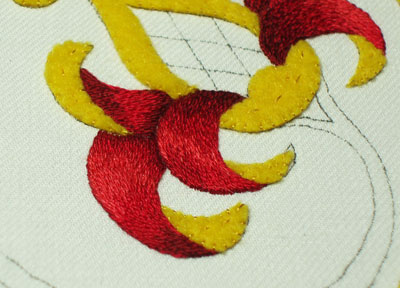
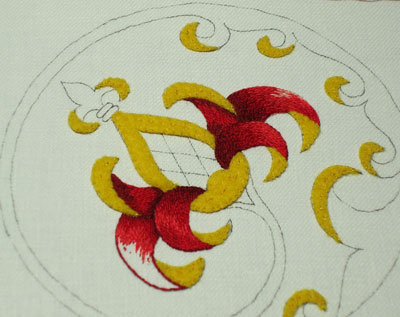
And there it is - the left side finished. It's a bit darker than the right side of the design, and this was done on purpose, by using less of the lighter shade of red at the curves. The point here is that, when the flower is tipped in the correct direction of the design, this side (the left side) is pointing downwards, while the right side is closer to the imagined light source. That was my idea, anyway. Whether or not it will actually matter that much in the finished design is another question.
The next part I'll tackle is the center of the fruit, where the lattice area is. This is actually going to be stitched with color. I may add some tiny gold lines after the color is in. We shall see!
Once that part is done, then it's on to the gold threads!
Have a perfect weekend - and get some stitching in!
For previous posts on this project, please visit the following links:
Stylized Pomegranate Pattern used for this project
Setting up the Project on a Frame
Preparing the Ground Fabric with Felt Padding
Selecting Colors of Silk for the Project
The Stitching Begins - SIlk Shading
|
