A few weeks ago, I posted a free hand embroidery pattern that I'm currently using as a goldwork embroidery project. For those of you who are new to goldwork, it is a form of surface embroidery that employs real metal threads. When it's mixed with silk shading, I think it's possibly the richest of all surface embroidery techniques. I mean, really - silk and gold! What more could you want?
So here begins a series on goldwork, wherein I'll take you step-by-step through this project with me. I'll try my best to give some clear instructions so that those interested in goldwork can give it a try!
Last week, I showed you the set-up of the goldwork project on the frame. I use Evertite stretcher bar frames, but if you have a slate frame, it is always considered the best choice of frame for goldwork. With goldwork, don't use a hoop! (My opinion, anyway!) You want your fabric to be drum tight, and you want it to stay that way, or at least to have the option of tightening it (hence, the Evertite frame or slate frame) without warping your fabric while you adjust it in the hoop. Another point: you won't be able to iron out hoop rings! Just trust me on this - goldwork is much better done on a frame than in a hoop!
With the project set up on the frame, the preparation for stitching can begin. All the areas where the gold will be applied to the design are going to be padded with yellow felt. This accomplishes a few things: it lifts the gold a little bit above the rest of the stitching and gives it a more finished look, I think, and it also provides a color base behind the gold, so that the white fabric, should it show through, will not be as visible.
For the felt, I'm using a regular craft felt which can be purchased in small pieces at your local fabric or craft store. I prefer a slightly thicker wool felt for this step, usually, but I didn't have any on hand. So this will do!
Besides the felt, I used a light fusible interfacing (similar to Wonder Under) for this step.
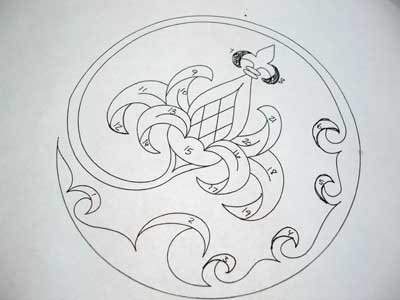
I took my pattern, and numbered each piece that would be cut out of the felt. This way, I wouldn't confuse which little piece of felt goes where on my project.
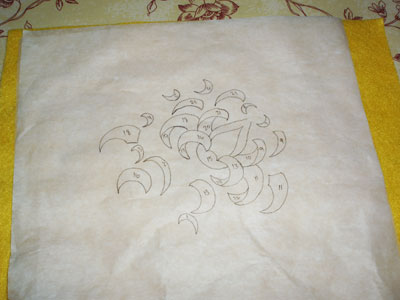
Then, I inverted the design (very important!) and traced out all the pieces where the gold would go onto the paper of the fusible interfacing.
I numbered each piece as I went, to make sure nothing got confused. And I traced out some extras of certain parts of the design, because I wasn't sure yet if I wanted to pad some areas more than others. (As it turns out, I didn't use these extra pieces.)
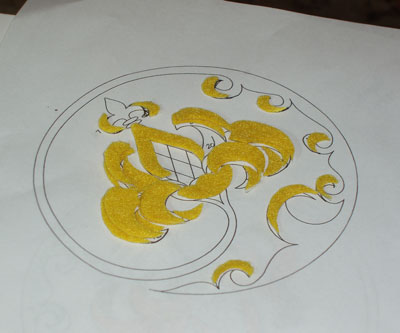
After ironing the fusible interfacing to the felt, I cut out each individual piece and left the paper on the back. Remember, the paper has the numbers on it. Then, I took my pattern and laid out all the pieces on it. Now, I'm ready to stitch the felt to the ground fabric.
First, peel the paper from the back of the felt. The fuzzy side of the felt goes up - not the side where the interfacing is. The interfacing merely makes it easier to cut the felt in accurate pieces.
Then, place the piece on the fabric and thread up a needle (I'm using a #9 crewel needle) with whatever thread you like to use for couching your gold onto your fabric. I'm using either Tire silk (50 wt) or Kreinik gold couching thread.
Knot the end of your thread and take your needle down into the felt, stitching some anchoring stitches into the felt, and then cutting the knot off the top there. (You may want to look at this photo tutorial for using anchor stitches to start a thread, if you're unfamiliar with the technique.)
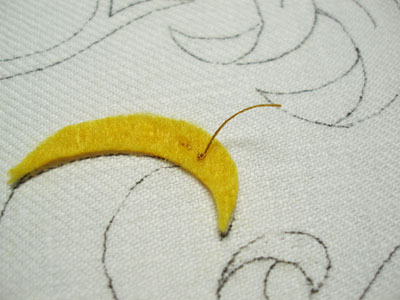
I'll generally stitch some straight stitches down the middle of the piece of felt, to hold it in place while I stitch up the edges. It makes it easier to stitch the edges without the felt shifting.
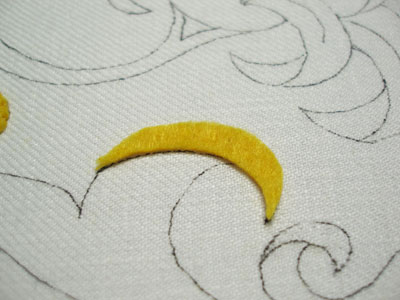
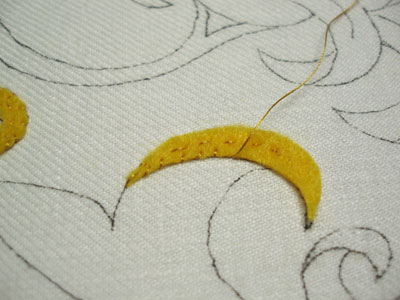
The felt is sewn onto the ground fabric with small stitches all around the outside perimeter of the shape. To do this, it's easiest to bring your needle up into the fabric and take it down into the felt.
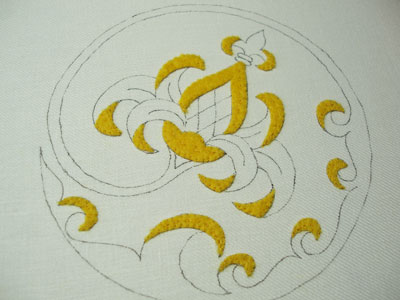
The process is repeated with each piece of felt, until all the areas where gold will be used as a filling are padded and ready to go!
So, that's the second step in the set-up process, and now I'm ready to stitch. I'll actually be stitching all the silk work first, and the goldwork last. This way, my silk threads won't get caught on my goldwork threads.
Next up - color selection, then silk shading!
For previous posts on this project, please visit the following links:
Stylized Pomegranate Pattern used for this project
Setting up the Project on a Frame
|
