After finishing the chip work on the "petals" on the goldwork embroidery project I'm currently working on, I set about outlining the larger areas of chip work on the top petals. The method I used is really very simple, and it makes a really nice edge!
Outlining various parts of a goldwork project with a different metal thread helps not only to make the edges look neat and finished, but also helps to set off an area filled with gold. Pretty much every filled element in my goldwork projects ends up with some kind of different thread as an outline, and in this case - outlining the larger chip work areas - I'm using pearl purl.
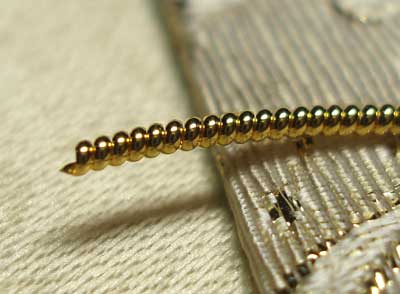
Above is an image from a previous article on pearl purl. This is what pearl purl looks like - it's a solid metal thread (not wrapped around a string core), coiled to form a "thread" (more like a wire) of pearl-like bumps. Pearl purl is spring-shaped - if you stretch it, you can see that it has that same spiral make-up of a spring. It does not spring back if it's stretched. You can check out the earlier article on this metal thread to see how I cut it, and how it is stitched onto the fabric when un-stretched. It is a couched thread. Using waxed couching thread, you couch the pearl purl onto the surface of the fabric, pulling the couching down in between the "pearls" of the metal so that it doesn't show.
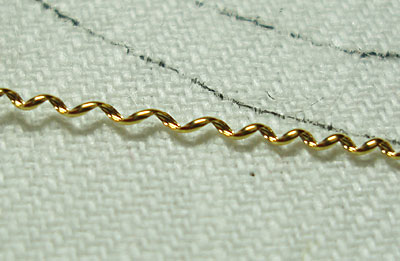
For this project, I'm working with Gilt Pearl Purl, size Fine 1, which I purchased at Hedgehog Handworks. I calculated the length around the turn-over on the petal, and cut a little more than half that length of pearl purl. Then, taking the very ends of the piece of pearl purl in my fingernails, I pulled gently on it to stretch it out to twice its length. I've covered the topic of stretching pearl purl previously, but here I'm going to show you how I couched it for this project.
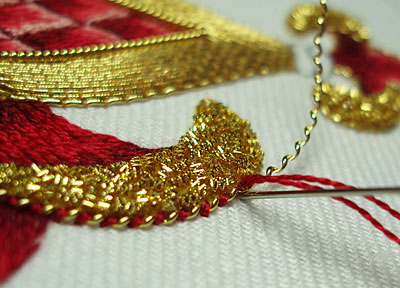
Using two strands of Soie d'Alger (in one of the middle shades of red) in a #9 crewel needle, I took a couching stitch at every "valley" in the stretched pearl purl.
A couple technical notes:
1. Begin couching just at the point where you want your pearl purl to begin. I forgot to take a picture! I began at the sharp lower tip of the area filled with check purl.
2. (And this point is debatable) Don't wax your couching thread. Some might think this is imprudent, since the metal thread can be kind of rough on the silk, and the wax provides extra protection. But the wax also darkens the thread and makes it look gummy, so whenever I'm couching pearl purl like this, using a decorative thread over the stretched purl, I don't wax my thread. I like the clean bright look of the decorative thread. If you're more comfortable waxing the thread, go for it....
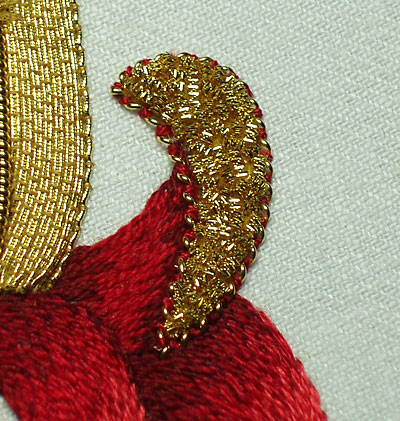
Here's one turn-over completed. I started at the lower tip, worked around the right side toward the top, pinched the pearl purl with tweezers to get it to turn sharply around the top, and then headed back down to the lower tip, where I ended with a final couching stitch.
Pearl purl is NOT plunged to the back. It begins and ends with a couching stitch.
If your pearl purl is too long, just snip it carefully before you take your last couching stitch, leaving enough of the metal thread to hold a final stitch.
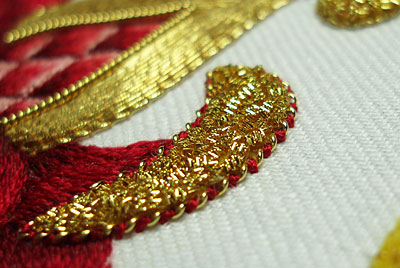
I think this edging is really one of the prettiest techniques in goldwork - I like the alternating twist with the colored silk and the gold.
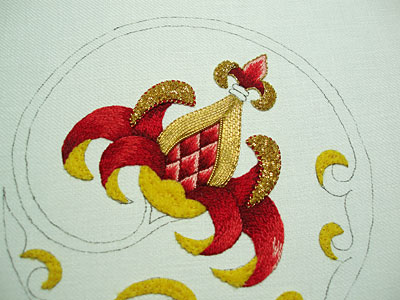
And here's the design so far. Little by little, we're getting there!
Next up, we'll address the larger felt area below the body of the fruit!
For previous posts on this goldwork embroidery project, please visit the following links:
Stylized Pomegranate Pattern used for this project
Setting up the Project on a Frame
Preparing the Ground Fabric with Felt Padding
Selecting Colors of Silk for the Project
The Stitching Begins - SIlk Shading
Continuing the silk shading - the left side
Finishing the silk shading
The Goldwork Begins: Smooth Passing Thread
Check Thread for Outlining
Chip Work Filling with Check Purl
|
