My goldwork embroidery project - a stylized pomegranate - is chugging along rather slowly! After finishing the passing threads on the turn-under tips of the "petals," there were only two more things that needed to be done in order to call the fruit finished: outlining a bit more with check thread, and taking care of the neck clasp at the top of the fruit.
Since I've already covered working with check thread - a wavy, real metal thread used in goldwork - you may want to read the previous article on it. I'm not going to go into deep detail here with the check thread! As a matter of fact, this last part was really easy, as it was just a matter of outlining.
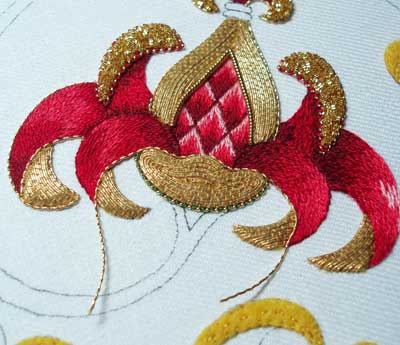
In the photo above, you can see that I've already outlined one petal on the far left. Now it's time to add the top edge to the center "bowl" of the fruit, and that edge is done with check thread, which carries over to the lower edge of the petals on both sides of the bowl.
To work the outline in the check thread, I picked out the longest continual lines, worked those, and then went back and worked the shorter broken lines.
All the "petals" of the fruit are outlined with the check thread.
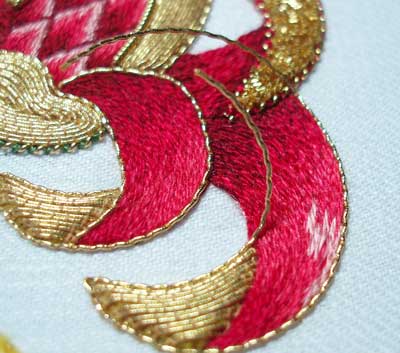
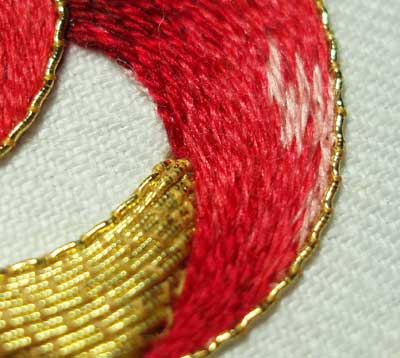
If you concentrate on this petal - the largest one on the right of the fruit - you can see that I picked the longest outline edge, starting from the origin of the petal (where it meets that other petal in the background of the photo), bringing it forward along the top edge of the petal, working around the tip of the turn-under (pinching with tweezers to take the corner), and then ending at the end of the turn-under. The next piece of check thread will cover the rest of the outline - the lower edge of the petal, into the petal above the turn-over.
I left at least an inch of thread at each end of the check thread, to take care of plunging.
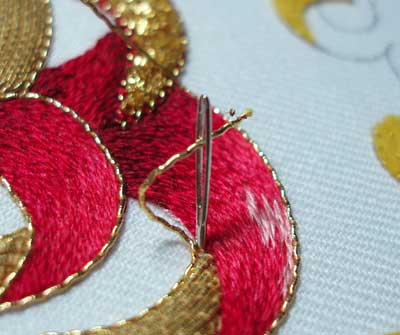
I plunged the check thread right in the corner, where petal and turn-over meet. Again (as mentioned in earlier posts on this project), I am using a chenille needle to plunge the threads, since the check thread is relatively fine and fits easily into the eye of the needle.
You can see the tip of the eye of the needle here, taking one last gasp before plunging to the back. When using a needle to plunge your threads, you might have to wiggle it gently back and forth to get the needle and the metal thread to pop to the back.
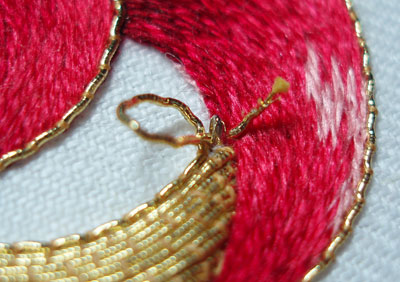
All gone! The next piece of check thread will be worked right along the edge of the petal there, and then right along the passing thread on the turn-under.
And all the remaining edges of the petals were duly outlined with check thread...
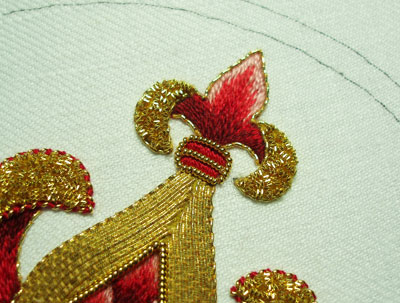
Then I went up and took care of the little neck clasp. I satin stitched the two 'bars' that were drawn there in the medium shade of red silk, and then ran a little snippet of pearl purl through the center area of the clasp, and then outlined the clasp with pearl purl, manipulating it around the corners without bending it square. You can actually bend pearl purl into a very nice 90-degree angle, but I didn't want sharp edges here.
I subsequently started poking around the pearl purl, trying to get it where I wanted it after stitching it on there, and managed a disturbing kink in the metal on the lower edge of the clasp. I'll fix that up at the end - nothing a bit of manipulating can't take care of, or, at the worst, I might have to replace that bit of pearl purl.
So here it is, the fruit complete:
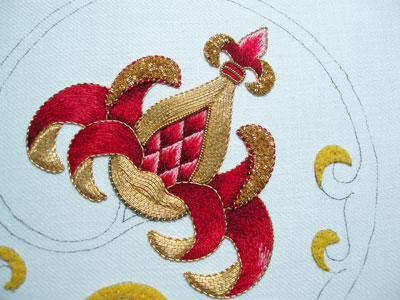
Now, on to the stem. One thing I've already discovered about the stem: it's a larger area than I thought, when it comes to filling in with the green silk!
For previous posts on this goldwork embroidery project, please visit the following links:
Stylized Pomegranate Pattern used for this project
Setting up the Project on a Frame
Preparing the Ground Fabric with Felt Padding
Selecting Colors of Silk for the Project
The Stitching Begins - SIlk Shading
Continuing the silk shading - the left side
Finishing the silk shading
The Goldwork Begins: Smooth Passing Thread
Check Thread for Outlining
Chip Work Filling with Check Purl
Outlining with Stretched Pearl Purl
Filling the Bowl with Passing Thread
Finishing the Tips with Passing Thread
|
