Here's a little more progress on the goldwork embroidery project I've been working on lately! Today, we're going to finish the tips of the "petals" or bracts - the turned-under parts, which will be covered in smooth passing thread.
Before delving into this part of the goldwork project, you might wish to read my first post on using smooth passing thread, earlier in the project. I've touched on some basics there and won't re-cover the same ground here.
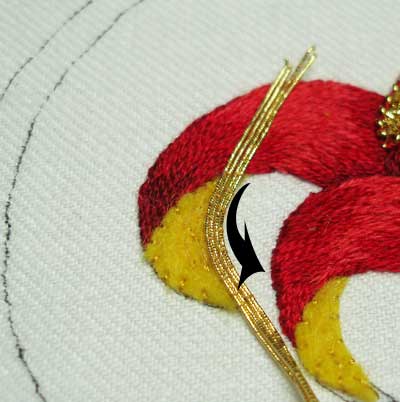
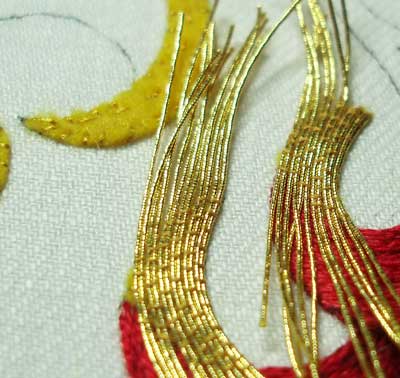
I'm using the same smooth passing thread that I used up the sides of the body of the fruit and on the "bowl" underneath the fruit - it's a #4 gilt thread. The smooth passing thread is couched in pairs, starting on the widest part of the turn-under and following the curve of the turn-under. I left about an inch of thread on each side, to use for plunging. You can get away with less, actually - about 3/4" is still easy to manipulate with a plunging needle, and if you're using a plunging lasso, you can leave even less (easily 1/2"). (I covered using a plunging lasso in my article in CQMagazine Online on goldwork and crazy quilting. You can also find a good tutorial on making a plunging lasso on Threads Across the Web.)
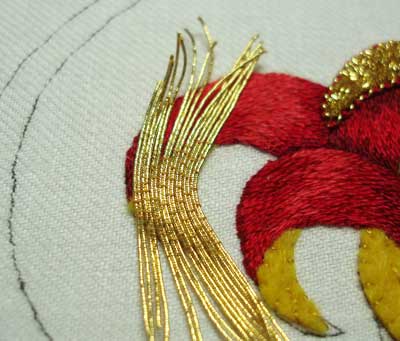
I filled the whole area, always starting with a couching stitch right at the edge of the felt padding underneath the gold, so that the gold was firmly covering the padded area.
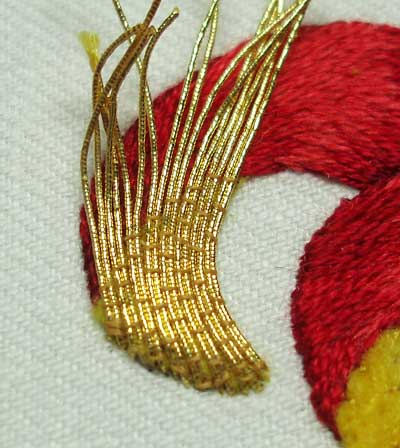
Once the shape was covered with gold, I plunged the threads on one side, making sure that I held onto the gold threads. While pulling the plunging needle through, I held onto the other ends of the passing thread, so that I didn't shift the gold threads (or pull the whole thread through!).
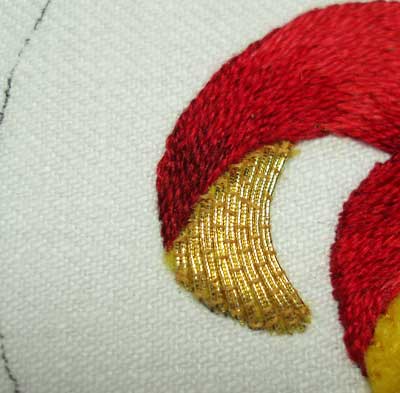
On the side next to the silk shading, I positioned the plunging needle right between the felt and the silk shading, and popped the threads on through. You can see the tiniest tip of yellow felt right at the "elbow" of the shape - but no worries, this will be covered with an outline.
I moved on to two at a time on the other side...
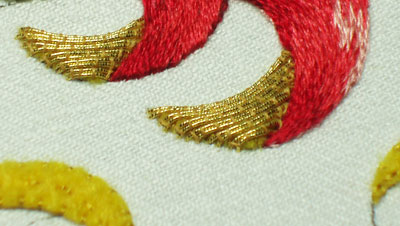
... and got those plunged and anchored on the back.
Doing the turn-unders was fun, even though the shapes were small enough to make it seem rather tedious. But, despite all the threads to secure on the back, it went faster than I thought it would.
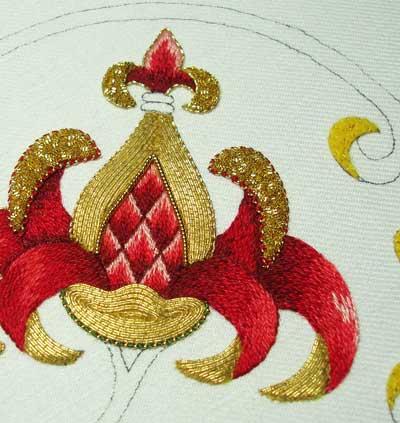
And here's the progress so far, including a stretched pearl purl outline at the base of the "bowl" below the fruit. I couched that stretched pearl purl with a medium green.
Next up - outlining the turn-unders, the rest of the petals, and the top of the bowl, and then the body of the fruit is finished!
(I think?)
Any questions so far? Feel free to leave a comment below!
For previous posts on this goldwork embroidery project, please visit the following links:
Stylized Pomegranate Pattern used for this project
Setting up the Project on a Frame
Preparing the Ground Fabric with Felt Padding
Selecting Colors of Silk for the Project
The Stitching Begins - SIlk Shading
Continuing the silk shading - the left side
Finishing the silk shading
The Goldwork Begins: Smooth Passing Thread
Check Thread for Outlining
Chip Work Filling with Check Purl
Outlining with Stretched Pearl Purl
Filling the Bowl with Passing Thread
|
