I've made good progress on the goldwork project, and I can't wait to show you! in fact, I've finished the project! But I want to keep the step-by-step format here, so I'm going to show you the finishing of the silk embroidery on the stem and the chipwork on the "swashes" before showing you the final step of finishing! Ah me! I'm a meany! But if you want to jump ahead to see the entire finished piece, I'll let you look at it here: Goldwork Pomegranate on Flickr. Here, then, is the final step, minus one, to finishing the project!
When last we left the Goldwork Pomegranate project, I was working my way around the stem with the green silk floss. Again, I'm using one strand of Soie d'Alger silk embroidery floss, in the colors of silk previously discussed. Concerning the greens, I ended up really only using three shades - the second darkest, a medium, and a light - 2135, 2133, and 2132 in Soie d'Alger. You can certainly use all five greens selected - you'd end up with a much richer stem with more depth to it, I'm sure.
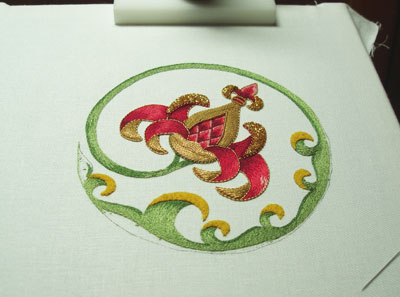
Although I began the stem, up by the fruit, using long and short stitch, as I progressed towards the swashy part of the stem, I switched to filling in with split stitch lines in order to accommodate the curves into the swashes. Underneath all the turn-overs on the swashes, I had worked a long and short stitch area in a darker green in order to put some shadows in there.
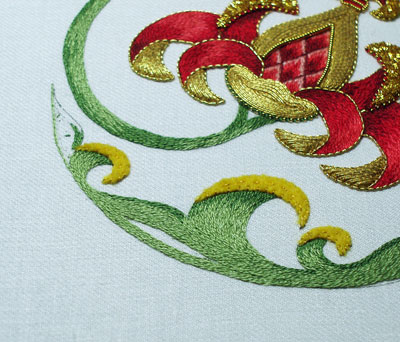
You can see here the split stitch lines coming together. Following the curve on the top part of the stem, but following the straight line on the outer edge of the stem created a gap in the middle that needed to be filled. It looks a little awkward here, but it filled in ok!
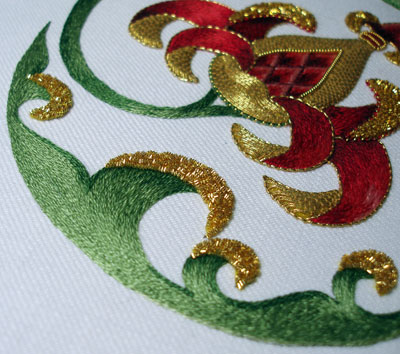
It's funny how a change in lighting picks up the gleam of the silk. Even though Soie d'Alger is a spun silk (as opposed to a filament silk, which is a lot shinier than a spun silk), it still has an excellent sheen and it reflects the light quite beautifully.
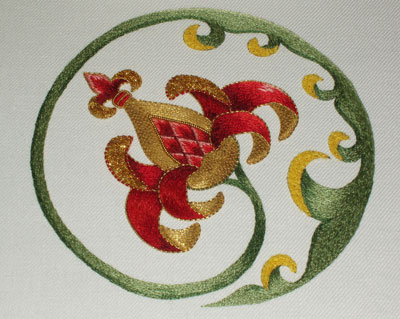
In the photo above, the green is finished. The last touch of green I put on the piece was actually up towards the top in this photo - a thin strip (two or three split stitch lines deep) of a lighter green.
The next step - the chip work filling on the swashes. Following the same procedure that I used in filling the turn-overs on the larger petals on the fruit, I covered each felt piece at the tip of the swashes with chip work, using #7 bright check purl.
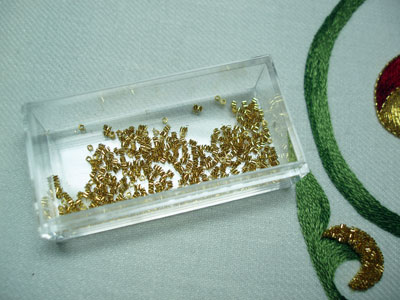
Before starting the chip work filling, I cut the bright check purl into tiny pieces and put it all into a little box, so that I could have easy access to the chips. Holding the little box in my left hand and using the needle in my right hand to pick up each individual chip, I was able to work pretty quickly. I didn't have to move back and forth between my supply table. Everything was right there on top of the needlework.
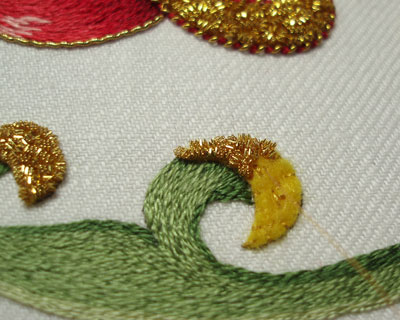
The effectiveness of chip work as a filling comes from the way the light plays off the gold, and in order to get a really good sparkle, the chips should be stitched down randomly in as many directions as possible. In a small space, this is somewhat difficult, but it's worth the effort. The random directions of the chips make all the difference in the way the light reflects on them. Sparkly!
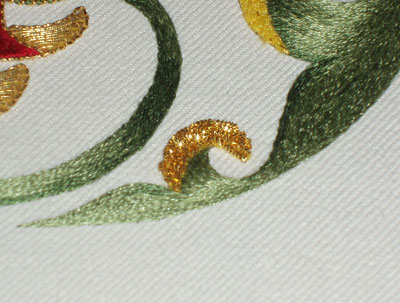
I developed a small "problem" here. I don't really consider it a real problem, but you can see that the larger swash up there is practically running into the small one next to it. And it did, by the time all was said and done. It looks fine, but it was not admittedly part of my initial design plan, to have those two "waves" meeting up!
The chip work filling is finished...
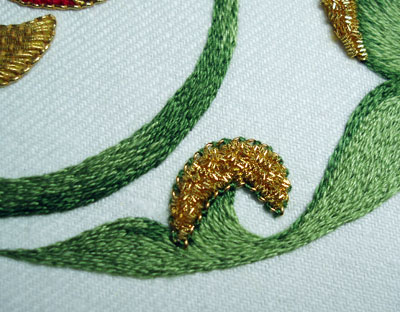
... so the last thing to do is to outline each little wave with pearl purl, stretched and couched down with the medium green.
The last step in this project will be to outline the stem - I'll show you that next, and then we can all jump for joy over the finished project!!
Questions? Comments? Suggestions? Don't hesitate to leave a comment below!
For previous posts on this goldwork embroidery project, please visit the following links:
Stylized Pomegranate Pattern used for this project
Setting up the Project on a Frame
Preparing the Ground Fabric with Felt Padding
Selecting Colors of Silk for the Project
The Stitching Begins - SIlk Shading
Continuing the silk shading - the left side
Finishing the silk shading
The Goldwork Begins: Smooth Passing Thread
Check Thread for Outlining
Chip Work Filling with Check Purl
Outlining with Stretched Pearl Purl
Filling the Bowl with Passing Thread
Finishing the Tips with Passing Thread
Finishing the Fruit
Beginning the Stem
Continuing with the Green on the Stem
|
