Here's the end of the Goldwork Pomegranate! This was a great needlework project for me, and I really enjoyed sharing it with you. Sure, there are things I'd do differently if I were starting over, but I'm satisfied with the results. I think it was fun! It was a good "goldwork fix." I got to work with my favorite embroidery floss - Soie d'Alger silk - and my favorite metal threads. What more could a person want? So here are the final pictures - I hope you enjoy them!
The final step in this embroidery project was outlining the stem, and I chose to do that with stretched pearl purl, couched with the silk floss, just like the outline on the turn-overs on the swashy things on the stem. I really like working with the stretched pearl purl. Admittedly, it is very easy to stitch with, so there's no great skill going on here - I didn't even have to pay attention to stitch spacing, as the thread took care of that for me!
I began by the body of the fruit, and worked from the right side of the "V" below the body, around the outside of the stem first. This was easy - it was just one length of pearl purl.
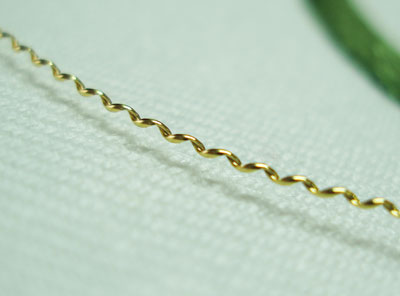
Remember, if you're stretching pearl purl, when you cut it before you stretch it, don't cut the full length! With the outline on the stem, I stretched the pearl purl to it's full extent, really. I pulled it until the "pull" was gone. I didn't want it to form a ridge around the stem, and the more it is stretched, the smaller the bumps are. I cut about 1/3 the length of the outline I was stitching, and then pulled the thread out - I still had leftovers! (It's a great way to use pearl purl and make a little go a long way!)

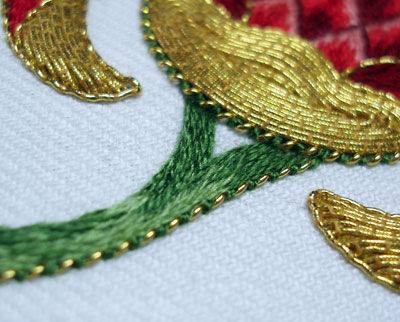
After finishing the outside of the stem, I moved back to the beginning, at the base of the body of the fruit, and worked on the left side. You can see the difference in the size of the pearl purl on the "bowl" at the base of the fruit and the pearl purl on the stem - this is only from stretching, as I used the same size pearl purl.

The inside of the stem was a bit more "difficult" - not really hard to do, but once I reached the waves in the stem, I had to cut small pieces and start and stop often.
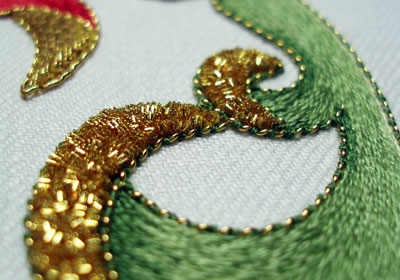
You can see here where the larger wave ran into the smaller one on the inside of the stem. I don't mind it, really. If I were doing it again, I might adjust it, but it still looks ok, I think.
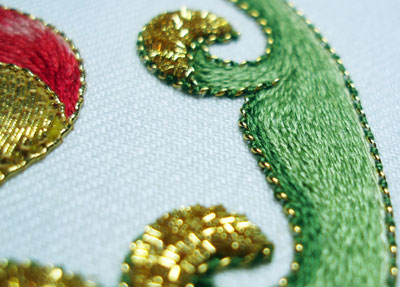
Here, you can see the three colors of green silk I used in the stem.
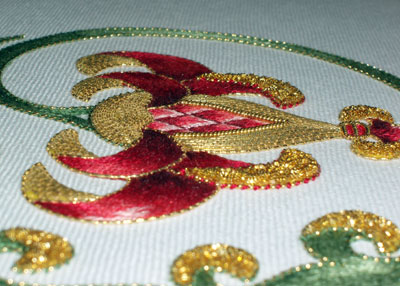
I always like to take a side shot, just to see the height of the stitches and the difference in the lighting!
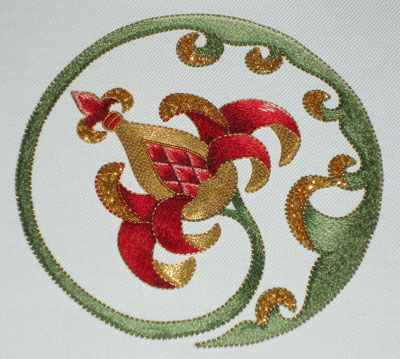
And voilá - there's the finished project!
Thanks so much for following along. I hope I didn't bore you to death with my "tunnel vision" on one project! And I hope there were some useful tips that might help you in your stitching. I appreciate all the feedback along the way! Thank you!
For the rest of the posts in this series, please visit the following links:
Stylized Pomegranate Pattern used for this project
Setting up the Project on a Frame
Preparing the Ground Fabric with Felt Padding
Selecting Colors of Silk for the Project
The Stitching Begins - SIlk Shading
Continuing the silk shading - the left side
Finishing the silk shading
The Goldwork Begins: Smooth Passing Thread
Check Thread for Outlining
Chip Work Filling with Check Purl
Outlining with Stretched Pearl Purl
Filling the Bowl with Passing Thread
Finishing the Tips with Passing Thread
Finishing the Fruit
Beginning the Stem
Continuing with the Green on the Stem
Almost finished! Chip work on the Stem
|
