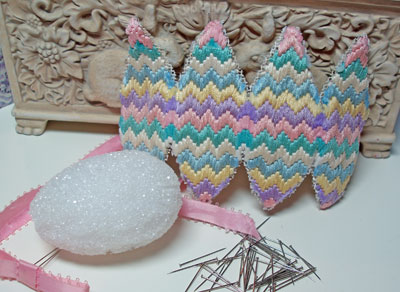
Last year, I flirted momentarily with the 3-D stuffed Easter Egg, made of felt and hand embroidered. It was a fun experiment - a very easy way to make decorated fabric eggs for Easter. This morning, I had an egg hunt. I wanted to revisit the concept of a 3-D egg, only I wanted a different pattern. In the deep recesses of my memory, I had an egg floating around - an embroidered egg (needlepoint, really) that my sister Susie made for my Mom many years ago. I needed to find that egg. I needed to find it and dissect it.
I found the egg. Here it is, below, embroidered on mono canvas (13 / 14 count, I think) with DMC floss in pastel colors.
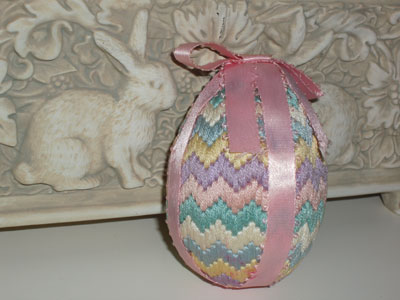
The egg must be a good 20 years old. Nestled away in a hutch drawer, it has survived some house moves relatively unharmed. I wonder if Mom will ever know I borrowed it?

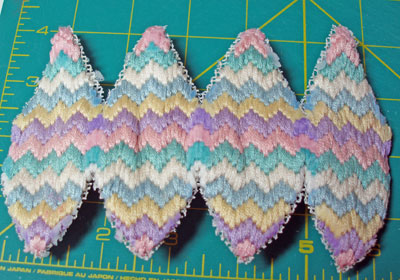
I just wanted to see, really, what the basic pattern was. Surely, it couldn't be all that difficult to disassemble... in fact, on first exploration, it looked like it was simply pinned onto a styrofoam egg.
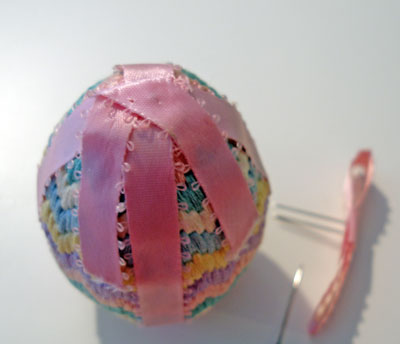
A few pins later, the bow was off. This was going to be easy!
The dividing ribbons were pinned down... and glued down. Ooooh. I hadn't considered glue.
Ooooh. I hadn't considered quite so many pins, either...
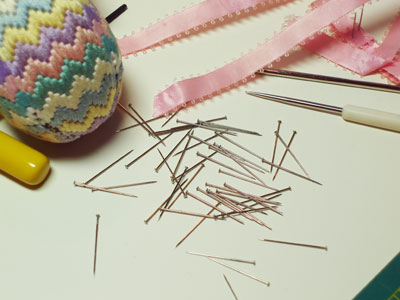
Yeeesh. I was feeling a bit like Lady Macbeth: "Who would have thought the old egg to have had so many pins in him?" Two broken fingernails later, they were out.
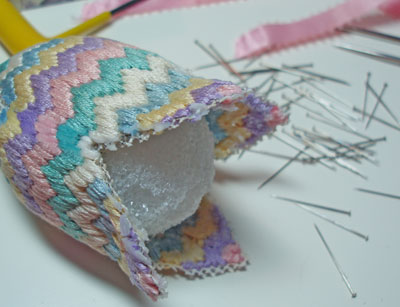
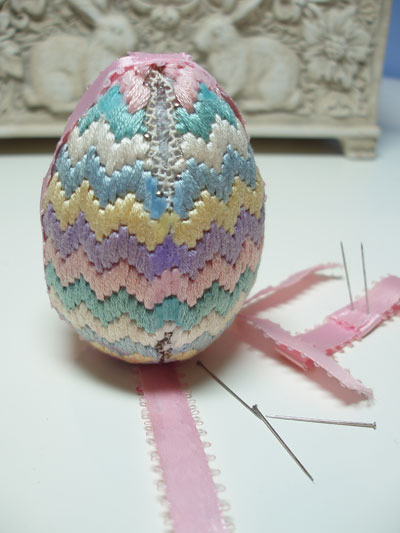
It yawned and revealed its styrofoam innards.
This was the point where I realized the thing was not going to go back together.
Ever!
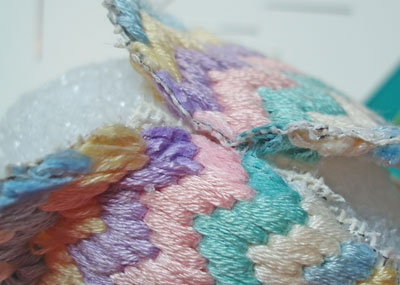
I knew there had to be one seam in the piece, and after much cajoling with an awl and some scissors and any other tool that I could poke and prod through layers of floss and glue hardened by time, I found the seam.
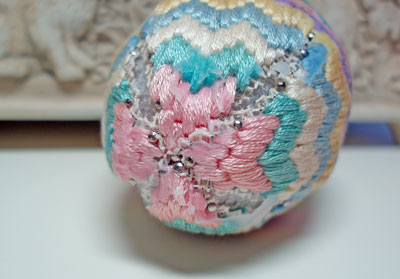
I unwrapped the egg.
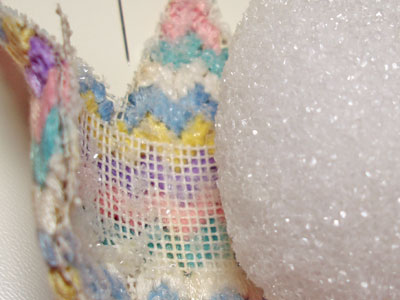
A band of mono canvas lined the inside of the egg, around the middle. It was glued on.
I have a whole new respect for glue. It is tenacious stuff.
The naked egg, and all its accoutrements.
And the needful piece, from which my plan was to develop a pattern that looks something like this:
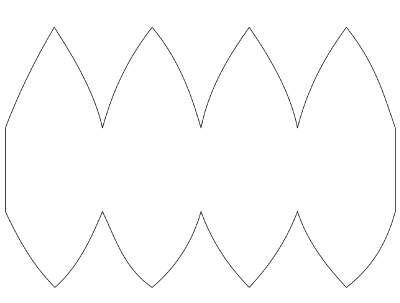
What I was aiming for was a pattern for a stuffed egg that was one piece, that could be embroidered before it was sewn up. I don't know if this will work - I haven't tested it yet - but if you want to play with it, you're welcome to do so! If you print it off your computer, enlarge it to 4" high (which will make it 6" wide). You'll want to cut it with a seam allowance. My plan is to print it on card stock to use as a tracing template, since I'll be working on felt. I'll trace the outline of the cardstock pattern onto the felt (that way, I have my sewing lines all marked) and then I'll cut it out with an 1/8 - 1/4" seam allowance around it.
Again, I have no idea how well it will work at this point - no doubt, some tweaking will need to be done - but it'll be fun to fiddle with, to see if I can make it work.
Ah. Nothing like last minute projects!
Any input, suggestions, or even admonitions for destroying the original are welcome!
Thanks, Mom! Thanks, Susie!
|
