When last we visited the Blackwork Fish, I had not quite finished embroidering the lower half - almost, though! Today, I'll show you how far I've gotten, talk to you a little about the pros and cons of the project, and pose a question that has come up.
To recap, the Blackwork Fish began as a doodled drawing. When I finished with the doodling, which was done on a whim in a moment of boredom while waiting for an appointment, I began to wonder if this type of doodling could be interpreted in embroidery. Recalling that I had a package of unused black silk threads in various weights, I found the concept of embroidering the doodled fish rather appealing. And hence, the Blackwork Fish.
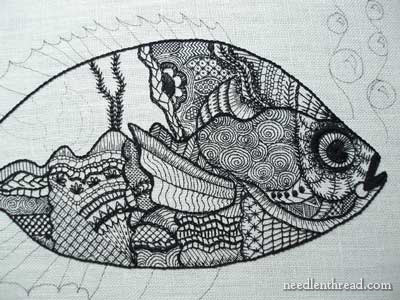
The last time we looked at the fish, that's what he looked like.

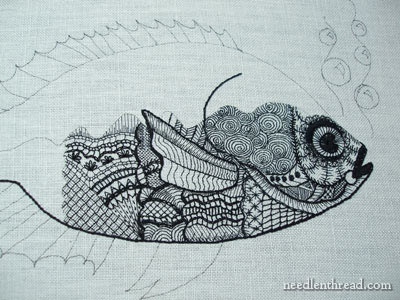
Here, I'm moving towards the tail. I wanted to move some of the stitches laterally, because normally on a fish there's an obvious lateral line in the middle of the caudal peduncle (the narrow part of the body that the tail's attached to). But I didn't quite carry the lateral stitching across the middle of the peduncle, as you can see:
I'll actually pick up some darker lateral lines in the top half of that back area by the tail, if I remember! I figure there's not too much about this fishy fellow that's very realistic, anyway. So I won't fret over it!
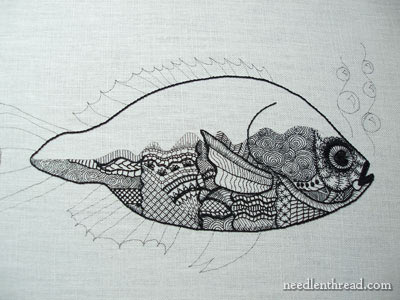
Funny - until I actually had the outline of the body stitched (minus all the fins and tail), I didn't realize what a big forehead the fish has! It looks kind of odd at this point, but I think once the dorsal fin (the top fin) is stitched, it'll look a lot better.
So that's the complete bottom half of the fish.

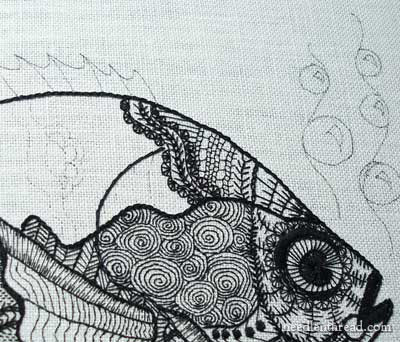
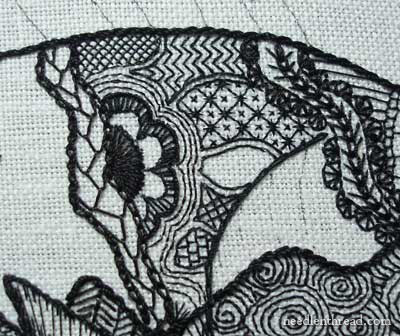
Then I moved up to the forehead of the fish. I like the wheat stitch for working darker lines, and I found myself using it more and more on the top of the fish. It tends to look kind of sea-weed-ish, doesn't it? I stitched lines of buttonhole scallops on each side of the wheat stitch line.
You can also see that I've sketched in a few divisional areas, using a micron art pen. This helps me divide and conquer the stitching areas. I find it's easier to stitch in some darker dividing "lines" and then to fill in between with smaller threads.
One of the pros of working this project is that there's never really a dull moment, because each area changes. One of the cons is that I find myself drawing a blank now and then when thinking up a new fill pattern or line stitch to use.
The "square" lines in the lighter threads that fill in the area above are worked in buttonhole stitch. I like using buttonhole stitch - it's versatile! It looks different with each application and it takes on a different look depending on the weight of the thread, too.
Another one of the pros of the project - for a different look without having to change the stitch, just switch to a heavier or lighter weight of thread. One of the cons - I find myself switching threads more often than I usually like!
I jumped over and worked some of the divisional areas next. The scalloped half-circle there is worked in a combination of buttonhole and straight stitch. I didn't want the scallops to be solid. I was trying to achieve a kind of sketchy look, but it looks somewhat sloppy, so I might end up going over this area again. On the other hand, once this area is surrounded with stitches, it doesn't look as sketchy.

The filling here was completely random. I started with backstitch, outlining the scallop semi-circle, using a tiny thread. As I stitched, I moved the lines out, and ended up with some chunks of area suitable for different filling patterns.
The variety makes it fun. The stitches look a bit larger than they are in real life, due to the close-up shots. I'm stitching on 40 count linen, so that may give you an idea of the size of the individual stitches.
That's about half of the top of the fish, finished.

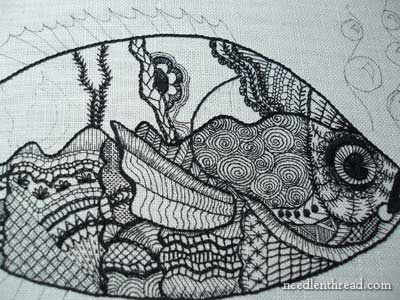
Working towards the double wheat stitch lines, I used buttonhole stitches to fill, changing the weight of the thread and the size of the stitches. To give a little depth to the lines, I used stem stitch to darken the under parts of the curves of the buttonhole stitch lines.
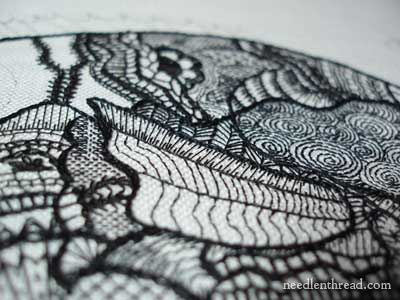
I want to be careful with how I fill the area behind the tip of the fin there. I really want the fin to maintain the look of standing out from the fish, if possible.
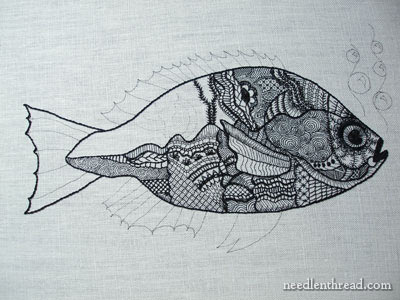
And there's the fish so far!
I've had some suggestions for finishing the project: pillow, outer pocket of a black and white tote bag, framed for a "guy" gift, and so forth. Any other suggestions?
Finally, I'm contemplating all the fin areas. Should each little section of each fin be a different fill pattern? Or should I keep the fins uniform, to make the body stand out more? That's something I'm contemplating.
What think you?
I'm enjoying this project, more than I actually realized I would. It's fun! And while working on it, all kinds of possibilities for future projects have been floating through my head. It might be fun to do a series of these. It might be fun to play with the same concept, only in color. So many possibilities! So little time!!! |
