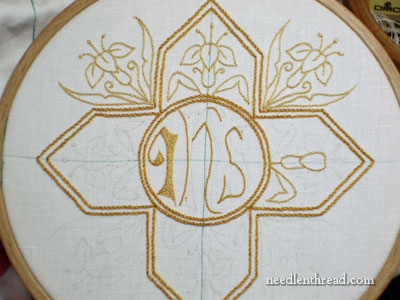
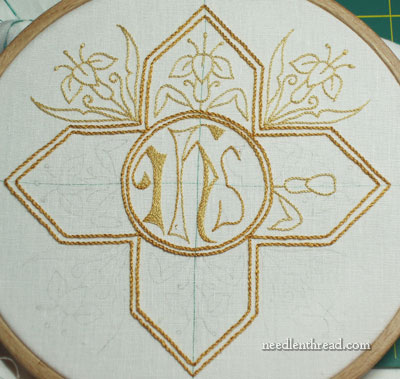
Stem stitch is a versatile stitch. Not only is it great for outlining, but it works really well as a filling, too. I’m using it to fill the letters on the pall I’m embroidering, and even though it’s slower going when compared to just outlining, I do like the results.
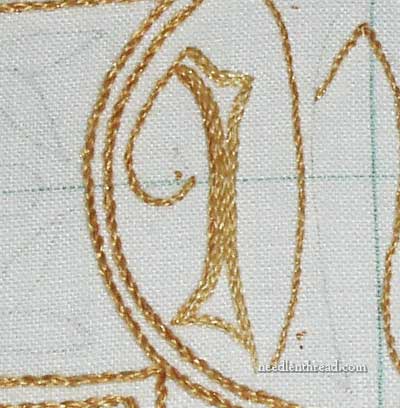
When you begin to fill an area with stem stitch, the first thing you do is outline the shape. Then, you work inside the outline, filling around and around towards the center of the shape. With irregular shapes like letters, you’ll end up with small areas cut off from the rest, like the small blank areas at the top and base of the “I” in the photo above.
Keeping working the stem stitch around those blank areas, until the middle fills to the point that the only thing left to do is to fill with a few straight stitches. In the “I” on this project, notice that the corners are all very sharp angles. So when working the stem stitch around the inside to fill it up, when you come to a sharp, angled corner, you stop the line you’re working on by taking your thread down into the corner, and then you begin the next “side” of the shape with a new stem stitch line.
Working with one strand of fine thread in a very small space can get tricky, but the thing to remember is that you’re working to an overall effect of filling. Not every single line of filling is going to be perfectly symmetrical, if you’re filling an odd shape. Just work it until it’s full, and then, in the tiny bit that’s left in the center, fill with a couple stitches.
I was supposed to have this project finished by the end of yesterday. As usual, my estimation of time is completely off! I’ve had a thousand and one interruptions, too, and about sixteen million other things that need doing just reared their ugly heads. When it rains, it pours.
And can anyone tell me how the beginning of August got here so quickly?!?!
It’s ok, though. I’ve got everything under control!
…. except for the things that aren’t!
Enjoy your Monday!
