Last week, we discussed different stitches that can be used for filling larger spaces. I brought the subject up because lots of folks ask whether or not they should fill this particular (large) space with satin stitch, and I wanted to emphasize that satin stitch is really not an ideal stitch for covering a large space, unless the satin stitch is somehow couched or held down by other stitches.
The difficulty is the notion of “large,” I think. After all, there’s large, and then there’s Large. It’s pretty obvious that I’m not talking about Large, as in table-cloth size or something of that nature. The term large being rather relative, let’s take a look at a small design that’s actually “large” and that just didn’t work with satin stitch.
The design above is drawn on the spot sampler I’m working on. It comes from Mrs. Grace Christie’s book, Samplers and Stitches, and it’s included on this sheet of little designs for stitch exploration that I took from that book. The drawing in the book was actually much larger than the present drawing on the design sheet – I scaled the design down, because I knew there was no way, at the book size, that it would work well for satin stitch. (Keep in mind that Mrs. Christie doesn’t indicate size of the piece – it is just a drawing in her book used to demonstrate what satin stitch looks like – so that’s not a “mistake” on her part!)
If you print out the design sheet, you’ll see that the leaf marked “satin stitch” is not all that large. And in fact, the stitching areas on the leaf are half the width of the leaf, as you can see below.
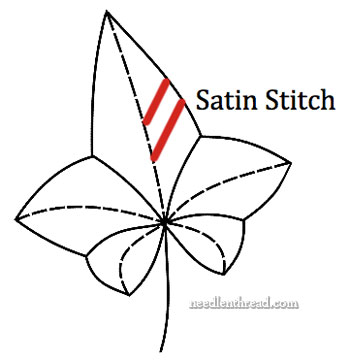
The leaf is supposed to be stitched in the direction of the red lines in the image above.
So half the leaf on my sampler ends up being about 1/2″ wide at its widest stitching point.
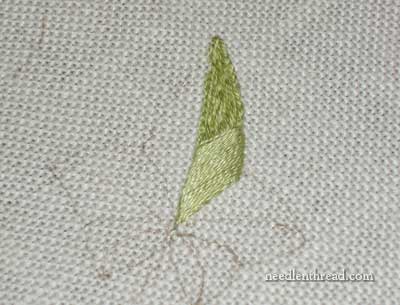
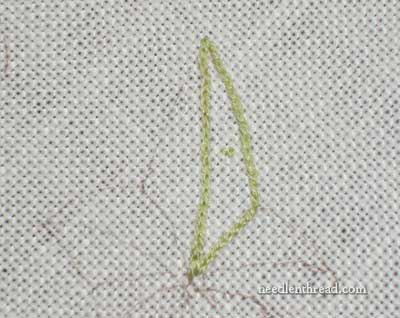
I outlined the satin stitch area with split stitch, and I filled the area with long split stitches, in three strands of floss. Then, using one strand of floss (because satin stitch looks better when you use one strand of anything – whether it’s a thick pearl cotton, or a tiny strand of silk), I began satin stitching.
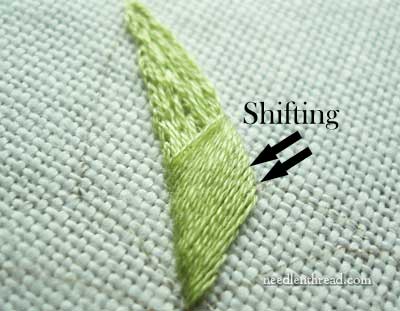
You can see in the photo above where the threads are shifting. Well, you can’t actually see them shifting in the photo, but they are moveable. The satin stitch is just too long, despite the fact that it is well padded.
Now, I could have pulled the stitches tighter, hoping that tension would make up for this shiftability, but in fact, that would be a mistake, too. For one thing, too much tension on the thread would make it very difficult to keep a consistent, smooth edge. The tension would also pull the fabric out of whack, and that just wouldn’t look good. So tension is not the answer.
I could use a much thicker thread here (such as pearl cotton rather than one strand of regular floss), and get a Much Better result on the satin stitch. This would work. But I’m not working with anything other than stranded cotton on the sampler, and using more than one strand would not be the answer. When working with more than one strand of floss for satin stitch, I’d use a laying tool to get the stitches to lie flat. And once the laying tool is employed and the stitches are lying flat, well – there’s not that much difference between using one or more strands, except that they’re all coming out of the same hole.
The answer, in my mind, is simply this: don’t use satin stitch on this piece. Sometimes, satin stitch just won’t work, even if the space being filled wouldn’t be called “large” at all.
So on this little design, instead of satin stitch, I’ll be using an alternative, like bokhara couching, with two or three strands of floss. In fact, I think I can use bokhara couching here and work in a pattern of veins in the leaf, to good effect. That’s my plan, anyway….. unless, of course, you have a better idea! If so, I’m all ears – feel free to leave a comment below!