Last week, we looked at how to switch to a new thread when working the chain stitch. And we found out that you can actually get away with be Technically Incorrect when you start a new thread.
Today, we’re going to look at joining up the end of a circle with the beginning of it, when working the chain stitch. Now, keep in mind, this techniques isn’t just for circles. It’s for any time you need to join one section of chain stitch to another section from the “back end.” You’re not continuing forward with a length of chain stitch, but you’re running into some already-stitched chain stitch at the point where the previous stitches started. Ovals, irregular shapes, twists, stars, knotwork – there are lots of instances where you bring your chain stitching back to where it began.
So let’s take a look at how to join up the chain stitches when you arrive back at where they began.
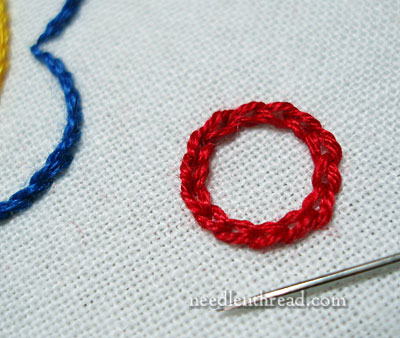
The idea here is how to make an invisible join, and for most stitchers who have been embroidering for a while and are familiar with chain stitch, this may seem like common sense – but in fact, with beginning stitchers who have only learned one way to end chain stitch (with a little anchoring loop), it’s one of those things that create an “ooooh” moment. Once it’s pointed out, it seems obvious, right?
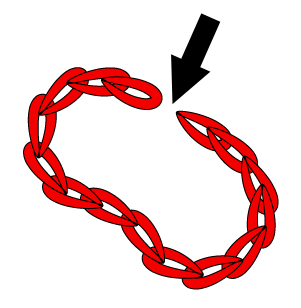
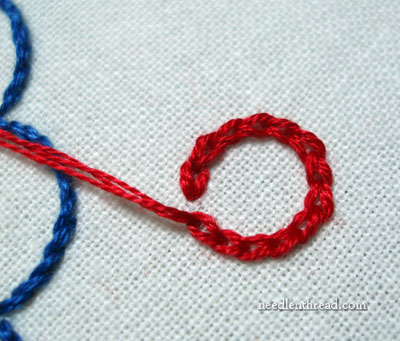
So this is what we’re trying to do here – to close that space where the arrow is pointing. I’m going to work through all the steps of stitching a circle to get to that joining point.
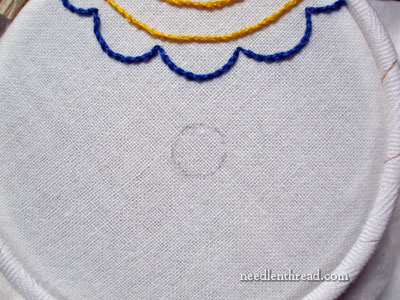
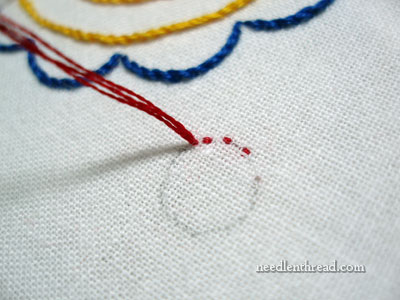
I started with a little circle, about half an inch in diameter, which is part of this design on a flour sack towel. I’m stitching with three strands of cotton floss, with a #7 crewel needle.
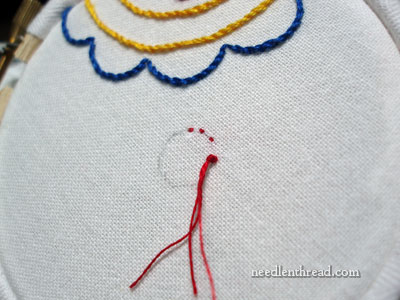
For line stitching, I find this method of anchoring the thread the easiest and surest. (There are several photo tutorials here on Needle ‘n Thread about beginning your stitching without a permanent knot, if you’re interested.)
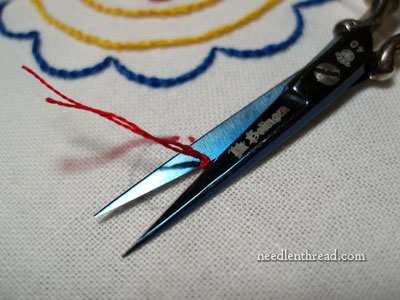
Once the anchor stitches are in, clip off the knot.
Then bring up the working thread on the other side of the anchor stitches, and you’re ready to start the chain stitch.
You can see that, on a little circle like this, it isn’t going to take too many chain stitches to make it around the circle. It’s important to keep the stitches small, so that they work the curve without “flattening” any part of it out.
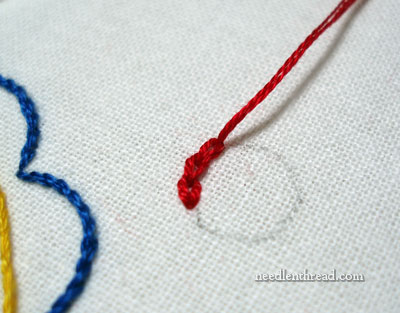
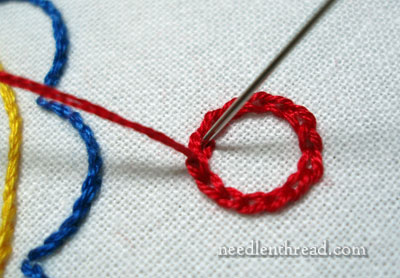
The end is in sight! This is when you have to start looking ahead, gauging the length of your stitches so that they look approximately the same size, but they fill the area, without being too crowded, or too elongated. About three more stitches, and the gap will be closed.
Now we’re at the final stitch.
If you’ve only been taught one way to end a line of chain stitches, then you might be tempted to do this to close the gap. I’ve taken a regular chain stitch (which is now overlapping the back of the first stitch), and I’m getting ready to take the little anchor stitch down into the middle of the first chain stitch.
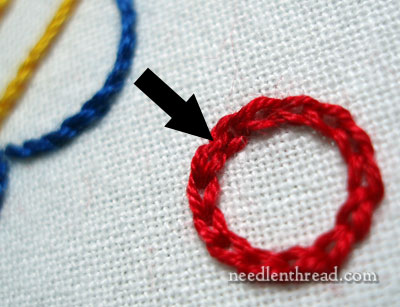
But oh! Alas! Woe is me! The join is obvious. No, no. This won’t do!
Let us unpick that stitch. Whenever you’re unpicking stitches one at a time, it’s helpful to use the eye of the needle instead of the tip. The eye is blunt, and it won’t catch on the fabric or other threads as readily as the sharp tip will. With chain stitch, when you unpick, be careful! If you pull on your working thread, you can very easily pull out all the stitches. Put your thumb over the last correct chain stitch to hold things in place, and you should be ok.

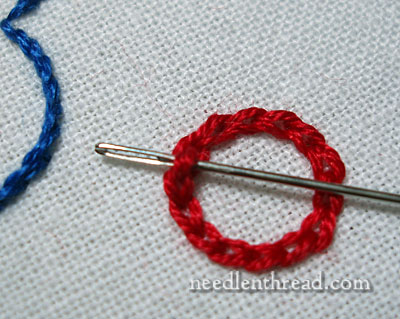
The stitch is removed, and we’re ready to try again.
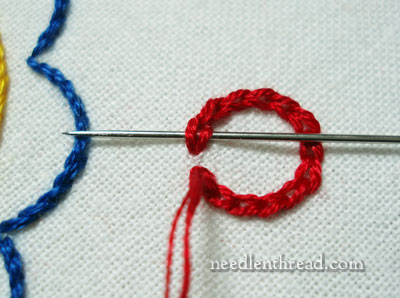
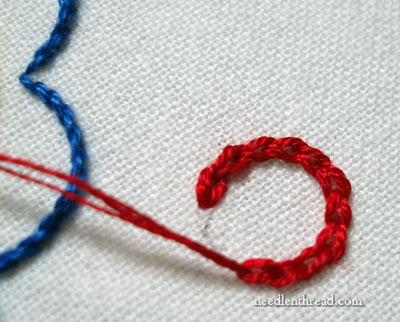
The best way to join chain stitches from the rear is to slide your needle under the first chain stitch that you’re trying to connect with. Pull the needle and working thread through…
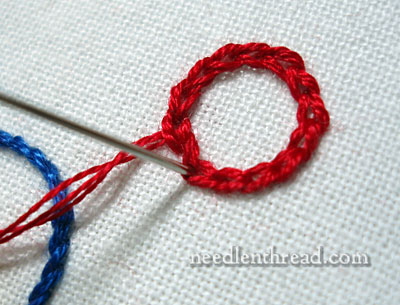
… and then take the needle back down in the middle of the last finished chain stitch (where your working thread came up).
And there’s the join. Easy, yes. But not always obvious to beginners.
Hope this comes in handy for your chain stitching endeavors!