Following up on yesterday’s blackwork pattern, I thought I’d talk a little bit about developing designs for blackwork and show you a bit of the basic process of coming up with myriad patterns all from the same basic design.
I don’t normally sit around drawing blackwork patterns, but since it was part of the spot sampler series, I messed around a bit with one theme, and developed it into several different looks. So I thought I’d show you how I did that, and encourage you – if you’re interested in blackwork – to sit down with some graph paper and doodle out some designs. You’ll be surprised what you can come up with, employing only slight variations on a theme.
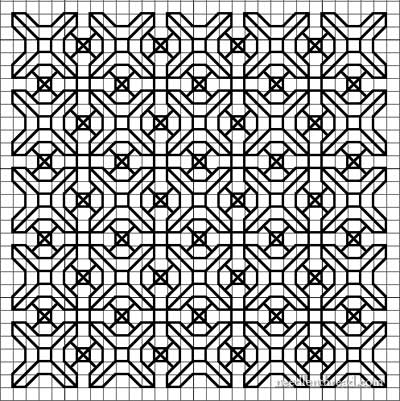
Above is one of the final blackwork squares I came up with, after starting with just this:

After drawing out one line, the next step seemed natural. I mirrored it:

Most blackwork patterns I’ve come across feature a lot of repeats. So why not repeat the line?

The repeated vertical lines begged for some horizontal accompaniment:

That seems to work. It fits well in the middle of the vertical lines, and it squares up the pattern a bit. So let’s fill in the rest of the square:

Now we have a basic square design to work with. The design can be repeated for a filling pattern as it is. But crossed lines always make me think of weaving possibilities, so let’s see what happens when we alter the way the lines overlap:

It looks similar to the previous square, but there’s a bit of variation and depth, with the over-under pattern. That’s ok. But it’s still somewhat bland. How about decorating the original square?

Ah. Yes. A bit more intricate. But we can go farther still:

It’s more or less a checkerboard kind of pattern now. The next step might be to play a bit with the background:

There’s one option of filling in the background areas. I like it, so I’ll repeat it:
Which finally brings us to the full square, which has lost some of the bumpy-line-striped-look that we originally started with:
If you worked the design above on 28 count fabric over two threads of fabric, it would come out to approximately 2″ square.
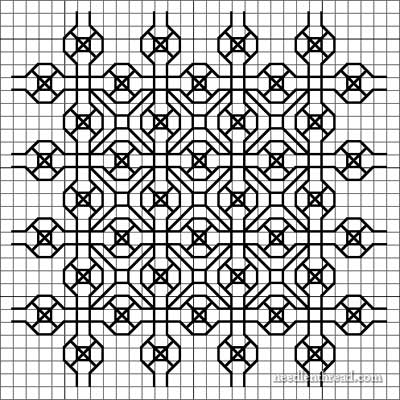
Tomorrow, I’ll show you a further development of the design, for a completely different look, and give you a printable PDF with all the variations of finished squares, in case you’d like to play with them, too. My plan is to show you a stitched version soon, along with a tutorial on working a design in Holbein stitch.
I’ll be gone for the weekend, beginning today around mid-day (I know – it sounds fun – “going away for the weekend!” Educational conferences in KC… gosh, I know how to have fun!). I’ll have limited internet access, though I will do my best to check e-mail and moderate blog comments. Admittedly, there’s a little demon in my head whispering something about giving a conference or two a miss and seeking out needlework shops……
Have a wonderful weekend!