Variegated embroidery floss. It had to happen.
When I began teaching my Needle Arts class this year to high school students, my intention was originally to keep the embroidery floss selection pretty simple. Since the goal for the first semester was to work a spot sampler with a variety of stitches, I planned on giving the students a rather narrow selection of floss – all regular stranded DMC cotton – in a particular range of colors and shades.
Well, I figured out right away that the color limitation wasn’t going to work. The students had their own ideas about color – what they like, what they don’t like – and I suppose if I had left my floss box at home, we would all have the same color schemes developing on our samplers, despite their likes and dislikes.
I’m glad I took the box in. It’s fun to see the variety of colors the students chose for their own samplers. But hidden in the floss box, unbeknownst to me, were quite a few skeins of variegated embroidery floss. Today, I’ll show you how we dealt with variegated floss, and other ways we discussed controlling color.
This is what I’ve noticed: there are some students who love variegated floss. There are some students who hate it. (I mean, they really have an aversion to it!). Right away, the Variegated Floss Lovers honed in on the variegated floss. And I didn’t mind their using it, though I hadn’t really planned on talking a whole lot about color control during the first semester.
Still, since some students really wanted to use variegated floss, we went over how to control the look of an embroidered motif if using variegated floss.
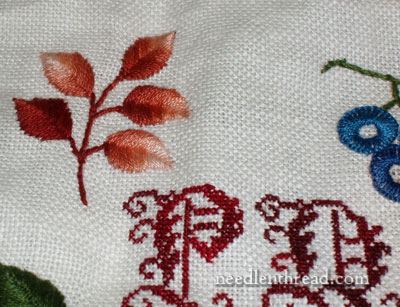
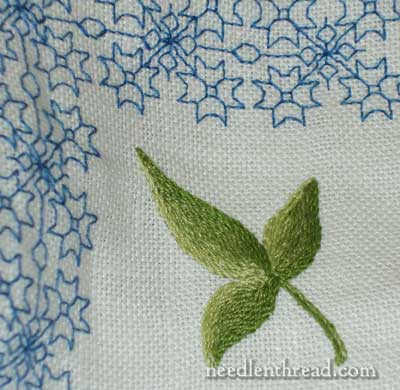
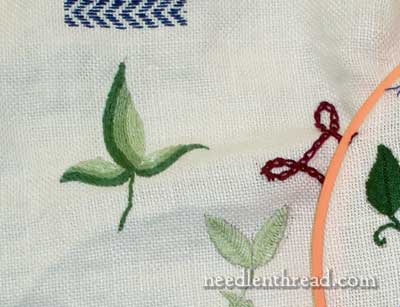
For example, in the leaves above, worked in fishbone stitch, the student used variegated floss. Now, if she had stitched straight with the floss as it came off the skein, without considering where the colors landed on the leaves, she would’ve ended up with striped leaves. Pointing out that you can control the color layout of the variegated floss saved her from the striped effect that can come from using variegated threads. It’s all a matter of cutting the floss right, and threading the right end into the needle. This student picked up on the concept quite well, and did a nice job producing a shaded effect on the leaves, without the stripes that could have resulted from using variegated threads.
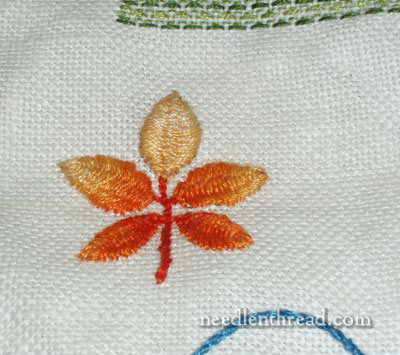
Here’s another example of leaves worked with variegated floss, with the color placement controlled. These are worked in cretan stitch, closed.
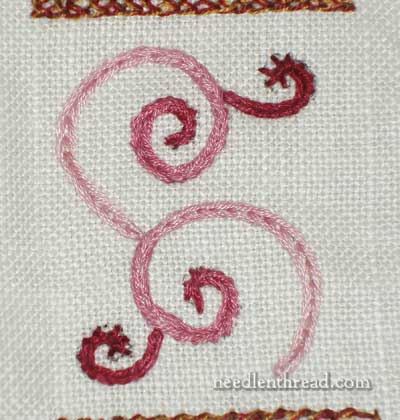
This student, working in heavy chain stitch, worked from light to dark on the scrolls, using variegated floss, keeping the small off-shoots dark.
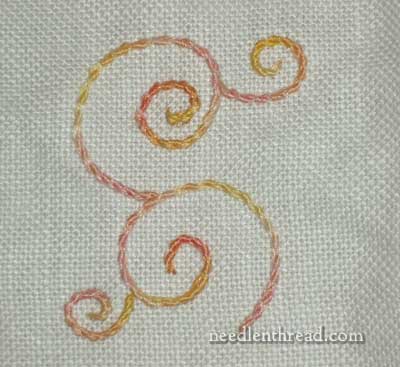
We discussed deciding the look you want before you stitch. This student liked the stripes of color from the variegation on the floss so she worked the Portuguese knotted stem stitch with the floss as it came off the skein. Still, she had to consider the placement of color on the side scrolls, and cut and threaded her floss accordingly.
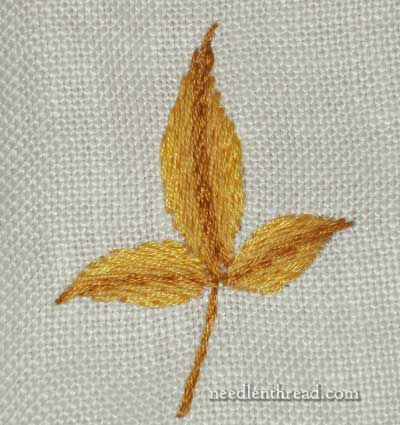
Besides controlling the color when using variegated embroidery floss, we approached the subject of “shading” a little bit, too, using stem stitch as a filling and blending the shades to avoid obvious stripes. Even though you can see a definite shade change in the leaf above, the student did control the shade changes a little bit, so that the shade changes wouldn’t result in drastic stripes.
We were working with three strands of floss in the needle. We began with the darkest shade of green, and worked a couple rows on the leaves in the darkest shade. Then, we switched out one strand of dark for a strand of medium and stitched a row or so, and then we switched out two strands of dark for two strands of medium and stitched a row or so, and then used all medium for a row, and then began working in the light in the same way – one strand of medium replaced by one strand of light, then two strands of medium replaced by two strands of light, then all light.
If you wrote out a formula, it would look sort of like this: D3 / D2 + M1 / D1 + M2 / M3 / M2 + L1 / M1 +L2 / L3 (D=Darkest Shade; M=Medium Shade; L=Lightest Shade, and the numbers = strands of floss). You can vary the amount of rows stitched in any given shade combination, depending on how much room you have.
This helped blend the shades a bit better, rather than ending up with a striped effect.
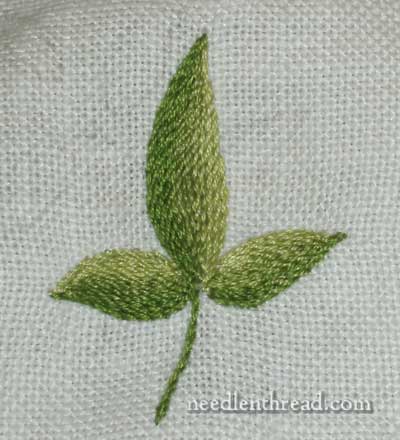
Even though you can still definitely see the change of shade in the leave above, it isn’t drastic. The blending of threads kept the color change a bit smoother.
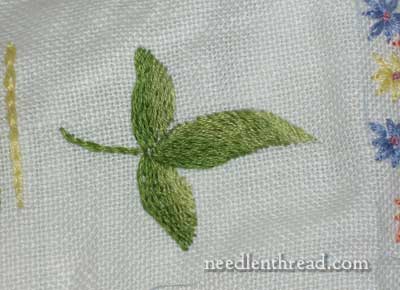
In the leaf above, the student didn’t blend as gradually.
And in the same shaped leaf above, the student didn’t blend at all, on purpose.
And then, of course, Autumn had to show up here and there. Some students really didn’t want green leaves, and that was fine, too.

Some students figured out pretty early in the game that they could combine colors if they wanted, for interesting effects. One student stitched this Quaker motif in a red, but wanted a darker boarder around it. The boarder is worked in herringbone stitch with one strand of dark blue and one strand of dark red. I like it!
An overall update on the class:
Most teachers take time to assess not only the daily lesson and how it worked, but also the whole unit, and again, the whole semester, or the whole year. I’m not quite ready to assess the whole semester – we still have a couple weeks left! – but overall, so far, I think the class has gone pretty well. Goal-wise, we didn’t do everything I planned, but I knew that I was over-planning, so that’s ok. Some general goals that have been met: the students, many of whom had never picked up needle and thread before, are at ease with stitching and confident in figuring things out, trying different things, experimenting, and so forth. They aren’t scared of the thread, scared of the needles, sacred of the fabric, scared of the scissors – they use their tools with ease and are no longer “awkward” with them. They can figure out stitches from diagrams. Most of the time, they troubleshoot their own mistakes, unless something Really Big pops up. And I’m not threading needles or removing knots for them anymore! (And that’s a Huge Accomplishment!)
One small problem to overcome, though: their samplers are not very full. But that’s a Whole Nuther Story – and I’ll tell you about it later!