NeedlenThread.com» Mary Corbet’s Needle ‘N Thread - Transfer-Eze Finish
Published: Mon, 12/27/10
| NeedlenThread.com» Mary Corbet’s Needle ‘N Thread |
| |||||
|
| ||||||
| ||||||

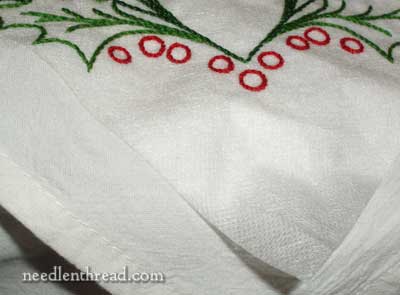
You can see the extra Transfer-Eze here, where I began to peel it off the fabric. It was fairly well adhered, and in the long run, I decided not to bother cutting away the extra.
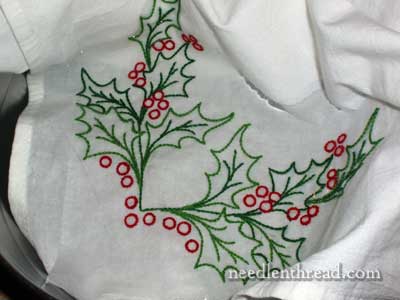
Next step after stitching: submerge the piece in cool water to soak. For how long? It depends.
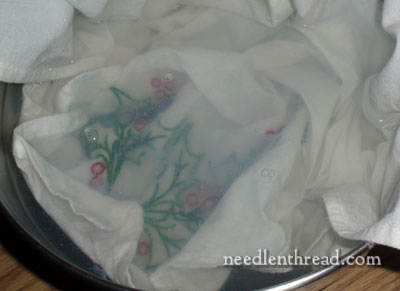
After a few minutes, the water gets murky.
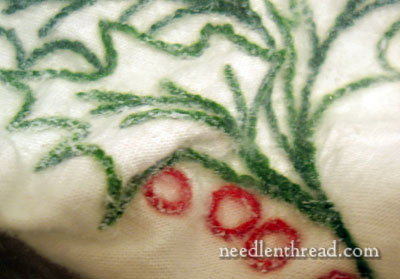
After about 15 minutes, the bulk of the Transfer-Eze was gone from the fabric, though still visible all over the embroidery. I switched out the water at this point, but didn’t rinse the piece yet. I wanted to see how much of it would dissolve by just sitting in water.
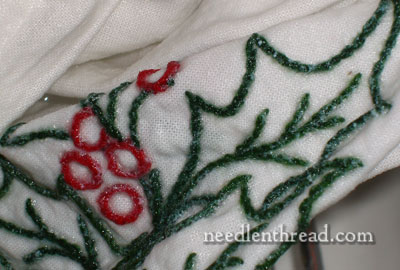
After about 30 minutes, I took it out of the water, and the Transfer-Eze was pretty much gone, except for little bits clinging to the embroidery. At this point, I rinsed the piece under running water, and the rest of the residue washed away. I noticed a few areas of stitching that were a little looser, but nothing drastically off.
I tossed the towel into the laundry, with other white kitchen towels and so forth, and washed it on a regular setting with regular detergent, and then I stuck it in the dryer with the same stuff. Why? Because I know that’s how it’s going to be washed after it’s given as a gift, and I wanted to make sure nothing went amuck with the piece when it went through the laundry. (If you’re absolutely counting on a towel like this as a gift, then you might not want to do the laundry thing at this point, the day before giving it away, just in case something does go amuck! I was confident, though, that all would come out well.)
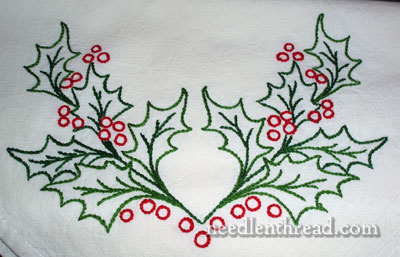
When it came out, it was fine – a touch of ironing finished it up. When ironing an embroidered project like this, it’s a good idea to iron on the back side of the project, with the embroidery face down, using some folded pillow cases or flour sack towels on the top of the ironing board, to cushion the embroidery and keep it from flattening. For ironing embroidery, I use a couple layers of soft flannel sewn together and topped with a clean (used just for ironing) flour sack towel or pillow case. Works great every time!
My final thoughts on using Tansfer-Eze:
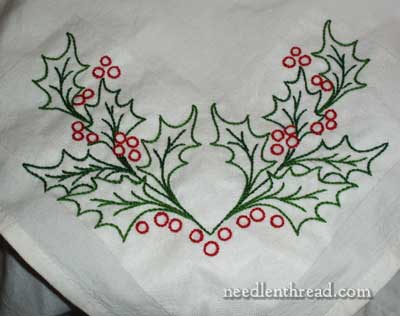
It worked fine for this type of embroidery: cotton on cotton, on a washable item. Would I use it again for this kind of work? Probably at some point. Generally, I use a pencil to trace corners on towels and so forth, and even though the Transfer-Eze is pretty darned easy, I prefer stitching directly on the fabric, rather than through the stabilizer. When it comes to the stitching part, it’s easier to stitch directly on the fabric – it’s easier on the fingers, it’s easier to gauge stitch tension, and so forth. The only part that’s not easier is the actual transfer of the design. But yes, I probably would use it again, for this type of project. And I can see how it could be handy for working on dark cotton with light threads. I would not use it for anything that can’t be washed.
Incidentally, there’s a product available by Sulky – it’s called Sticky Fabri-Solvy, and it comes in printer-sized sheets and in larger rolls. I suspect that it’s probably pretty much the same thing, so I ordered some just to find out. If it is the same thing, it’s a little less expensive than Transfer-Eze, especially if you buy it in bulk and cut it yourself. Several readers e-mailed me with the heads-up on that (thank you!), and I figured a comparison would be interesting. I’ll let you know!
Thus ends my Transfer-Eze experiment.
Now, moving on, tomorrow – Thread Talk! Woooohoooo! I’ve started my next two projects (the planning and setting-up phases, anyway), and will show you the threads for those. A little later in the week, I’d like to revisit a couple stitch videos, specifically stem stitch and outline stitch. I’m trying to edit both in such a way that you can see the difference between the two stitches, and so that you can see thread placement when the direction of stitching changes. I hope to have those up for you before the week is out. And… an end of the year give-away! So keep an eye out!
Have a terrific Monday! See you tomorrow!

Home | How To Videos | Needlework Books | Patterns | Tips & Techniques | Pictures |