What better way to start the New Year, than by cleaning up something I’ve been wanting to clean up for a while! I’ve updated the stem stitch video tutorial in my collection of How-To Videos here on Needle ‘n Thread.
Now, why the eagerness to update this video? To put it frankly, because I just love the stem stitch! And the previous video, though a lot shorter and probably a lot easier to watch, didn’t do the stem stitch justice. It also didn’t instruct on some of the finer points of getting stem stitch right.
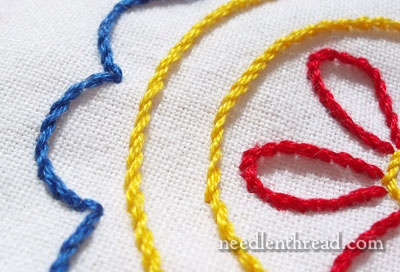
On the new stem stitch video, the viewer has the opportunity to see how the stem stitch is worked from four directions, without moving your work. If you’re working on a frame, or for some reason, you aren’t able to turn your work as you stitch, then it’s useful to know where the working thread should be in relation to the needle, to maintain the correct look of the stem stitch.
Another useful point demonstrated in the new stem stitch video is how to work a sharp corner with the stem stitch. Often, the stem stitch is worked on leaves, vines, or outlines that turn in sharp points. I’ll show you how to begin a new line with sharp turns, instead of working the stitch around the corner.
Additionally, the new stem stitch video demonstrates how to finish a line of stem stitch in such a way that the thickness of the line is maintained to the end. You see, if you want your line to be consistently the same thickness to the end, the last stitch on your line of stem stitch should actually be a lot shorter than the rest of the stitches in the line.
In the article for the stem stitch video, I’ve included information for working with Z-twisted threads. While most commonly used embroidery threads are S-twisted (DMC, Anchor, and other cotton flosses, as well as wools and many silks on the market), there are some threads out there (some silks and most rayons used in Brazilian Embroidery, for example) that are Z-twisted, which require a different approach to the stem stitch. This point won’t apply to most stitchers, but it’s good information to have if you are branching out into other fibers beyond cotton.
Finally, I’ve included some information about stem stitch for left-handed stitchers, and in the video, I address the direction that the left-handed stitcher would take when using stem stitch.

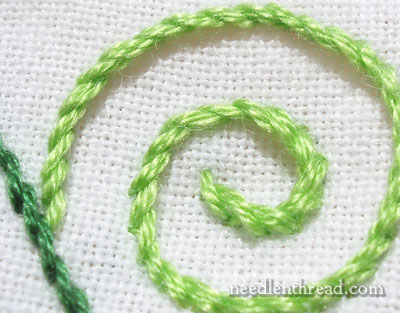
Stem stitch is an incredibly versatile stitch, and this is one of the reasons I love it so much! Not only does it make pretty lines with its rope-like finish, but it also makes a beautiful filling stitch. You can fill an area of stitching quite easily with stem stitch, by working lines of stem stitch close to each other within the place to be filled. You can even trade out strands of color in order to shade your filled area, and achieve a beautiful and gradual shading with stem stitch. For example, in the leaf above, the filling has been worked in three shades of green, using three strands of floss for stitching. On the approach to the shade change, I switched out one strand of three for the next shade, then two strands, then finally worked with the full three strands. By mixing the shades, the color change is gradual and effective. You can read more about controlling the color change in stem stitch in this post on teaching color control to my Needle Arts Class students.
So there’s my update on stem stitch – I hope you find it helpful!
I’ll see you again on Monday, with the winner for the end-of-the-year give-away (if you haven’t signed up yet, don’t forget!), and coming up next week, I’ll show you some progress on my new project! I can’t wait!
Happy New Year!

