Various metal threads for goldwork are cut into pieces and sewn onto the ground fabric like beads. For example, bullions and purls (check, smooth, and rough) are applied in this fashion. The pieces are often cut in advance, and then sewn on as you go. You can see a good example of this when I started applying the chip work the goldwork pomegranate I embroidered last year. I usually work on a velveteen or velvet mat, and I’ll usually put the mat inside whatever basket or tool box or any other thing with sides on it that’s at hand, so that I can pick up the mat with the cut pieces on it, and hold it next to my work surface.
But you know, the idea of having something a little more permanent – especially something that closes and keeps the already-cut gold threads secure – has preyed on my mind off and on.
Inspired by Kathy on Unbroken Thread and her use of a yogurt container lid as a goldwork tray, I decided to concoct my own goldwork tray, one that was small enough to be comfortably holdable, and that could close for storage when putting a project away.
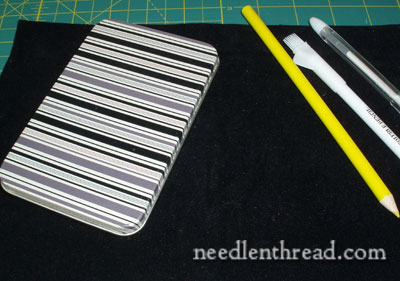
I looked around, and up and down, throughout the house, thinking I might find some kind of small plastic tub, shallow, with a lid that fit. The fridge yielded nothing stored in plastic tubs, but when foraging through my needlework stuff, I came across the tin in the photo above, in which I usually store magnets. It’s slightly less than half an inch deep and a perfect size for holding securely in the hand. It’s not the most attractive tin in the world, but I think I paid about fifty cents for it at a craft store, so hey. It works!
These are the supplies I gathered together to make the goldwork tray:
- 1. Tin – or a small shallow plastic tub of some sort, that can be closed securely.
- 2. Velveteen – I’m using a double-backed velveteen (it’s velveteen on both sides) because that’s what I had, but any cotton velveteen will do. You can use velvet if you want, but it doesn’t cut with neat edges as well, and it’s a lot stretchier. When cutting goldwork, incidentally, I prefer a dark background, like black or deep red, so that the gold pieces show up easily against it.
- 3. A light-colored fabric marking pencil or chalk, so that you can see the lines you draw on the velveteen.
- 4. Fabric scissors and paper scissors
- 5. Strip glue (used for paper crafts) or double-sided tape, or even craft glue and a paintbrush.
- 6. Ruler
- 7. A printed ruler (on cardstock) – more on this below!
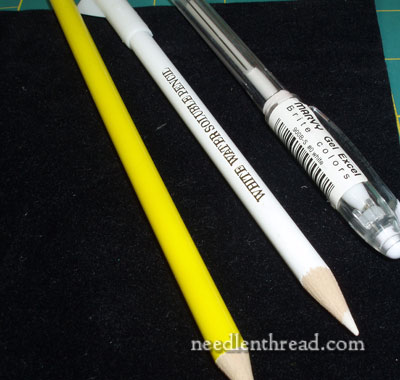
I had a few pencils and pens on hand that would be suitable for drawing cutting lines on dark fabric – a yellow dressmaker’s pencil, a white water-soluble pencil, and even a white liquid gel pen would work. Really, you just need something that will draw a line that you can see. All three of these worked fine
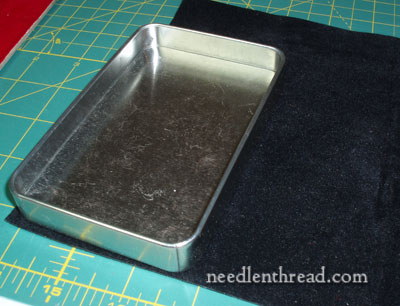
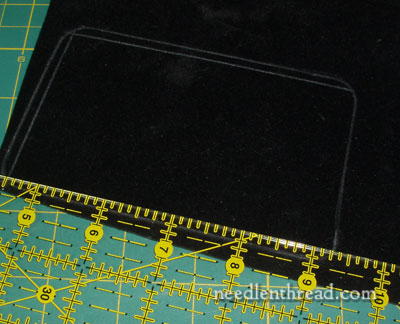
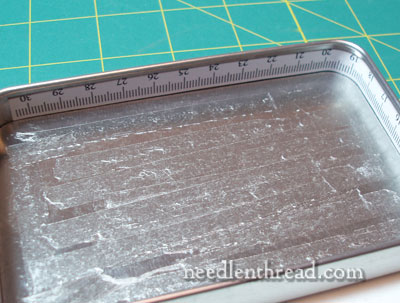
The first step was to trace the outline of the base of the tin on the dark fabric. Angle your pen or pencil into the tin as you trace. Cut out the shape, along the inside of your traced lines.

I still had to trim up the shape a little bit, so that it covered the base of the tin all the way to the edges.
Next, place the lid of the tin on the fabric, top down, and trace an outline of the lid. Then, using a ruler, make another set of lines an eighth of an inch inside the tracing. The idea here is that you want the lid to close on the tin as it normally would. If the fabric lining the lid extends all the way to the edge, the tin may not close securely. So I took an extra eighth of an inch off all the way around.
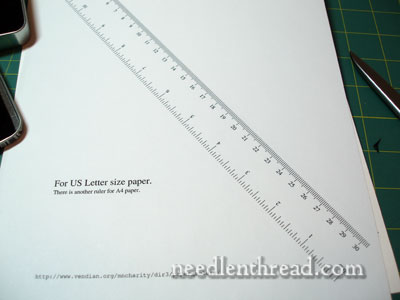
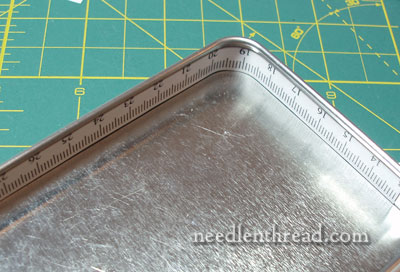
Once you have the lining for the lid cut out, it’s time to move on to the paper ruler. I found this paper ruler online and printed it out on card stock.
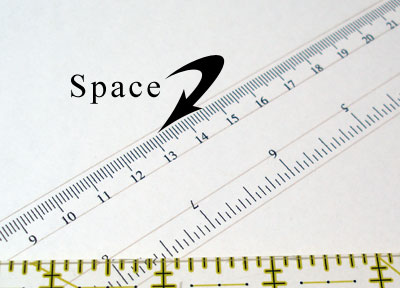
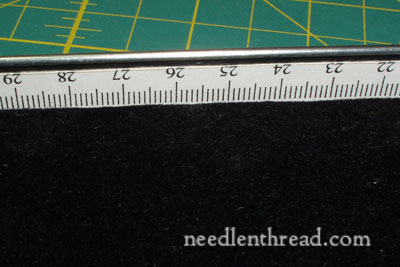
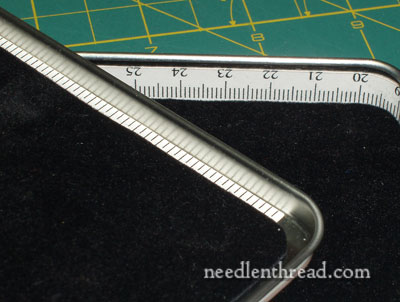
I drew two sets of lines on each side of the ruler, so that I could cut out measurements in centimeters and measurements in inches. I left a tiny space on the outside edge, between my cutting line and the printed ruler, so that the measurements would still be visible above the velveteen lining inside the tin. There’s about 1/16th of an inch there, and I cut out strips that were about 3/8″ wide. You’ll want to measure the inside of your tin, to determine how wide to cut these measuring strips.
Now, I didn’t really care about the numbers on the measurements – I really just want the markings to be visible. I knew the numbers would end up upside down on the centimeter side, and that they would actually be cut off on the inch side, but that’s ok. We’re not after numbers here. Just markings to use as measurements, if necessary, when cutting the pieces of metal thread.
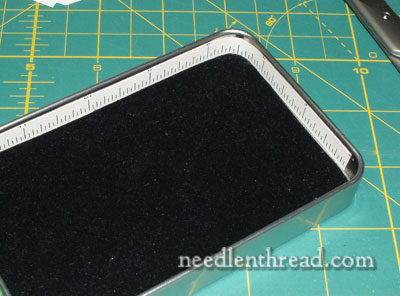
Fit the number strip inside the edge of the tin. I lined one long side and one short side with centimeter markings, and one long side and one short side with inch markings.
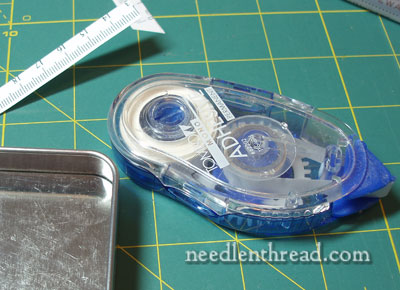
For adhesive, I’m using this strip adhesive, which is good stuff, and very easy and convenient to use. If you don’t have anything like this on hand, a good glue stick, double-sided tape, or even a slightly diluted craft glue and a pain brush will all work fine.
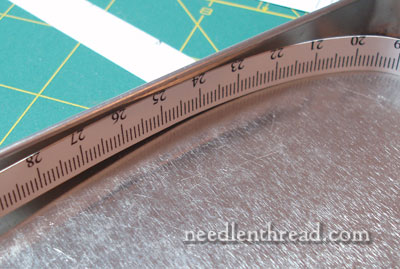
Here’s the centimeter strip, glued in place.
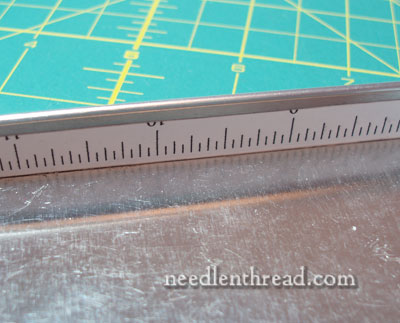
And here’s the inch strip.
Now, situate your cut lining into the base of the tin, and make sure that it fits well. You want it to extend to the sides – like wall-to-wall carpeting – without any gaps, if possible. It’s very important that if you do have a gap, the edges of the lining are glued down, but no adhesive extends onto the uncovered part of the tray. You don’t want your gold bits sticking to the base of the tray, or getting stuck underneath the lining!
To adhere the lining, I covered the base of the tray with adhesive, and placed the lining on top lightly, adjusting it first before firmly pressing it in.
Once I was sure it was where I wanted it to be, I rubbed the lining in firmly with my fingers, all the way around the edges and in the middle, making sure there were no bumps or buckles.
You can see that the lining goes right up to the centimeter marks, which are visible above the fabric, thanks to the little space left when I cut the ruler out.
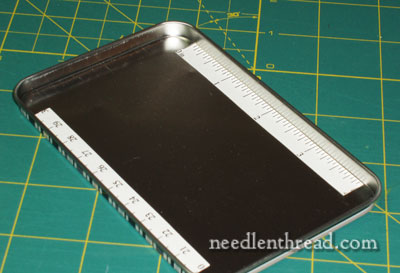
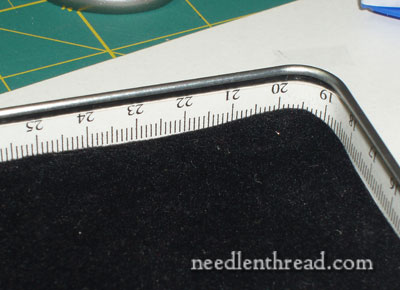
Now it’s time to move on to the lid. I glued down two more bits of the ruler on the long edges of the lid, with the measurement markings towards the outside.
Then I checked to make sure that the lining fit inside the lid. There’s about an eighth of an inch gap all the way around the lining – enough to show the markings on the rulers and to make sure that the lid closes securely.
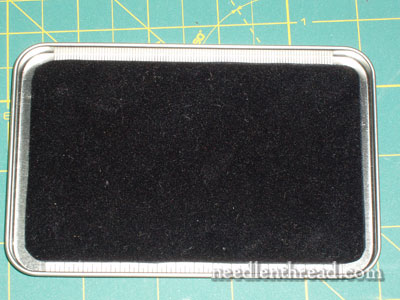
I used the strip adhesive, making sure that it did not extend past the edge of the lining. I pressed the lining onto the adhesive, making sure it was smooth and pressing firmly all around the edges of the lining, to make sure they were completely adhered to the inside of the lid of the tin.
Now I can use both the tin and the lid as goldwork trays, to cut metal threads, and to transport them close to my work while applying them.

Even with the handy-dandy tin, I won’t do away with my red velvet mat! I love it. But the tin is great for measuring and cutting metal threads, and for storing extra cut bits when the project is packed away.
I bet you can think of other uses for a lined tin like this! Even if you don’t do goldwork, a lined tin with some measuring marks in it might come in handy for other needlework pursuits. Any ideas?

