After finally getting Pomegranate Corners framed up and ready, it was time to start stitching. The thread selection for this wool embroidery project has already been discussed, but I’ll make a few clarifications here, for those who wish to follow along.
Now, one thing I should probably mention is that this project will develop a lot like the Crewel Rooster project developed last year. I’m showing it to you “raw” as I go. For new visitors to Needle ‘n Thread, this means that I will make mistakes and change my mind and pick things out and change them and try again – and maybe even again – until I get what I want out of the thread and the stitches. When I show this kind of embroidery project development on the website, you get stuck with the whole darned process! So it won’t be like receiving a kit with perfect instructions in it – instructions that have already gone through the process, have been tested and found successful!
So that’s my disclaimer. It’s sort of like “covering my six,” as my dad-the-pilot would say…. or basically just offering a really lame excuse for showing you my mistakes!
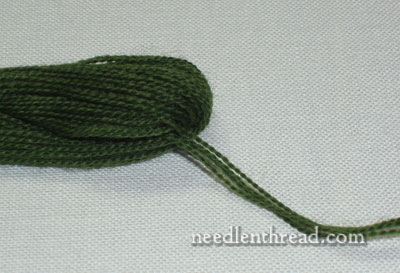
Let’s start by talking a bit more about the wool tapestry thread I’m using. This is the Fine D’Aubusson (available at Hedgehog Handworks – and on sale until the end of January), and you can see that it comes off the skein in a group of four. I’m only using one strand of those four for all the stitching on this project.
The greens for this project are are kind of celery color in their lightest shades. This is the number / color range:
2131 – lightest green
2132 – medium light green
2133 – medium green
… and then, shades that don’t necessarily belong strictly to this color family:
2118 – medium-dark green
2952 – dark green
Because there are so many leafy bunches on this project, it is likely that I will need two skeins of the 2132 and 2133. I’m not 100% certain of that yet, but I’m thinking it’s a pretty good guess.
Now, let’s talk about stitching….
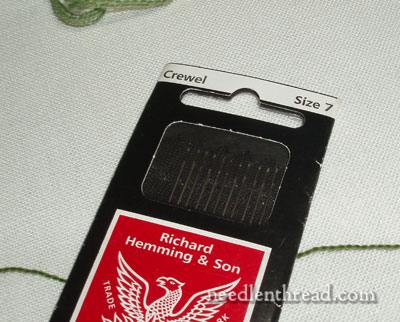
For needles, I’m using a #7 crewel needle. You may be able to get away with a #8, but it seemed a little tight to me, so I’m sticking with #7. Alternately, you can use a chenille needle, which has a longer eye, and may be easier for you to thread.
To thread the needle, I used the thread as it came off the skein. That is, I pulled the bundle of four out, and cut off one strand in the length I wanted. I threaded the “front end” (not the cut end) of the thread into the needle. I don’t know how much of a difference this makes with the Fine D’Aubusson, and I haven’t had a chance to really test this wool thread for “nap” direction, but I suspect that it may make a difference. I’ll test further and get back to the subject later on. For now, though, that’s how I’m cutting my threads and threading my needles. I’m working with thread lengths of about 15″. With wool, it’s best not to work with very long lengths of thread.
So I began with the top most leaf in the bunch on top of the pomegranate – this is the leaf that is farthest back and farthest up in the bunch. When doing long and short stitch shading (which is the treatment I’ll be using for all the leaves), work from the element farthest back.
You can start with any pomegranate – I started with the lower left-hand corner of the design.
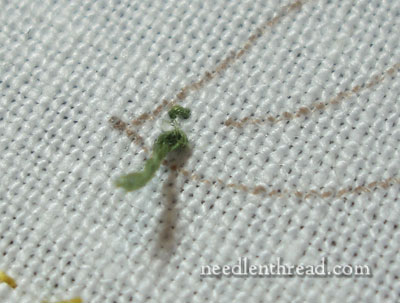
To begin stitching, start with a waste knot and some tiny stitches inside the leaf. I describe this process of using anchor stitches and a waste knot in this photo tutorial (under “Tips & Techniques), and even though the photo tutorial deals with anchor stitches on a line, it’s the same idea when you’re filling a space.

Once the anchor stitches are in, snip off the waste knot.

Before working long and short stitch, it’s helpful to outline the leaf with split stitch. The outline extends only from the tip down the sides – leave the other leaves that cover this leaf un-outlined for now. For the outline, I used one 2132 – the medium-light green – because this is the color of thread that will at the tip of this leaf.
I’m working the leaves in shades from light at the tip to darker at the base, and as I get to the front leaves in the bunch, I’ll be using only the light and medium shades, with barely a touch of dark, if any. So, from back to front, the leaves are darker in the back and lighter in the front. You’ll see what I mean as I finish the bunch of leaves.
(Well, you won’t see it today – you’ll see it later….!)
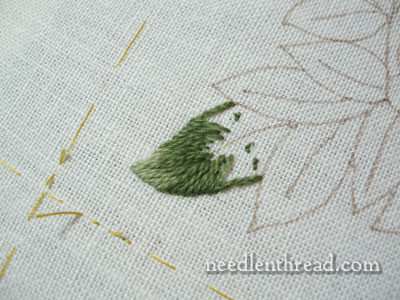
Beginning with the tip of the leaf, I worked with the medium-light (2132) at the very tip, angling the stitches towards the “growth point” of the leaf. The very tip is the light part on this leaf. Then I moved in with the next layer of stitches in the medium-dark 2118, followed by the darkest green, 2952.
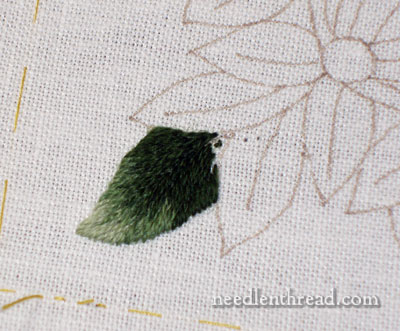
You can see that the leaf is very dark indeed. If you are unsure of long and short stitch, by the way, you might take a look at my long and short stitch tutorials, especially the one with the three long and short stitch video tutorials, and the lesson that discusses filling in leaf shapes with long and short stitch. You might also consider having a crewelwork book on hand, like the RSN Stitch Guide for Crewelwork.

After finishing the first leaf, I worked the split stitch outline for the next leaf forward.
It was then that I decided I didn’t like the leaf! I had debated whether or not I would keep a “vein” line in the middle of the leaf, and I decided not to at first. But I like the definition that a line down the middle of the leaf gives, and so … I picked out the leaf. And you know, I was glad I did. I wasn’t 100% satisfied with the stitching on the leaf in the first place, though I did like the darkness of it.
So, thus ends the first lesson. If you just stitched the leaf like I did, and you want a vein down the middle of your leaves, now’s the time to pick out all your stitching!
Aren’t you glad we aren’t doing this in real time? I might as well make the mistakes for you, I figure!
Next time we visit the pomegranates, I’ll show you how I solved the leaf question, and then maybe surprise you with what I did after that. Though if you know me even a wee bit, you can probably guess!
Snip.
Snip.
Snip.
Other posts on this project:
Pomegranate Corners – Free Embroidery Pattern
Setting up Pomegranate Corners – fabric selection, transferring the design, and preliminaries
Wool Embroidery Thread Selection for Pomegranate Corners
Framing Up the Project for Stitching – mounting the ground fabric on stretcher bar frames

