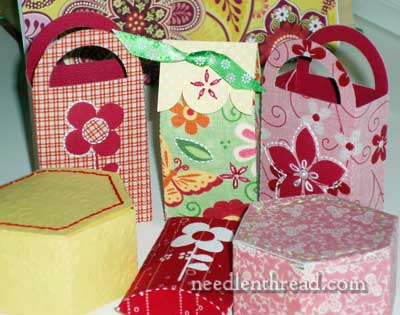
As promised, here’s my write up on how I made this group of small gift boxes out of fabric, paper, and a wee touch of embroidery. You’ll notice I’m using the Silhouette cutting machine that I reviewed yesterday, as well as Silhouette’s Clean Cut fabric interfacing. Lots of photos ahead!
Can I do This Without a Machine?
Without a cutting machine, it’s still possible to make little gift boxes and bags. You just have to find a pattern that works! I can’t share these particular patterns with you, because they belong to the artists who created them, but there are other options out there that focus on cutting boxes from paper. An example would be The Gift Box Book by Gerald Jenkins and Ann Wild, as well as More Gift Boxes by the same authors.
Both of those books feature printed gift boxes ready to cut out, as well as templates and hints for designing and creating your own templates. You can always trace the box designs in the books to use with other paper or fabric. As for adhering the fabric to the paper, the process probably wouldn’t be as quick and painless. I don’t know of any fusible interfacing that acts the same way as this “Clean Cut” interfacing from Silhouette acts. So you might have to resort to fabric glue or something similar, which can get a little messy and time consuming. I haven’t had a chance to work out a completely “by hand” fold-up fabric & paper box, so I can’t advise you on this as well as I’d like to – but maybe there’s a reader out there somewhere who has successfully and permanently adhered fabric to paper and can share a method?
I Used a Machine
Although I spent a lot of time making the boxes, much of the time was working with the Silhouette and getting familiar with it. In fact, to make one of these boxes, if you keep the embroidery to a minimum – just an accent here and there – all told, it might take about twenty minutes to half an hour, depending on how much detail you put into the box, and that includes cutting time with double passes on the machine.
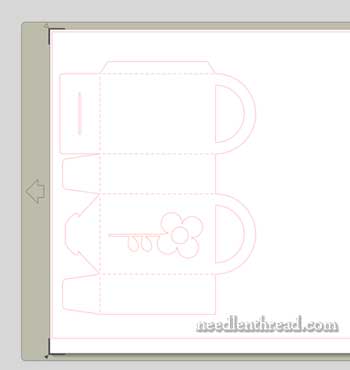
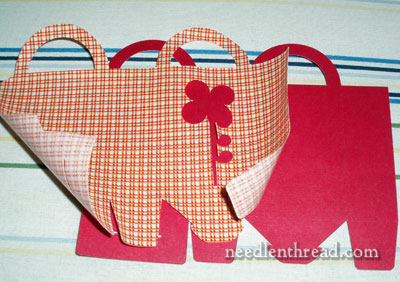
The first order of business was to decide on a box design. I liked this one best – it is more of a “gift bag” than a box, but it has the sturdiness of a box once both fabric and paper are fused together. I cut the plain box, without the flower, first, out of textured card stock, with the card stock turned texture side down on the mat. This would assure that the textured side showed as the outside of the box, where the fabric was removed to reveal the flower design.
Once the plain box was cut, I found a single flower design and positioned it on one side of the box. Now I’m ready to cut my fabric!
I cut out a piece of the Clean Cut interfacing that was about 1″ larger all around than the design I was cutting. I positioned the interfacing on the back of the fabric and ironed it on, using the cotton setting, and holding the iron down for about 8 – 10 seconds. It gets pretty hot! Because I was using a small plaid design, I made sure that I lined up the interfacing square with the plaid design, as best as I could.
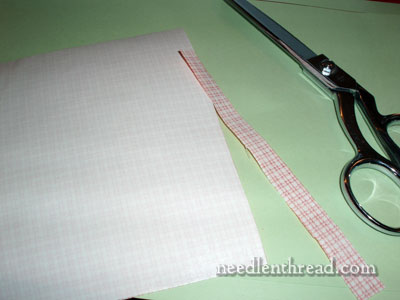
Once the interfacing was totally adhered to the back of the fabric, I trimmed away all the fabric up the straight edge of the interfacing. Incidentally, I cut the interfacing originally with a paper cutter (which worked great!) and later, I realized I could actually trim the fabric to the edge of the interfacing very easily with the same paper cutter. At this point, though, I was using scissors.
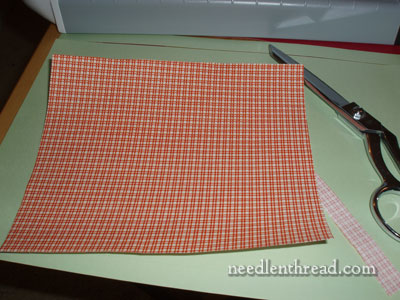
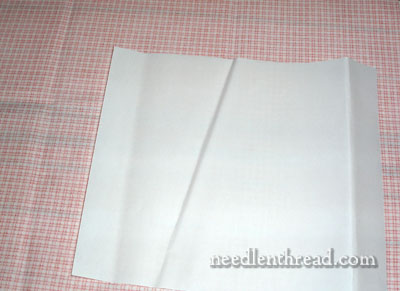
There’s my fabric square. You can see that it’s pretty stiff at this point, as the paper backing is still on the fabric.
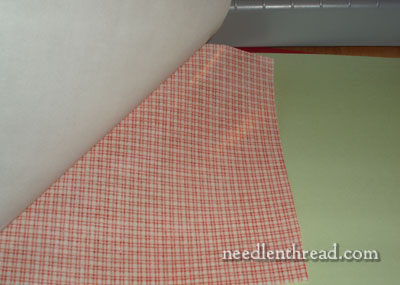
Before putting the fabric on the mat for cutting, the paper backing gets peeled off. See the shine on the back of the fabric? It’s almost like a thin coating of rubbery vinyl, very plastic and rubbery feeling, not sticky, and though it makes the fabric feel thicker, the fabric is still very flexible. That overall coating of plastic is more or less melted to the fabric – you can’t peel it off. (I tried, just out of curiosity!) It becomes, in a sense, part of the fabric. In case you’re wondering, the coating does not alter the look of the fabric; it retains its color and brightness.
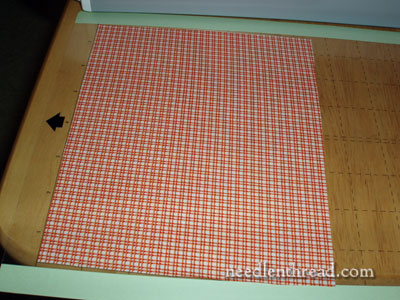
Next, the fabric is smoothed onto the cutting mat, face up. It’s ready to be loaded into the machine and cut.
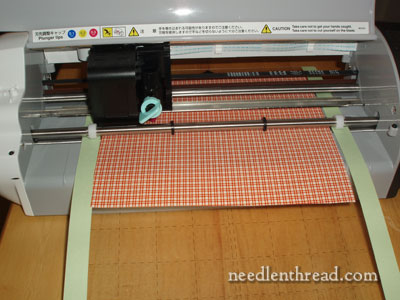
And there’s the machine, doing all the hard work!
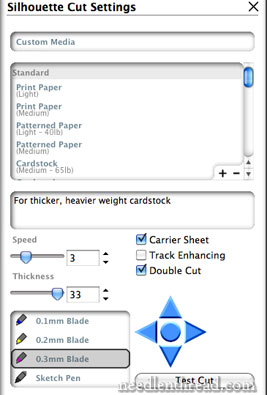
For cutting the fabric, I chose the thickest setting, slowed the speed of the machine down, and chose “double cut” – so the machine passed over the fabric twice and cut it precisely in the same place on both passes. Pretty neat!
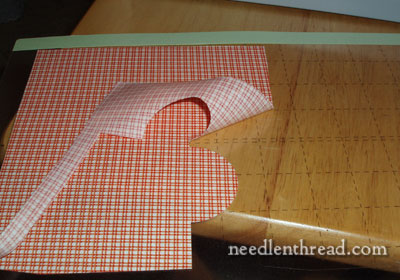
The Moment of Truth – and the Fun Part! How good was the cut? It’s time to peel away the excess fabric from the cut out design.
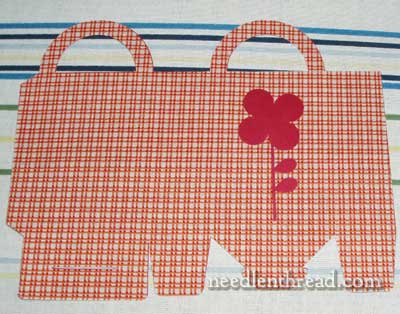
Perfect! You can see the “voided” flower area – that’s where the card stock will show through.
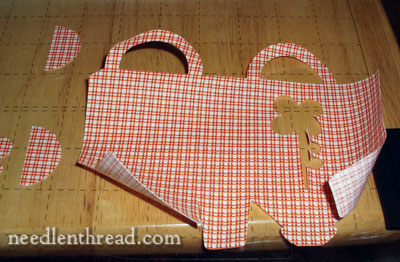
And, not to waste the flower that was cut out, it can be adhered to another project!
Back to the ironing board with the card stock shape and the fabric shape. I have a really ugly ironing board cover.
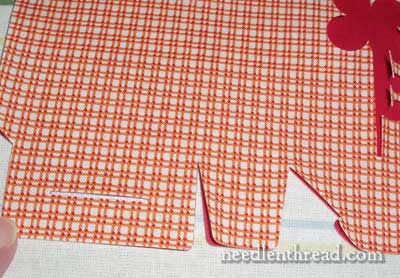
I lined up the fabric (face up) on top of the card stock, matching up all the edges so that the fabric would fuse together along all the same lines as the the card stock shape. Not only are the edges cut out, you see, but all the scoring lines have been cut as well, which makes for very easy folding.
Using the cotton setting, I pressed the iron straight down onto the fabric and card stock and held it for about 3 or 4 seconds. I was careful not to move the iron back and forth, but just set it on top, so that the fabric didn’t shift on the paper.
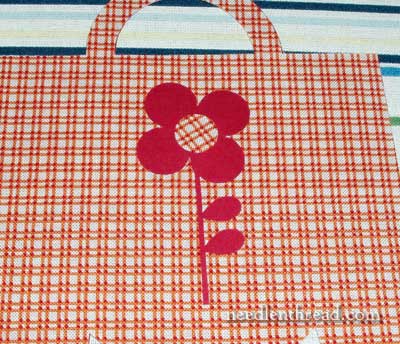
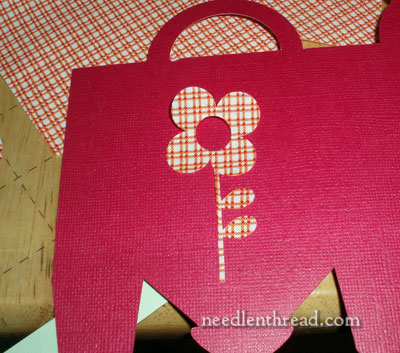
Ah! And of course, I couldn’t forget the big fat dot in the middle of the flower! So there’s the body of the gift box – paper and fabric fused together nice and smoothly – no bumps, no air bubbles. It feels like one product – paper-backed fabric – rather than two fused together elements.
So that’s the beginning of making the little gift bag box. Tomorrow, I’ll show you how I embellished the boxes and then very easily folded them up into their three-dimensional shape.
Funny how writing about it makes it fun, all over again! I can see the Silhouette coming out again very soon, to whip up some other projects. Birthday gifts in advance? Little fabric Easter baskets?!

