Yesterday, we looked at how to embroider a satin stitched dot, which is not as easy a task as it sounds, but once the general layout of the stitches in the top layer of satin stitch is understood, it sure makes it a lot easier to achieve a nice looking satin stitched dot.
One thing I failed to mention in that tutorial – being too caught up in the finished satin stitched top, rather than what was going on underneath – is that the padding of the dot is not actually “satin stitched.” Thanks to Carol-Anne of Threads Across the Web, who followed up the original post with a very informative comment about padding in Japanese embroidery, I decided I better complete the dot tutorial by clarifying the method of padding the dot.
And so, today, in a somewhat reversed order, I’ll show you how I do the padding for a satin stitch dot, and really for any area of satin stitch where I don’t want a layer of padding as thick as the padding on the front of the work, on the back of the work. Make sense? Let me show you!
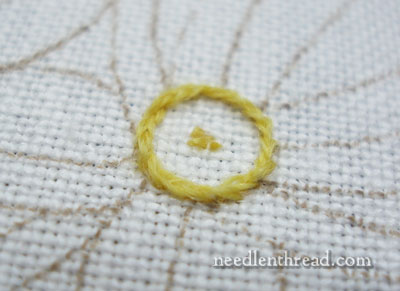
Here we are again, at the beginning of the satin stitched dot. The outline has been split stitched, and what you see inside the middle of the dot are the anchor stitches first used to secure the embroidery thread (in this case, wool).
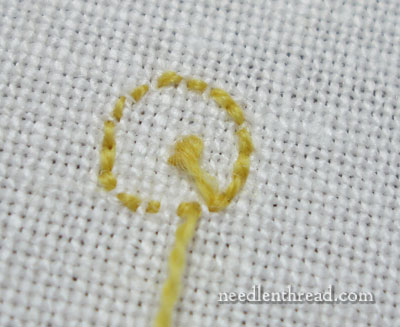
Here you see the back of the dot – where the anchor stitches are in the center, and around the circumference, you can see the back of the split stitch line, which looks pretty much like a backstitch.
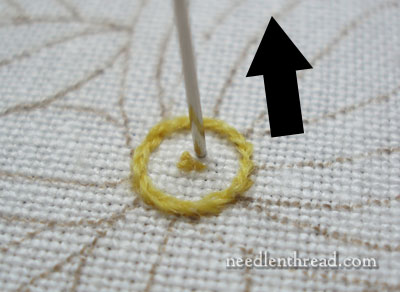
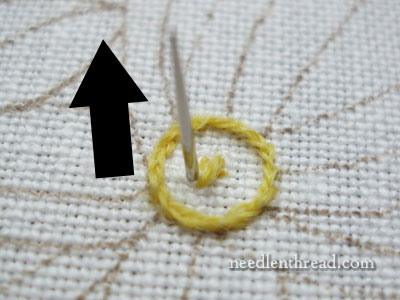
Beginning the padding, I brought my needle to the front of the fabric, just off the center of those anchor stitches, where I will begin my first layer of padding.
Crossing over the top of the anchor stitches, the needle goes down into the fabric, forming the first stitch of the first layer of padding, which is, for all accounts, just a simple straight stitch.
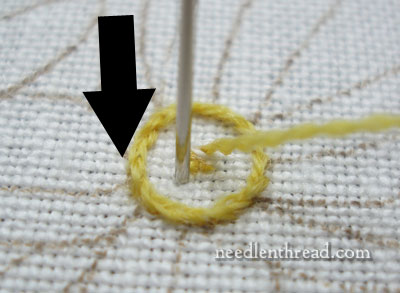
Now it’s time to come back up in the fabric. Instead of moving back to the other side where the original stitch started, I am coming up just to the other side of where I went down into the fabric at the end of the last stitch. In this way, instead of forming a complete satin stitch on the back of the fabric, there’s just a little tiny straight stitch.
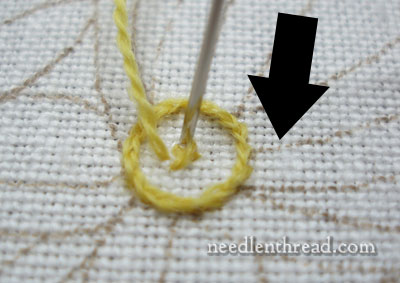
Complete the second stitch of padding by taking it down on the other side, next to where the first stitch started. For the third stitch of padding, you’ll come up next to that stitch. And as the padded area grows bigger, you’ll need to lay more stitches parallel to each other, but you’ll always start the next stitch right next to where you ended the last stitch (except when changing the direction of stitches in the the padded layer).

If this were to be diagrammed, it would look like this. The needle comes up at A, down at B, up at C, down at D, up at E, down at F. On the back, you would see a small straight stitch between B and C, and between D and E.
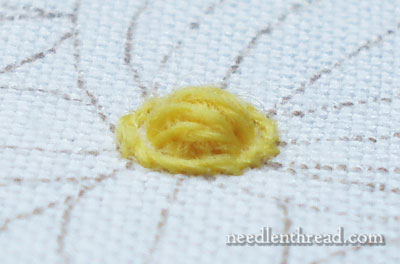
On the top of your fabric, you’re building this up. But you don’t want the same build-up underneath your fabric, so….
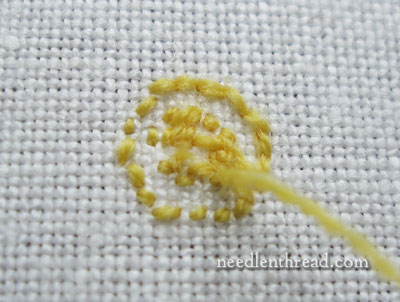
… instead of stitching across the back in satin stitch form, you move over with little tiny straight stitches. The back of the padded area will look like this, more or less, while the top will be nicely mounded up.
For the final satin stitch layer on the top of the dot – worked outside the outline as demonstrated in the satin stitch dot tutorial – you use a satin stitch that crosses across the back, too. This way, you end up with only one layer of satin stitch on the back.
Now, you might be tempted to ask – and I would be, too – why the final layer of stitches that finishes the dot isn’t stitched in the same manner as the padding stitches? Wouldn’t it, after all, save you some thread? I suppose you could stitch it in the same manner if you really wished to, but in fact, the tension on the stitch will be different, and the tiny straight stitch between the top layer of satin stitch as you move to the side will slightly skew the way the stitch lies. That tension across the back of the satin stitched area helps to hold the stitches and make them lie nicely next to each other.
Now, you might even go farther and say that, when laying stitches for laid work, you move sideways with each laid stitch just like you do with the padding stitches demonstrated above, so what’s the difference? To that, I say…. laid work is different! Over the laid work (you can see this lattice work video to see better what I’m talking about), you work other stitches to help hold the laid stitches in place. Not so with satin stitch! Satin stitch stands on its own, in all its smooth and satiny glory, without the aid of other stitches to hold it in place. When there are other stitches holding the satin stitch in place, it’s no longer satin stitch – it’s laid work.
So that’s a little reverse-order instruction on padding satin stitches! I hope you find it helpful. I’ll link to this post from the satin stitched dot tutorial, too, so that there’s a little less confusion from my convoluted approach to tutorials! (Gee, don’t you hope I don’t do this on a regular basis with my students in the classroom?!)
Thanks again, Carol-Anne! You’re a dear!

