The satin stitch is one of my favorite filling stitches for small areas and narrow elements in embroidery. While it is absolutely a gorgeous stitch worked in silk, really, in any thread, it’s beautiful.
Perhaps the most difficult element to stitch well in satin stitch is a circle or larger dot. A wee tiny dot in satin stitch isn’t so difficult – it’s really just a matter of stitching two or three tiny stitches the same size and two slightly smaller stitches on each side of those, to give the look of a dot, without it actually being a perfect circle. But those are wee tiny dots (an 1/8″ or smaller). But what about larger dots? They’re a little more difficult, true, but not that hard once you get the hang of them. Here, I’d like to show you how I satin stitch larger dots or circular elements.
By larger dots, I’m talking about a circular area that’s anywhere from 1/4″ to 1/2″ or maybe slightly little larger. I don’t personally like satin stitching large things (anything over about an inch at its farthest points), because the larger the area, the more likely the stitches will loosen and look messy.
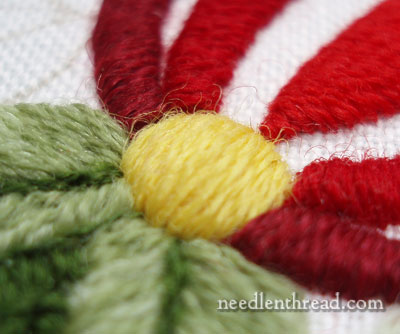
In this tutorial, I’m satin stitching the dots on each side of the pomegranate on the Wool Pomegranate Corners project.
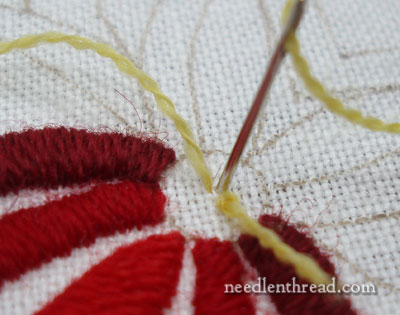
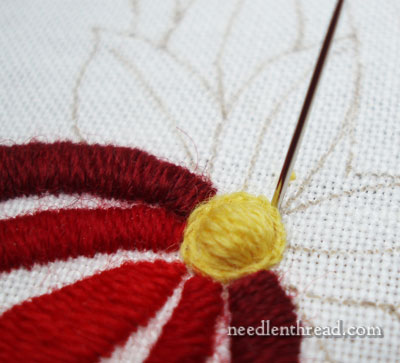
Begin in the center of the dot with a waste knot, stitching about three tiny anchor stitches to hold the thread. Then cut off the waste knot.

From the center anchor stitches, move to the outside edge and split stitch the outline of the dot.
Once the outline is stitched, jump back into the center and work some satin stitches over the anchor stitches – just a small area of about three little satin stitches.

They don’t have to be perfect. After all, you’ll be covering them up – a LOT.

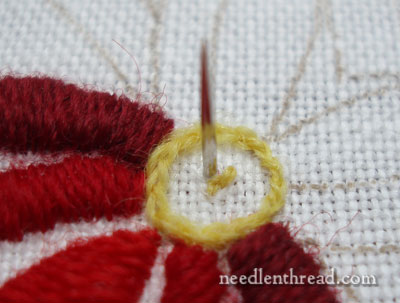
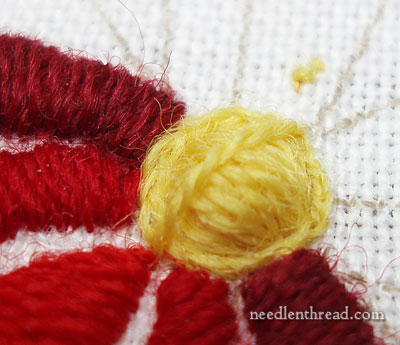
Then stitch some perpendicular satin stitches over the previous layer, filling up the middle of the dot a little more. Three stitches should still do it at this point.
Then, on top of those and perpendicular to them, add another layer. Continue in this manner, adding one layer over the next and increasing the amount of stitches to make the layer, each layer perpendicular to the one before. Again, the stitches here don’t have to be perfect – the idea is to add enough padding to give the middle of your dot some lift.
Keep going, keep going! And eventually, you will end up with the middle of your split stitch outline filled with padding that bulges up in a little mound. Now, it’s important to make sure that your last layer of padding (which will be just below your final layer of satin stitching) runs perpendicular to the direction of your top layer of satin stitching. Gauge this as you get close to filling up the whole inside of the dot.
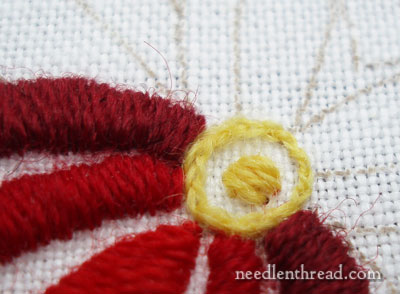
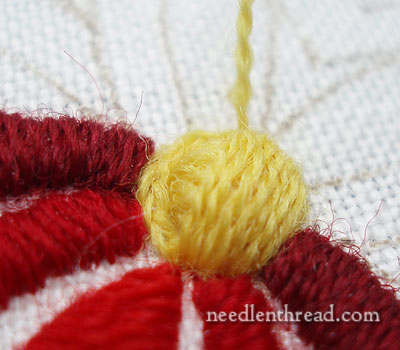
Once the inside is full, it’s time to start satin stitching the top layer. Switch your thread at this point to a fresh thread. The final product will look better if it is not stitched with a worn thread.
Bring your needle up just outside the split stitch outline, centered at the top or bottom edge of the circle.
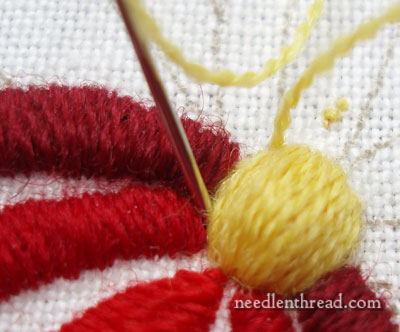
Take the needle down directly across from this, to make your first satin stitch. From this point, you will work from this center stitch outward toward one side of the dot, and then go back to the center, and work outward toward the other side.
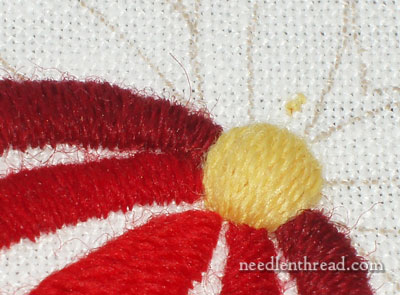
As you work towards the edge of the dot, the stitches will hug the padding, and you’ll notice on the right side of the dot in the photo above (the side that is satin stitched) that the last stitch is not that much shorter than the stitch next to it. Don’t work satin stitches all the way to the edge, but just far enough that the last stitch covers enough of the padding and makes the edge look round.
You can see in the photo above, as I take the last stitch on the left side of the dot, that the stitch itself is not that much shorter than those closer to the center of the dot. It’s the padding that is serving to round out the dot.
If you don’t want your dot to sit so high in the center, you can simply outline the dot in split stitch (which I think is really essential for a good satin stitched dot), pad with just one layer inside (or none) and stitch in the same manner, to the point where your last stitch covers the outline with its length, rather than trying to stitch smaller and smaller towards the edge (which will usually only result in a wacky kind of oblong, football shape).
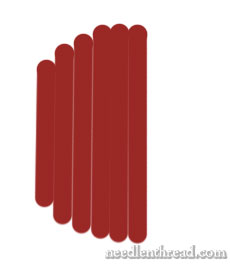
If you were to diagram the stitch layout, it might look something like this:
The split stitch outline will help “finish” the circle. When the circle is padded (as in the photos in this tutorials), the threads are going to wrap around and hug that padding, to round out the shape. If the circle is not padded, but just outlined with split stitch, the split stitch outline underneath will finish rounding out the shape. This doesn’t mean that you want the split stitch to show – but you want the length of that last satin stitch to lie just on top of the split stitch curve. Sometimes, the very outside edge of the split stitch on the curve might peek out a little bit, but this is better than working satin stitches that decrease in size so much that the circle looks squat, or a point forms on the edge of the circle.
The finished dot will look plump and round, if padded, and will look flat and smooth, if not padded.

At an angle, you can see that the dot sits up above the surrounding stitched areas (which, incidentally, are also padded). It’s a nice round mound.
So there’s one way to achieve a nice, rounded satin stitched dot. What about you? How do you achieve a round satin stitch dot? Any stitching secrets you can share with the rest of us? Feel free to leave a comment!

