“Prick and Pounce” is a method of transferring an embroidery design by using a pattern that is pricked with tiny holes, placed on the fabric, and then pounced all over with a powder that filters into the tiny holes, leaving tiny dots on the fabric. Nowadays, the prick-and-pounce method of embroidery design transfer gets very little attention in the everyday embroidery world. Perhaps it’s because we have so many other design transfer methods available – from iron-ons to water-soluble transfer materials to “disappearing” pens – that we tend to think prick-and-pounce transferring is a bit passé. If not that, it may simply seem too labor-intensive or too messy to bother with. And so, we don’t.
But this seldom-used method of transferring an embroidery design has been around for a long time, and it’s still used, for good reason: it’s reliable.
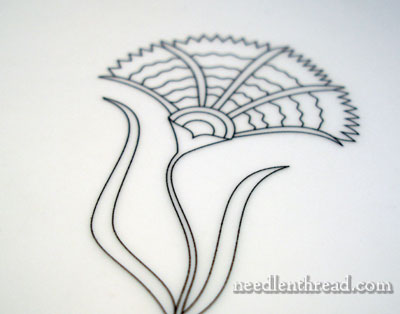
Now, this is a wee little embroidery project – the design is about 3″ high. On such a small project, I would normally trace the design, but using this method will give me a permanent pounce pattern that I can re-use as often as I need to. Once the pattern is made, it’s really just a matter of a quick pouncing and tracing, and it’s done – it’s really not as time-consuming a process as it seems.
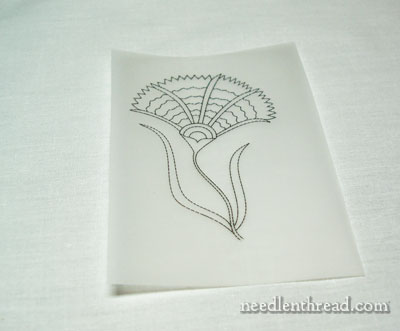
So you start with your pattern. It’s best to have the pattern traced or printed on vellum or a heavier tracing paper, so that the paper doesn’t tear when you prick the smaller detailed parts of the pattern. A heavier tracing paper is easier to work with and will result in a pattern that lasts, whereas a lighter tissue-type paper won’t last as long.
I printed my pattern straight from my computer onto the vellum.
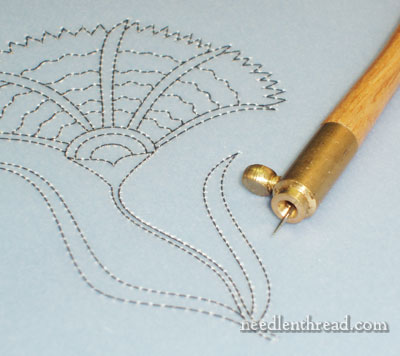
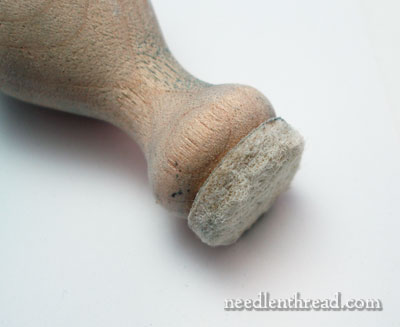
For the pricking part of the pattern, I used the wooden shaft that holds a tambour needle, but instead of a tambour needle, I’ve got a tiny eyeless needle (a tattoo needle, to be precise) mounted at the tip. If you don’t have these tools lying about, never fear! A #10 embroidery needle works just as well, and you can hold it in your fingers to prick the pattern, or you can push the eye end of the needle into a cork, which will give you something more substantial to hold onto.
Prick the pattern, following all the lines and spacing your holes about 1/16″ apart. Using a very small needle (like a #10) makes this easy, and keeping the dots close together and small ensures that you can transfer even the most intricate details of your design.
When I prick the pattern that I’m using, I always make sure that I end up with a hole at the beginning and end of every line and on every pointed part of the pattern. Anywhere a line terminates or intersects with another line, make sure you have a hole. You can always prick the ends of lines and the intersections first, then go back and pierce along the line between those points, spacing your holes to fit between the terminal points. Once you’ve pricked a pattern a few times, it becomes really easy to eyeball the spacing.
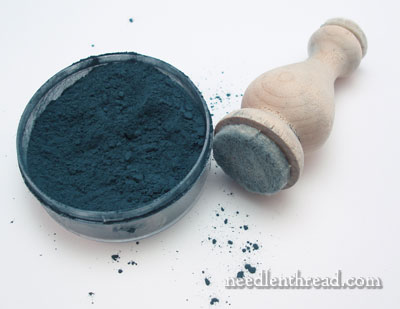
Now for the pounce. Pounce (dark pounce, like the stuff above) is simply powdered charcoal. It used to be sold (for a fairly pretty penny, for this small amount!), but it’s hard to find these days. Tanja Berlin sells charcoal pounce, which she makes herself. You can also find pounce substitutes out there – especially in white, which I’ve seen at quilting stores. But dark charcoal pounce is the traditional powder of choice for pouncing a design, and your best bet, if you’re looking for it, is to get it from Tanja Berlin, or get brave and make your own. (I’m going to try that one of these days!)
In addition to the powder, you’ll need something to pounce the powder onto the pattern with. There are tools for this, like the one pictured above, but you don’t really need a special tool. You can take a piece of felt and roll it up tight, secure it with a rubber band, and use that just as easily.
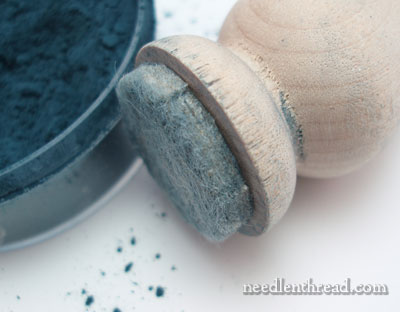
The pouncing tool I’m using is a wooden piece with thick carpet-like felt circles attached to each end. I use the larger circle of felt for dark pounce…
… and the smaller circle on the other end for light pounce. Light pounce is great for transferring patterns on dark fabric. It’s a white powder made from cuttlefish bone.
When it comes to positioning your pattern on the fabric, it is helpful to have a center line drawn vertically and horizontally on the pattern, and similar lines basted onto your fabric so that you can center your design accurately if you need to. For this little design, I’m transferring it onto a piece of white muslin and I just estimated the center.
To hold the pattern in place, you can pin it to the fabric, or you can weight the corners with something. If you’re transferring your design on fabric that has already been mounted in a frame, strong magnets work well to hold the paper in place. Since this piece is so small, I just used my fingers. I don’t advise using tape, because you want to be able to lift the pattern straight up off the fabric, without fiddling too much with it. The point is, you want to secure the pattern so it doesn’t shift, but it shouldn’t be so secure that you can’t easily lift it off.
The right side of the pattern goes up. This is the side that’s smooth (the back side will be rough, from the pricking of the pattern).
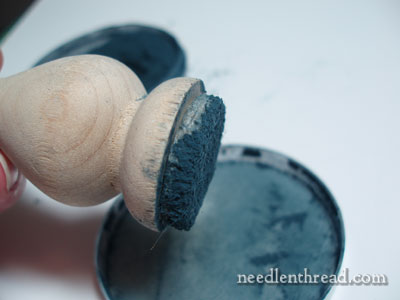
Now for the fun part. Place the felt in the pounce powder so that it is coated with powder.
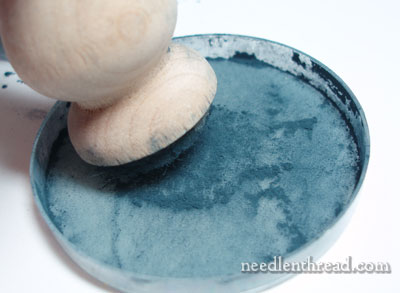
I use the lid of the pounce container to lightly tap off some of the powder. You don’t need to use tons of the stuff – just a light coating.
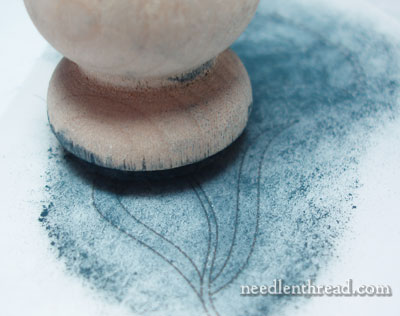
Now, rub the felt over the pattern, or you can lightly “pounce” it, with small taps over the whole pattern. Don’t go wild here, banging the felt all over the pattern – it’s better to go lightly than to overdo it.
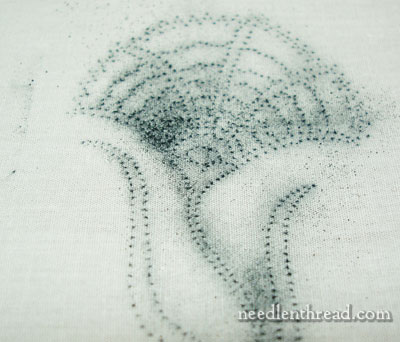
I overdid it on the left part of the flower there – that’s where my initial contact was made with the paper. Now, doesn’t that just look grandly messy? It’s not as bad as it looks!
At this point, you can blow on the surface of the fabric and remove some of that excess powder. I like to do that outside, though, or over the trash can, so I leave it just like this and go ahead and trace in the design.
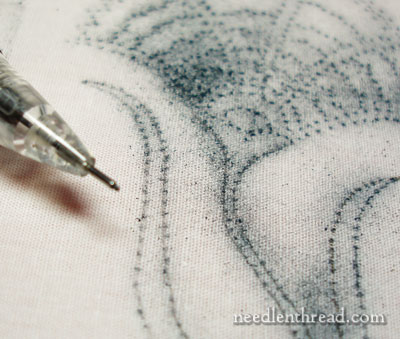
Using a mechanical pencil (or you could use a micron art pen, if you want your lines to be permanent and very visible – and if you intend to cover them completely with the embroidery!), draw over the dots.
If you’re working a large design and it will be mounted for a long time on a slate frame or stretch bars, you’ll want some real permanence to the design. You don’t want the pencil marks to rub away, for example – and you definitely don’t want to use one of those disappearing or water-soluble pens for something like this. On any long-term, larger project that I’m not going to wash, instead of using a pencil, I use watercolor paint and a tiny brush to draw the lines in. You can see the results of this on the Agnus Dei project.
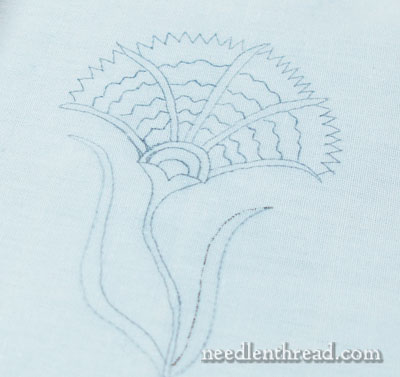
Then, when you’re finished drawing over the dots, it’s time to get rid of the excess pounce. If you’ve mounted your work in a frame before transferring the pattern, it’s really super-easy to get rid of the pounce. Just click the back of your stretched fabric a few times with your finger, and it will all bounce off. If you don’t have a dedicated space for this messy work, you might step outside to do that! I transferred the above design on the fabric not mounted in the frame, so I just stepped outside and gave the fabric a few good shakes. The powder was gone. If there’s any residue, you can use a clean soft brush and gently brush the residue away. Don’t use your hands to smudge it away. If you don’t have a brush, you can even use a crumpled paper towel to lightly brush it off.
All in all, though, the pounce powder blows or flicks away quite easily. A good hard shake or two with loose fabric should do it, or a good flick on the back of mounted fabric will make it disappear.
Now, you may (rightly) be asking – why all the fuss, when you could just trace the design on a light box or a sunny window?
The biggest differences between transferring with prick and pounce and transferring by tracing – whether using a light box, a window, or carbon transfer – are two. The first: you don’t have to guess at all. Often, when tracing via light box or sunny window, especially in very detailed areas of the design, you can’t always see the design lines clearly and you end up having to guess where tiny lines go. The second: you don’t have to deal with pattern or fabric shifting, which often happens in tracing if you’re not careful about the set-up (and sometimes, even if you are). With prick and pounce – especially when your work is already mounted on the frame and you’ve pinned the pattern onto the fabric – there’s no worry about any shifting going on. It is a sure-fire way to transfer a design, even the most intricate design, accurately every time.
So that’s my little design transfer using the prick and pounce method. The focus of the little flower, by the way, is an exploration of satin stitch. We’ll look at that later on!
Any tips or comments on prick-and-pounce design transfer? Have your say below!

