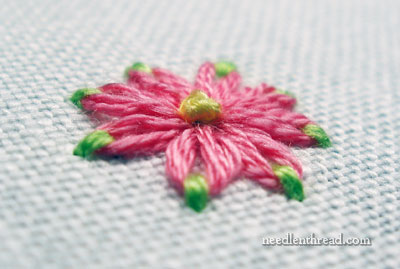
It was one of those e-mails: “Can you look at this and tell me how it was done?” It was a picture of a daisy embroidered in detached chain stitch (lazy daisy stitch), only there was a difference – the anchor stitches on all the petals were worked in a different color from the petals. It was really cute!
My first thought was that this is an easy technique. Use two threads of different colors, stitch the loops for the petals with one color, and anchor them with another.
But as soon as that thought flitted through my head, it was followed by another one, suggesting a different method. I’ll show you both methods in this two-part tutorial, one of which is decidedly easier than the other!
The first method corresponds with my first reaction to seeing the picture. We’ll stitch each petal and anchor stitch using two different colors of floss simultaneously.
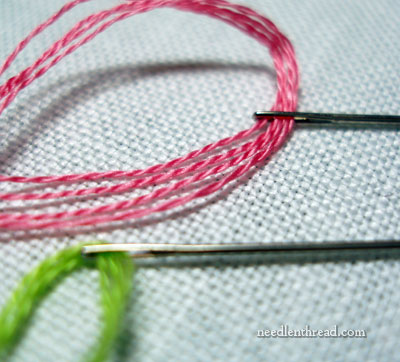
So, thread up two needles with two colors of thread. I’m using a bright pink and a bright green, since the contrast works well for photos. But you can use whatever colors float your boat! I’m using regular stranded cotton, four strands in each needle. The needle is a #7 crewel needle.
Anchor your threads in whatever way you like to anchor them. I started with two little stab stitches with each thread color (hence the tiny green stitch on the front of the fabric), but in retrospect, I think this would be easier if you use a waste knot from about three inches away.
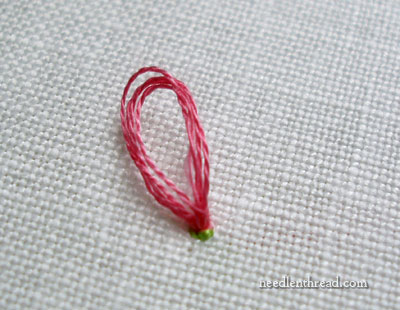
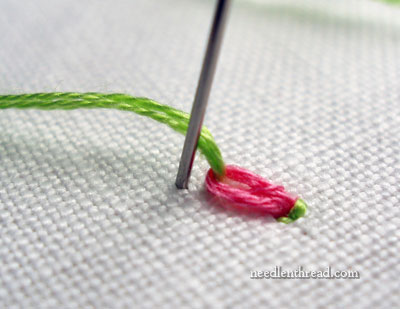
Once your threads are anchored, take the petal color and begin a daisy stitch as you normally would, coming up in the fabric and going down in the same hole, but leave a good sized loop on the front of your fabric.
Bring your second color up inside the loop, coming up at the point where you want the petal to be anchored. Where you come up will determine the length of the petal.
Once the anchor thread is pulled through, you can pull on the petal thread from below and tighten your petal loop up. Don’t pull too hard – just enough to bring the loop snug around the anchor thread.
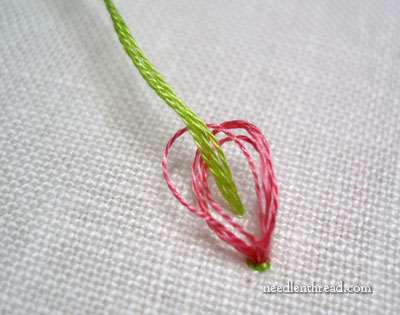
You can see that the petal is snug agains the anchor thread here. When you make your anchor stitch over the loop, feel free to take it down a little ways away from the end of the petal. After all, you want the anchor stitch to be quite noticeable. (Otherwise, you wouldn’t be going through all this to make a daisy stitch!)
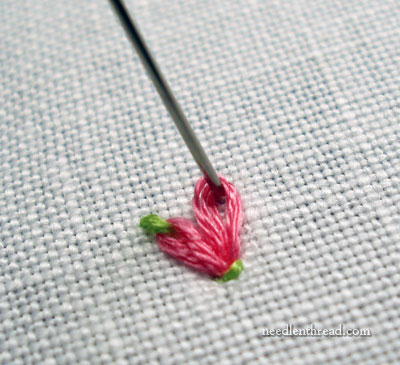
Make each subsequent loop around your daisy in the same fashion, first bringing up the petal thread and making a loop by taking the thread down into the same hole, and then bringing up your anchor thread and stitching over the loop.
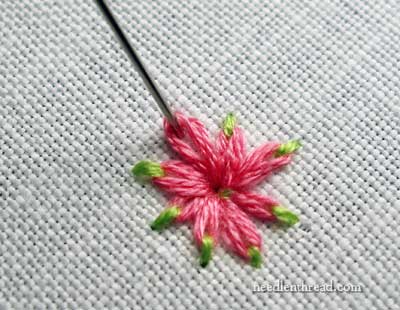
Work around the daisy until you get to your last stitch. Hopefully, your daisy will not turn out as wonky as this one!
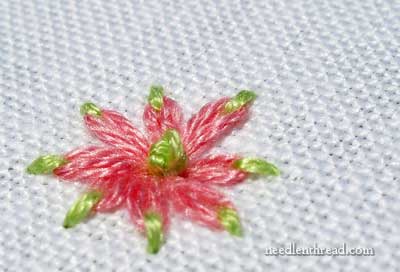
When you’re finished working all the petals, come up in the center and top the thing off with a French knot. You can do this in the same color as your anchor stitches, or you can finish off your anchor stitch thread, and use a different color. I just stuck with the green.
So that’s one method of making a daisy-stitched daisy with two colors.
Tomorrow, I’ll show you the other method, and you’ll probably be able to figure out on your own which way is easier! (Um… hint: tomorrow’s way is a lot easier!)
See you then!
Questions? Comments? Suggestions? Feel free to leave a comment below!

