Yesterday, we looked at one method of working daisy stitch in two colors, with petals in one color and anchor stitches at the tip of the petals in a different color. Today, let’s look at a different method of achieving the same result – and a much easier method, to boot!
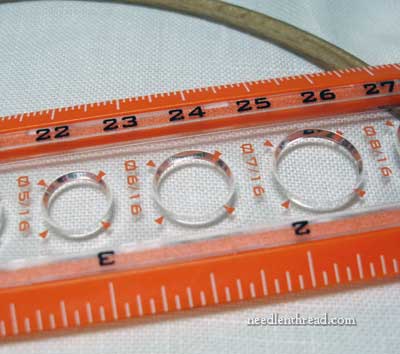
To ensure that this attempt came out at least a bit even on the first go, I used a circle template and marked on the fabric 8 equal points around the circle. You don’t have to do this…. and in fact, a flower stitched with detached chain stitch (daisy stitch) can have any number of petals, equally spaced or not. It’s up to you, and the look you want.

But I wanted to work out something that was relatively neat and even for this little tutorial, so I put the marks on the fabric, using a pencil.
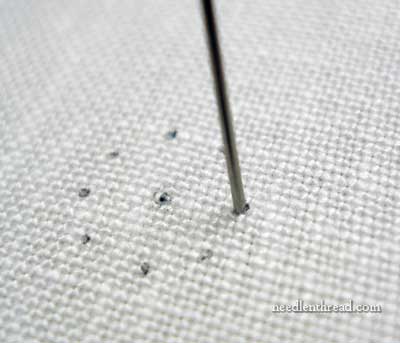
I used the same materials that I used in yesterday’s demonstration – 4 strands of stranded cotton floss, in pink and in green for contrast, threaded into a size 7 crewel (embroidery) needle. I threaded the green floss first, and brought my needle up at one of the small dots.

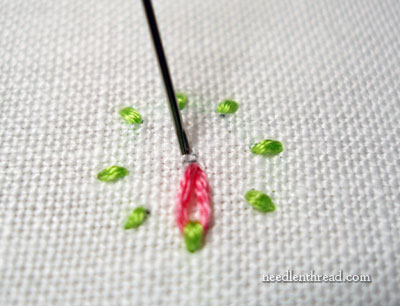
I took my needle down a short distance from where I emerged, to make a small straight stitch. At this point, you do want a stitch – this isn’t just a tiny stab stitch. You want the stitch large enough to be able to pass your needle underneath it easily, plus you want the stitch to be visible, in order for this technique to be effective.
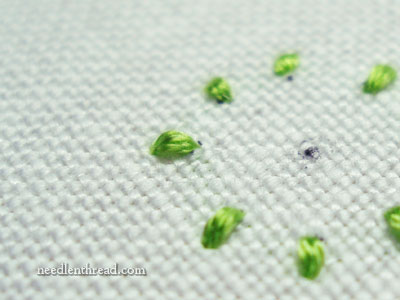
I worked the small stitches all the way around the circle, coming up into the dots I’d drawn and taking the needle down to the outside of the circle, a stitch length away.
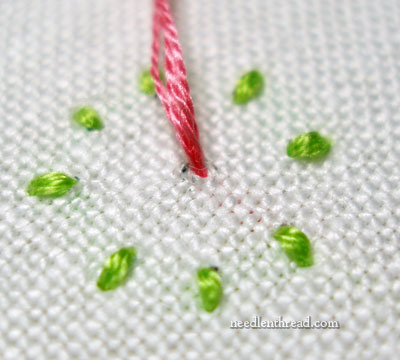
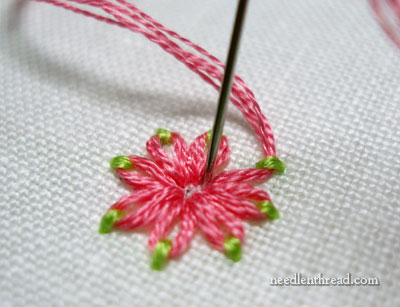
Time to thread up the second color (pink). Bring the thread up in the center, just off to the side of the center (not right smack-dab in the center).

Take the needle underneath the small stitch opposite where you came up.
Then take the needle back down into the fabric in the same hole that it came up in. Move to the opposite side of this stitch to work the next stitch, again coming up just to other the side of the center point.
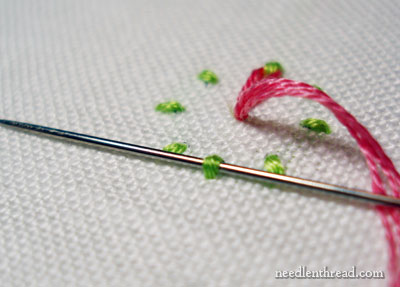
Again, slide the needle underneath the small stitch, making sure you don’t pick up any fabric or split the stitch.
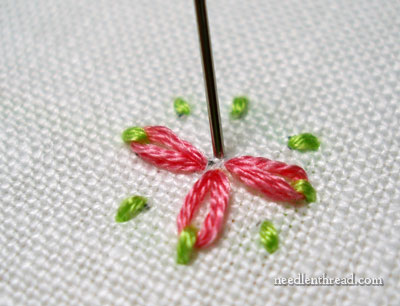
Continue doing this around the whole circle, always coming up just to the side of the center point (not directly in the center).
The reason I’m not going down and coming up in the direct center of the flower is an obvious one: if you end up coming up and down in the same hole, the previous stitch is going to be unstitched! So that space in the center of the flower is necessary.
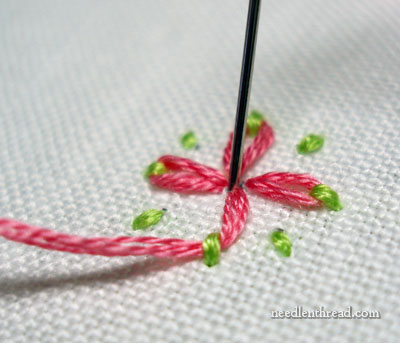
The final stitch goes in.

This technique is Much Easier than the techique shown yesterday! The main reason for its ease is the fact that you aren’t required to work both threads at the same time, so you don’t have to keep checking the back of your work to avoid tangling the two working threads.
So there you have it! Two methods of working daisy stitch in two colors! If you decide to use the technique for your stitching, you can do it whichever way is easiest for you.
What think you? Cute, isn’t it? Any particular suggestions for use? Or other suggestions or questions regarding method of stitching? Feel free to leave a comment!

