For me, the question of the Ultimate Design Transfer Technique for embroiderers is an ever-present one. I’ve discussed in-depth the various hand embroidery design transfer options that are available and often used, but you know, I’ve never found the Absolutely Perfect Design Transfer Method, and I don’t think I ever will.
That being said, I did manage transferring a couple of designs this week, and one of them is this one from the “Royal Persian Blossom” collection from Talliaferro designs.
During the transfer process (I used the prick-and-pounce method), I learned a couple little lessons that I thought I’d share with you.
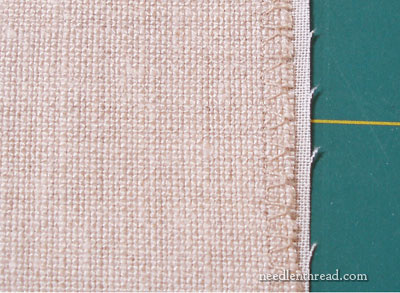
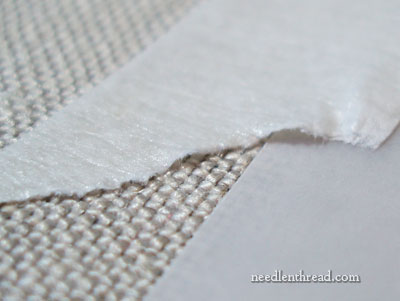
The ground fabric I’m using is Strathaven linen, in natural, and I’ve backed the linen with muslin.
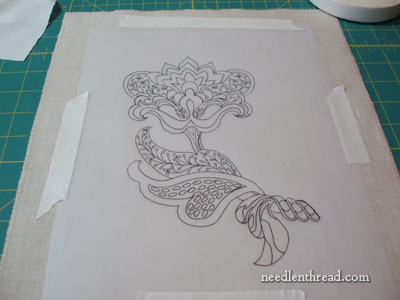
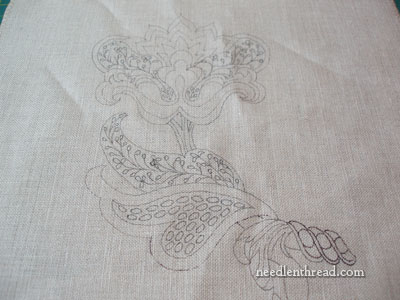
Here’s the design, traced onto a rather thickish tracing paper (it’s sold as “vellum”). The design I’m doing is the “sprig” from the Royal Persian Blossom collection, so it’s not the whole big design. The sprig fits well on a 9″ x 11″ Evertite frame.
I used a low-tack masking tape to hold the design in place on the fabric. This tape is sold usually with drafting supplies, and it’s called “drafting tape” – it’s not as sticky as regular masking tape, and it releases easily from paper and other stuff. Normally, with smaller designs that I’m going to use pounce powder on, I just use my fingers to hold the design in place. The “texture” on the back of the paper (from pricking the paper) also helps keep the design in place. But on this larger design, I wanted a little more security, so I used the low-tack masking tape.
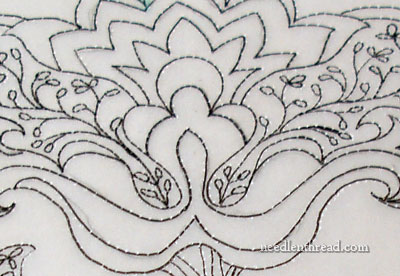
One thing that I did with the design when I traced it (before pricking it) was to draw in the lines that indicate a change of shade in the stitching. Sometimes, I draw these guidelines on my fabric as I go, if I need them. But for this, I thought I’d go ahead and transfer them onto the fabric with the rest of the design.
Lesson: Lots of lines like this, crowded into a smaller space, can become confusing when you’re transferring your pattern. It’s probably better to transfer the design outline without them, and then draw them in if you want them. In any case, if you do transfer the guidelines in when you do your design transfer, keep your pattern close at hand while connecting the pounce dots, so that you can refer to it if the dotted lines of pounce become confusing.

To connect the pounce dots, my intention was to use the Martha Stewart “moonstone” colored permanent ink drawing pen (in size 0.5). I had several pens sitting on my drafting table, among all my supplies, and honestly, if you must know, I was surrounded by a variety of clutter – from pens, to threads, to scissors, pins, needles, you name it. (Sound familiar?)
Lesson: adopting the “mise en place” rule from cooking (everything in its place!) is a good idea, before you begin working on something in particular like a design transfer. I picked up the pen that I thought was the pen I wanted and started drawing in the lines. Though I thought to myself, “Wow. This is really coming out dark,” it was a while before I realized I was using the wrong pen!
You can see the difference in the color of the lines on the right of the photo (much darker) compared to the ones on the left (much finer and lighter).
I would say “Live and Learn” at this point, but golly, I can’t tell you how many times I do stupid things like this! You’d think I’d already lived and learned something!
But – Live and Learn!
I think I should embroider a sign that says “mise en place” and hang it in my workroom…
(It probably won’t make a difference…)
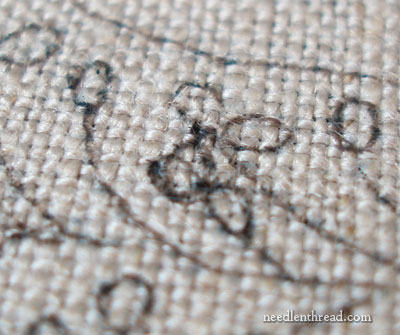
When pricking the tracing of the design, I pricked all the teeeeeeny tiny ovals that make up the petals of all the teeny tiny buds and flowers that are crammed into a few of the elements. Now, I love these little buds and flowers – I suspect I will enjoy stitching them – but you can see that I made a blurble of a mistake when connecting the pounce dots. I couldn’t quite figure out which oval was which.
Lesson: When doing tiny elements like this that are very simple (they’re just tiny ovals at the tips of curved stem lines) prick in the stem lines, but don’t bother pricking in the ovals. These can be drawn easily enough on top of the stem lines without the aid of pounce, once the stem lines are drawn in.
The design transferred ok in the end, and I’m ready to start stitching on this piece. I’ll be posting regular updates of stitching progress on this over in the Ask & Share section, under Royal Persian Blossom SAL. If you’re stitching any of the Royal Persian Blossom designs, you’re welcome to join me! We can commiserate – or just support each other enthusiastically as we make progress!
Well. It was fun. It’s always fun to learn little lessons along the way, isn’t it?

