As promised, here’s the beginning of step-by-step stitching instructions for the goldwork & silk Tudor-style rose.
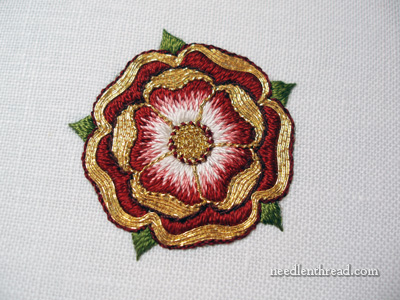
If you’re just checking in on this and you want to stitch the project, you can download the embroidery pattern for the Tudor-style rose and use whatever size you want to work. My original size was the small 1.5″ round rose, so the stitching that I’m doing in this step-by-step tutorial fits in that size piece. If you work a larger sized rose, you’ll need to adjust your stitching to fit the size of your design.
These instructions are simply to show you how I went about stitching this piece. You can certainly customize yours if you wish – switch up the colors however you wish, or select different types of threads, etc.
These are the materials I used for my version:
Au Ver a Soie Silks:
Soie de Paris, in four colors: 2134 (green – or you can use 2214, which is a bit darker); 4624 (dark red); 2914 (pink / rose); & creme
Soie 100/3, color #518
Soie Gobelins, color #2646
Metal Threads
Gold Tambour Thread #7
Check Thread #7
Pearl Purl, size Super
Gilt Wire Check #10
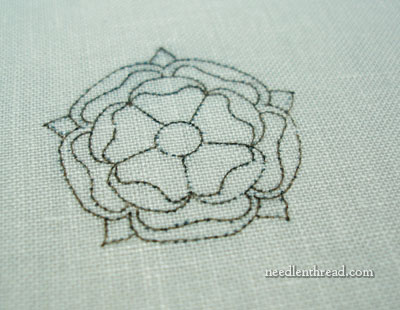
First step: transfer your design to your fabric of choice. You can use whatever embroidery transfer method you prefer, and whatever ground fabric you prefer, but the ground fabric should be sturdy enough to accommodate metal thread embroidery, if you’re using metal threads.
I used a nice linen woven specifically for embroidery, called Alabaster Angel by Legacy Linen. You can find this linen at a number of fine embroidery shops online. I usually order from Hedgehog Handworks, as I get great service and the price is the same as anywhere else. I lined my linen with a good quality white muslin.
To transfer my design, I used the prick & pounce method. This way, I had a pricked “template” ready for repeat transfers (I’ll be doing five more of these in the days to come). After applying the pounce powder, I used a micron art pen to “connect the dots.” Easy-peasy, and it worked really well.
When working a combination of silk embroidery and goldwork, it’s normal to do all the silk embroidery first, so that your silk threads don’t catch on any metal threads while you’re stitching.
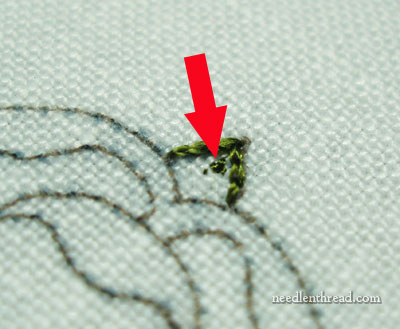
The leaves are the first thing to tackle. I’m using Soie de Paris #2134, a filament silk with a soft twist. It’s a beautiful thread, and great for this type of embroidery.
For all of the silk embroidery on this piece, you’ll want to anchor your thread with small tacking stitches in an area that will be covered up with other stitches. For the leaf, I made my tacking stitches right in the middle. Knot your thread, go down into the fabric from the top of your work, make three tiny stab stitches to anchor your thread, and then cut the knot off. Your thread will be secure.
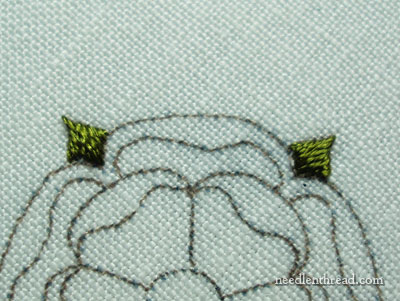
To stitch the leaves on this design, please refer to this tutorial on stitching to a point with satin stitch. I used these leaves to demonstrate stitching to a sharp point with satin stitch, so you’ll want to follow those directions if you want to stitch the leaves the same way.
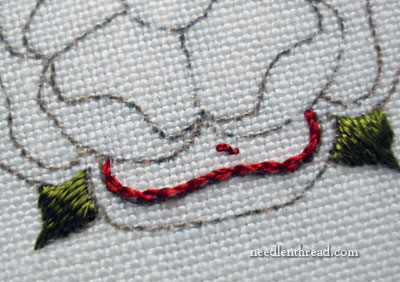
Once all five leaves are finished, you’ll move on to the inside of the outside petals. This part is stitched in satin stitch, in dark red Soie de Paris, #4624. Begin with a split stitch line only on the top edge of the inside of the petal (refer to the line shown in the photo above). Do not split stitch the inside edge of the petal. I stitched my split stitch line just inside the pattern line, instead of right on it, because I want my satin stitch to end exactly on the pattern line.
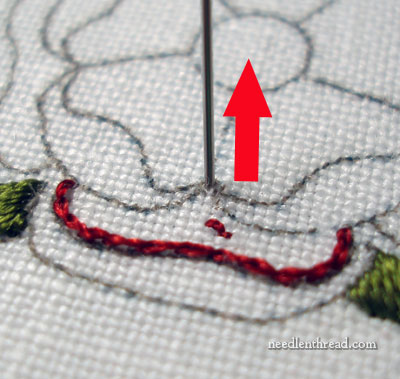
After split stitching along that outside edge of the petal, it’s time to satin stitch the petal. Bring your needle up in the middle of the inside edge of the petal, in the little “valley” at the intersection of the inside petals of the flower. For this satin stitching, you’ll always bring your needle up on the inside edge of the petal and take the needle and thread down over the split stitch line.
As you take your needle into the fabric over the split stitch line, make sure you’re on the design line, not outside it, and not inside it. Just work right on the line, up against your split stitch outline, and if you need to, slant your needle underneath the split stitch a tiny bit, pointing towards the middle of the flower. This helps lift the outside of this petal and creates a nice smooth edge. The lifting of this edge also helps create a little illusion of a darker color on the outside of the petal, due to the shadow created by the satin stitch.

Satin stitch from the middle to one end of the petal, and then go back to the middle and stitch to the other end. For these outside petals, there is no angle. You’re just satin stitching straight across the petal, without any slant.

You can see here that the stitches aren’t slanted.
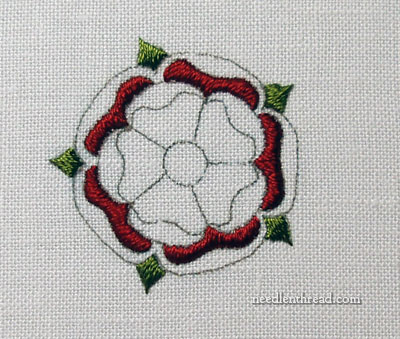
Continue with the other five outside petals in the same exact way.
Remember when working the satin stitch that you want your stitches lying parallel to each other, right next to each other, not overlapping, but not far enough away to leave a space. Sometimes, it takes a little doing to get the spacing correct on satin stitch, but take your time and work it slowly. With a little practice, you’ll find it pretty easy to make a nice satin stitch!
Another point about satin stitch – some threads just make a better satin stitch. Soie de Paris happens to make a Really Nice satin stitch! But you might be working with different threads. If you’re working with stranded cotton, I suggest working the satin stitch in one strand of floss, even if you’re working a larger version of the flower. One strand always makes a better finish on satin stitch.
If you’re working a larger version of the design – say you’ve enlarged the design to 3″ or more – you’ll actually have plenty of room in these outside petals to do some long and short stitch and use more than one color. Doing so will give the petals some nice depth. The 1.5″ version is too small to manage two rows of stitching with this particular thread, but larger versions should accommodate two more more rows more easily.
Next, I’ll show you the inside of the inside petals of the flower and then we’ll tackle the goldwork!
If you have any questions or comments, feel free to leave them below!

