This is the 7th and final part to this series of tutorials on the Goldwork & Silk Tudor-style Rose project. If you’re just joining in on this series, you’ll find the index of all the previous stages of this embroidery project listed under Tips & Techniques, in the first section titled Hand Embroidery Lessons & Step-by-Step Projects.
Let’s look at the last step of the project, which involves outlining the inner circle of the flower with pearl purl and filling inside of the circle with Gilt Wire Check #10, which is a check purl in a fairly small size. I’ve already covered today’s particular goldwork techniques elsewhere on Needle ‘n Thread, so we’ll look at them briefly here, with links to other articles if you wish to read further.
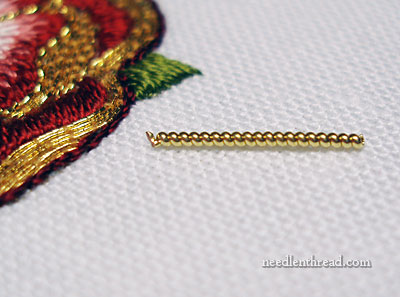
Begin with a small length of pearl purl, in size “super”. You won’t need to cut more than half an inch if you’re working the smallest rose, but for handling purposes, you might cut it a little longer, as the small pieces can be difficult to handle. At this point, you’ll want a pair of tweezers on hand, to help you manipulate the metal thread.
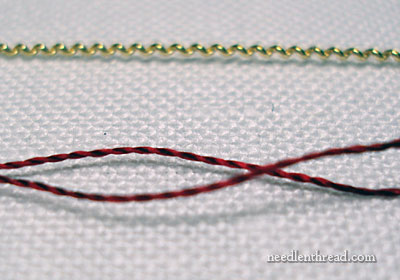
Stretch the pearl purl out to twice its length by gripping the very ends of your cut length and pulling gently. Then you’ll want to prepare two or three strands of Soie de Paris (#4624) and thread those up in a needle (probably a #9 crewel / embroidery needle will do). I ended up using three strands of the Soie de Paris to couch the pearl purl, but in fact, you can get away with two, especially if you want a little less red and more gold.
You’ll outline the circle area by couching the stretched pearl purl in every “valley” of the thread. Use the tweezers to manipulate the pearl purl around the circle (it’s pretty tight and fiddly, but just take your time and be gentle with the thread!), and when you arrive at the starting point, snip the pearl purl to size, use the tweezers to “fit” the two ends of pearl purl together, and take your last couching stitch to the back and anchor your thread.
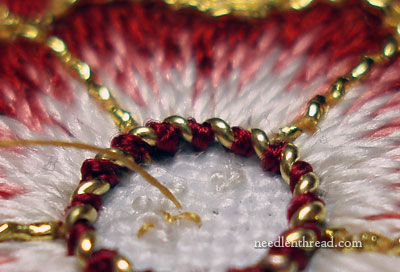
You can see here that the three strands of Soie de Paris look a wee bit bulky, but I wanted the red to really show up. You’ll get a much lighter look if you use only two strands.
In case you’re wondering about wrapping the pearl purl with the red silk first, and then couching the pearl purl into the circle, the very small circle here makes that technique extremely difficult to execute in this case. It’s much easier just to couch the pearl purl!

Now it’s time to cut your chips of Gilt Wire Check #10. You’ll want some kind of cutting surface to work on – the normal being a velvet board or a small lid lined with velveteen or something of that sort (I used my goldwork thread tray that I made out of a tin). Cut your chips about 1/8″ or smaller.
Use the YLI #100 thread (pull it through your beeswax a few times, and then run it through your fingers to smooth out the wax) and a very small needle for this – I used a #12 crewel needle, but if you can’t get your fingers on a crewel needle that small, you might try to find a fine beading needle. A #10 crewel doesn’t fit inside these chips very well. (Hedgehog Handworks carries #12 crewel needles, if you’re ever looking for some!)
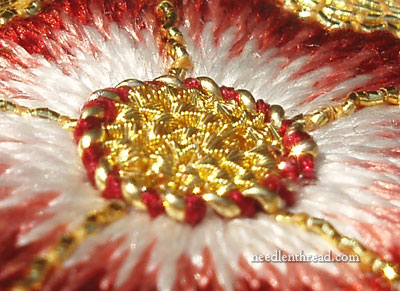
This type of gold chip work is pretty simple – it’s just like sewing on a bead. Because we’re not working on padding here, it’s important to really fill up the center. You’ll want to work the chips in close together, but not so close that they end up buckling over each other or pushing up off the fabric. Keep them close and snug, but not overlapping or buckling.
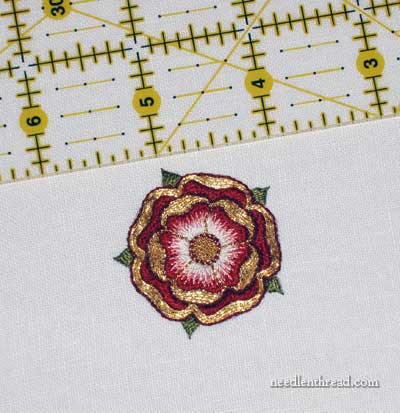
When you see the whole rose in context, with a ruler for size perspective, you can see how tiny this center section of the rose actually is!
And that, my friends, is the end of this little project! You’ll probably see this rose popping up now and again in the future, so when you do, you’ll know where it came from.
I really hope you enjoyed this series of tutorials on embroidering a goldwork and silk Tudor-style rose!

