Bullion knots can be used to make all kinds of flowers – from the simple daisy-shaped flower, to the bullion rose bud, to elaborate and ornate bullion roses. Like I said yesterday, it’s a versatile stitch!
Today, I’ll show you how to make a simple petal shape for your basic, everyday daisy-type flower. Think “detached chain stitch,” only made with a bullion knot.

I’m working this bullion knot flower petal on a piece of linen stretched in a frame, so if you didn’t see the little discussion on making bullion knots on fabric stretched taut in a frame, you might want to check it out.
I began the bullion knot in the same way I demonstrated the other day: bring the needle and thread up and through the fabric at A, take the needle down at B. This time, notice that B is very close to A. There are only about two fabric threads or so between point A and point B.

Don’t pull the working thread all the way through when going down at point B. Just pull enough through so that the needle is all the way through and there’s a good sized loop on the top of the fabric. Then push the majority of the needle back up at A, but leave the eye on the back side of the fabric (don’t pull the needle all the way through).

Then, wind the thread around the needle. When you’re making a petal, the number of wraps you use will determine the size of your petal. I used about 20 wraps on this one. You can do more! If you’re using a milliner’s needle (aka “straw” needle), the shaft is a bit longer than most embroidery needles, so you should be able to get quite a few wraps onto it.
As you create the wraps, keep a good hold on the working thread, and if necessary, hold the wraps in place with your finger.

Now, hold on to the wraps while you pull your needle and the working thread all the way through the wraps. When you’ve pulled all the way through and you let go, this is what your thread should look like. You’ll have that short bit of thread from the end of the bullion to point B, and it needs to go away in order for this to look right.

So take the tip of your needle, and hold the base of the wraps in place at point B, and pull on your working thread until that little length of thread disappears.

Now take your needle into the fabric at point B, and pull your working thread all the way through.

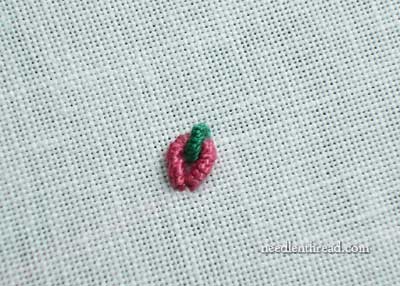
Isn’t he just darlin’, standin’ there all alone?

Assuming you want to create a flower petal and not the Loch Ness Monster, you should now situate the knot into petal position by bringing your working thread up inside the petal….

…. and taking it down outside the top of the petal…

…. and pulling the working thread through.
Now, if you find that you just love the bullion knot and you can’t get enough of them, never fear! You can also do this:
Work another bullion loop inside the first one, and over the top of the petal, and use that to anchor down your petal. This is actually a lot easier on a larger petal, and it looks really cute. This petal was a little small to accommodate the larger bullion anchoring loop, but it still worked out ok.
The best book out there for bullion knots and how to use them is the A-Z of Bullions by Country Bumpkin publications. If you do any kind of textured embroidery, or if you love the idea of working with bullions but don’t know what to use them for, or if you’ve seen beautiful bullion roses and flowers and animals and whatnot, and you wish you could do that, too, this book will help you.
So – go tackle some bullions! And have fun with them!

