Hand embroidery is much easier when you work with the right tools. Today, I’ll illustrate this point by taking you through the rather shoddy set-up of my latest embroidery project.
This is a commissioned piece of church embroidery. I should have started it a month ago, but I offer no excuses beyond the fact that my Subconscious Self had a certain premonition that the set-up would go the way it did.
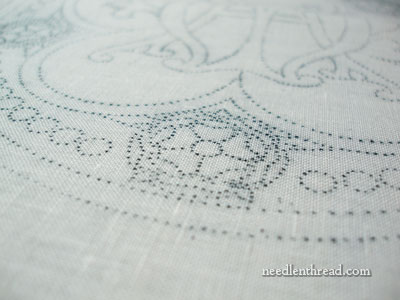
I had the right tools for the transfer. I used the prick and pounce method of transferring an embroidery design, and the pounce dots came out quite well. This really is the most accurate way of transferring a pattern, and once I started on this part, I was glad I didn’t trace the design onto the fabric instead.
If you’ve been reading along for a while, you’ll recognize part of the design above. It’s the goldwork Tudor-style rose I worked on this past summer. There are five of those little 22-hour beauties on the piece. The sample this summer was my test run on the flower, to see if it would work out. It did, so I’m using it. Granted, it took me 22 hours to stitch the sample – I’m hoping that familiarity with speed things up a bit!
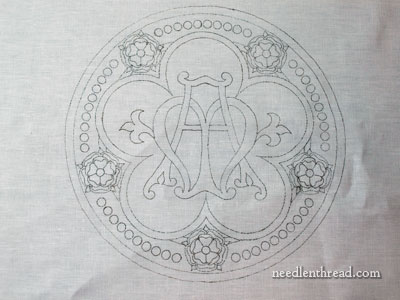
This is the whole design, which will be an appliqué. It’s transferred onto Legacy Linen’s ecclesiastical linen, which is a nice (as in Nice!) linen, but it’s a bit dear, price-wise, so I was careful not to make any unfixable mistakes. I didn’t want to cut out another 16″ x 16″ piece. The design itself is 9″ in circumference, so I had a good bit of fabric on all sides for any spontaneous practice stitching. All was well – no big mistakes.
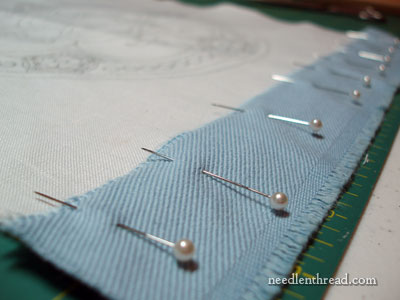
Then I started setting the fabric up for the slate frame. The first step (or so I thought) was sewing on some twill strips to the sides.
Before I did that, I probably should have checked my frame supply. Who would have thunk it? With all the stitching paraphernalia floating around my domicile, did I have the right size frame? Noooooo!
I was counting on using my slate frame with a 16″ tape. But I forgot that it is presently employed on this project. Rats!
Note: Always line up your tools before you start! It’ll save you some brief moments of frustration!
So I took off the twill strips after sewing them on. And I rummaged about for a 14″ or 15″ set of Evertite stretcher bars, which is the Next Best Thing to a slate frame on this type of long term project.
Well, who would’ve thunk it, again? Did I have the right sized stretcher bars? Noooooo.
So I took the fabric with the design on it, and I cut it down to 12″ square, to fit a 12″ slate frame. I stitched the fabric to the frame tapes, and I stitched on the twill strips, and I was back to All Being Well.
Then, it came time to lace up the slate frame. There is something very satisfying in setting up a slate frame for a big embroidery project. But it’s not what I’d call an Easy Thing to Do!
Whenever I set up a slate frame, I think of saddlers – you know, people who make saddles by hand? I figure they must have some seriously buff arms. I also think of the episode in Tim Severin’s book, The Brendan Voyage, when they were sewing leather hides to the boat frame, and they had to pierce the leather first with an awl and then, before taking the awl out, they had to get the needle in the hole, so that the hole didn’t close up. It was back-breaking and arm-fatiguing work. And Severin commented about the arm muscles on the saddler who was helping him.
And when I think about those kinds of things, it makes me happy that I’m just trying to get my awl through a piece of twill. Not so hard, right?
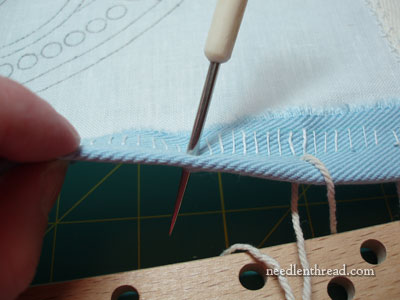
It just so happens, as you can see in the photo above, that I had to fold the twill in half over the linen, and pierce through all three layers. Otherwise, the piece would not have fit into the frame. I’m sure there are other ways I could have – and should have – gone about this, but this is what occurred to me at the time.
To get the awl through the fabric and to open a large enough hole for the needle, some serious wiggling and twisting action has to go on. I was back to thinking about those saddlers…
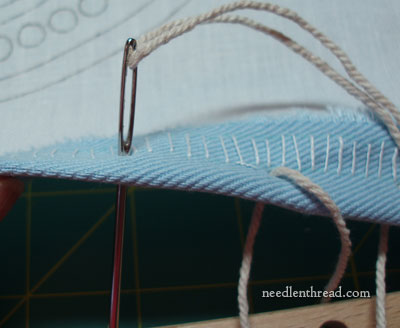
The hole left by the awl has to be large enough for this Monster Needle (threaded with string) to fit through. I don’t think you can lace a slate frame easily without an awl. This sharp tapered tool is your best friend when it comes to opening up holes for Monster Needles.
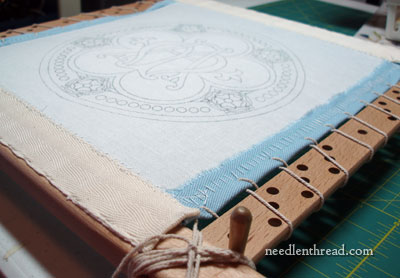
Finally, the frame was more or less filled up with the project. And wow, do I mean filled up. The 12″ tapes just held the 12″ linen, with very little room to spare for lacing. This was going to be tight. And I don’t necessarily mean drum tight…
In fact, I had not tightened the lacing completely yet, and this is how much space I had between the edge of the fabric and the side slats on the frame. Not a whole lot of room for tightening things up!
Note: In case I didn’t make it clear: Always line up your tools before you start! It will save you some not-so-brief moments of frustration.
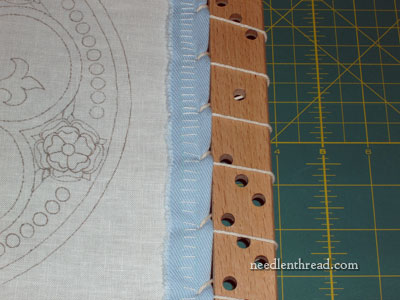
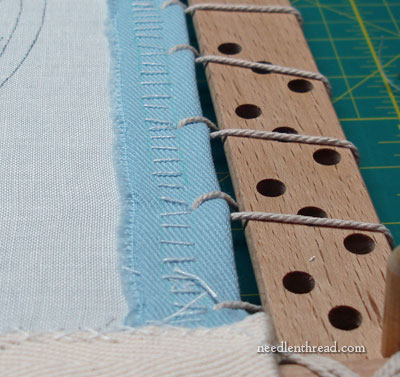
Tighten, tighten, tighten those lacing ropes, and this is what I ended up with: the edge of my fabric butted up nice and cozily next to the side slats. It’s not really supposed to be like this, you see. If, for some reason, I need to tighten again, there’s no where to tighten to.
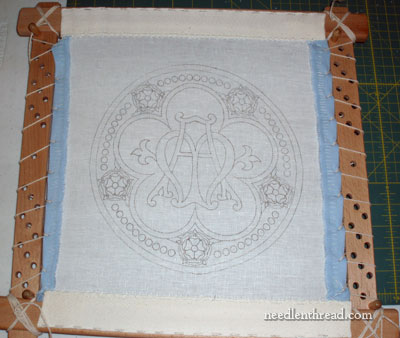
But for now, we’re laced. We’re tight. We’re good.
This whole episode took more time than it should have. The moral of the story: Line up your ingredients before you start! Know what you have. The right tools can save you a whole heap o’ trouble when you finally get underway with a project.
Cooks call it mise en place. I call it smart.

