The angle at which you slant your satin stitch makes a difference in the outcome of your stitching. Have you ever asked yourself this question: “Why do they say to start the satin stitch in the middle of an element and work to the edge? Why not just start at the edge and work across?”
One of the reasons (there are two, in my mind) is that it’s in the middle of the element that you set the slant of your stitches.
Let me show you what I mean.
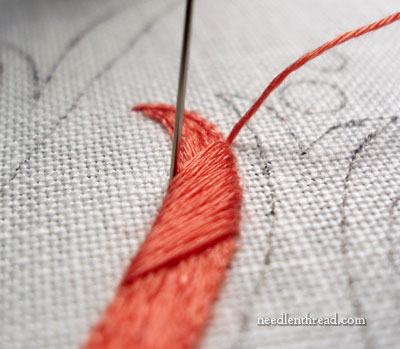
On the satin stitched element that I showed you the other day, you can see that I began the actual satin stitching halfway up the element, and continued to the top, leaving the bottom half void of satin stitching for the time being. Notice that I’m slanting my stitches as I go, from top right to lower left.
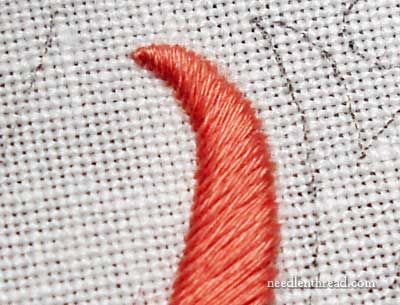
You can see that the angle in the middle has allowed me to take the curve at the tip of the element very gradually and subtly, so that the stitches are lying comfortably next to each other on both smooth edges.
Starting in the middle of the element and working towards the tip was how I set in the angle in order to achieve that gradual curve.
But there’s more to it than just starting your stitching at any old angle in the middle of the element. Think before you stitch: What angle or slant do I need to start with, to get my satin stitches to do what I want them to do?
Let’s look at some diagrams to see more clearly why it’s important to plan out your slant before you start satin stitching.
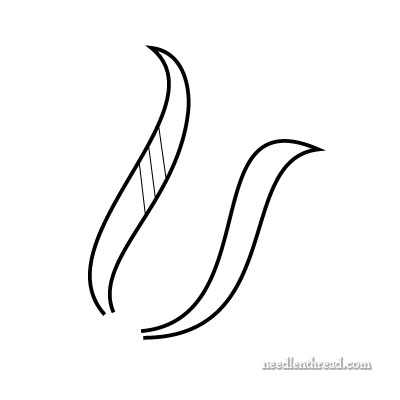
These are the side elements in the piece I’m satin stitching right now. The photos above are the element on the left. If you look at that element, you might be tempted to set your slant in as shown in the diagram above.
Let’s see what would happen if we did that.
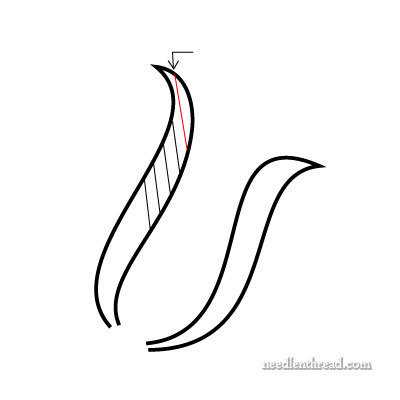
As we progress up the element, we’d end up with two choices. The first would be maintaining the angle of the stitch all the way up, which would result in some very long satin stitches in order to fill up the space. Note the red line in the image above. We would have to break our stitching on either side of that curve that turns to the tip. Chances are, the outcome wouldn’t be ideal. Sure, there are situations in satin stitching where you do break elements this way, but for this particular element, is this the most attractive way to stitch it? Probably not.
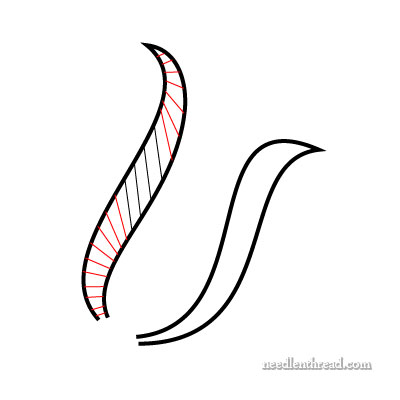
The second choice if using this slant would be to gradually turn the stitches as we fill the element. You can see in the diagram above how the stitches really have to turn to get around the tip of the element, and in the lower half, they also turn quite a bit. This will require us to crowd one edge with the stitching (the left edge in the top half and the right edge in the lower half) in order to accommodate the turn.
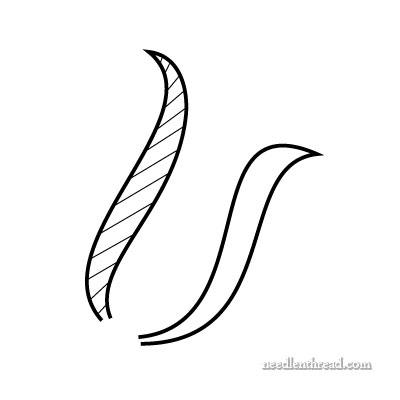
Now let’s change the direction of the slant. Notice that now, as the curves come into play, they can be taken gradually, without crowding either edge.
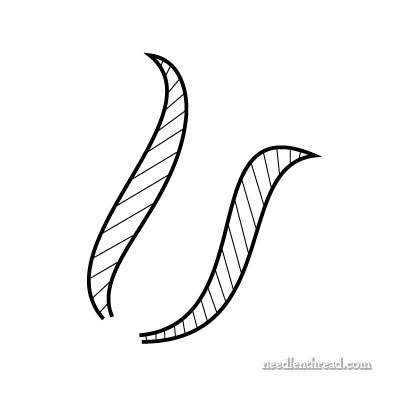
On the second element in the pattern, because the curves move in the opposite direction, the slant changes, too.
The moral of the story: when satin stitching, start in the middle of the element and work towards a tip or edge, so that you can set in the slant of your stitching. But think before you stitch: what slant will work best around the different curves in the design?
It’s not always possible to accommodate all the curves in the design in this way. And of course, not every design has curves. It depends on the design! But for simple designs like this one, before you start stitching, try to figure out the most reasonable slant that will help you create graceful, uncrowded curves with your satin stitching.
To learn more about satin stitch, feel free to visit these articles on Needle ‘n Thread:
Satin Stitch Video Tutorial
Satin Stitch & Embroidered Monograms
Satin Stitch Padding for Dots and Satin Stitched Dots Tutorial
Satin Stitching to a Sharp Point Tutorial
Silk on Silk & Satin Stitch
Taking Tight Curves with Satin Stitch
Floche + Satin Stitch = True Love

